

If anything has changed my painting game, it’s this $100 paint sprayer. This tool has been worth every penny and every troubleshooting minute. If you’ve been thinking about buying one but are hesitant to spend hundreds of dollars, give this HomeRight paint sprayer a try. Here are all of the tips I’ve gathered along the way to make it a painless learning and painting experience!
This is not a sponsored post. I just really like and recommend my HomeRight Super Finish Max paint sprayer for other beginners.


Why Try a HomeRight Paint Sprayer?
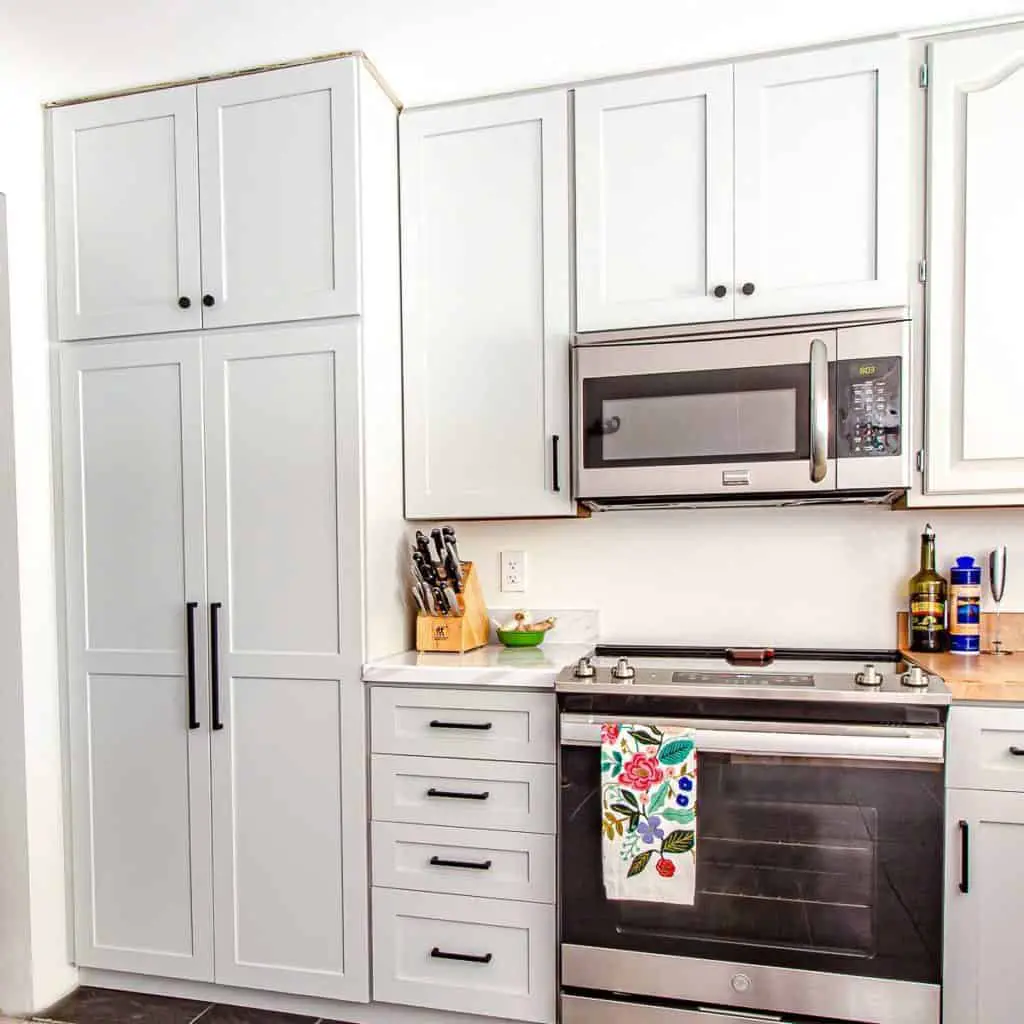
First of all, any paint sprayer is worth it if you want the smoothest finish possible and/or have a large area to paint. If you don’t mind brush strokes and don’t want to deal with all the prep and cleanup of a sprayer (there is a lot!), then pick up a brush and go to town. If you are after a super smooth finish, like on our kitchen cabinets, or you want to try painting a room more quickly, a paint sprayer is the way to go!
The Best Paint for Kitchen Cabinets
I researched the heck out of sprayers before starting our kitchen cabinet project. Wyatt brought home a commercial sprayer for us to try, and I was WAY out of my league. I decided to buy a small, portable, hand-held sprayer, because it seemed much easier for me to manage. Ultimately, I picked this paint sprayer after reading dozens of reviews of similar models. I think you probably get what you pay for, and I wish the spray tips were a higher quality metal, but that’s my only gripe. Here is my advice for this HomeRight paint sprayer.
Tips #1-3: Prepping Your Painting Space
#1 – Prepping your project and space is the key to a successful project. Unless you can spray outside, away from anything that might also get painted, you’ll probably need a spray station. We used these nifty adjustable ZipWall poles to drape plastic in our garage. (Shades of Dexter??) We lined the ceiling, made four walls, and I lined the floor with scrap cardboard. It’s been working out really well because I have some tall pieces to paint and they fill the entire space. If you can make do with a smaller shelter, try one like this. I’ve read good things about these shelters from other bloggers who use paint sprayers, and they cost less than the ZipWall poles.

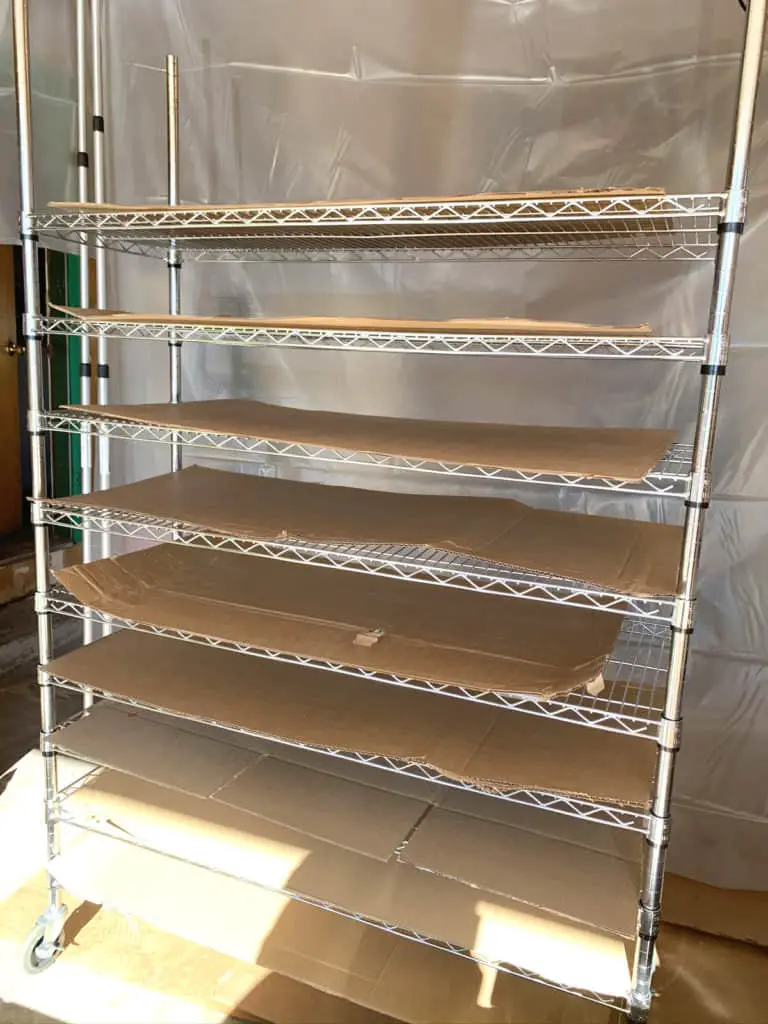
#2 – If you have cabinet doors to paint, you’ll need a painting and drying system in place before you start. I set up this wire shelving unit, and I lined each shelf with cardboard for drying space. These shelves are pricey, so just use what you’ve got on hand. We already had this in our basement for storage.
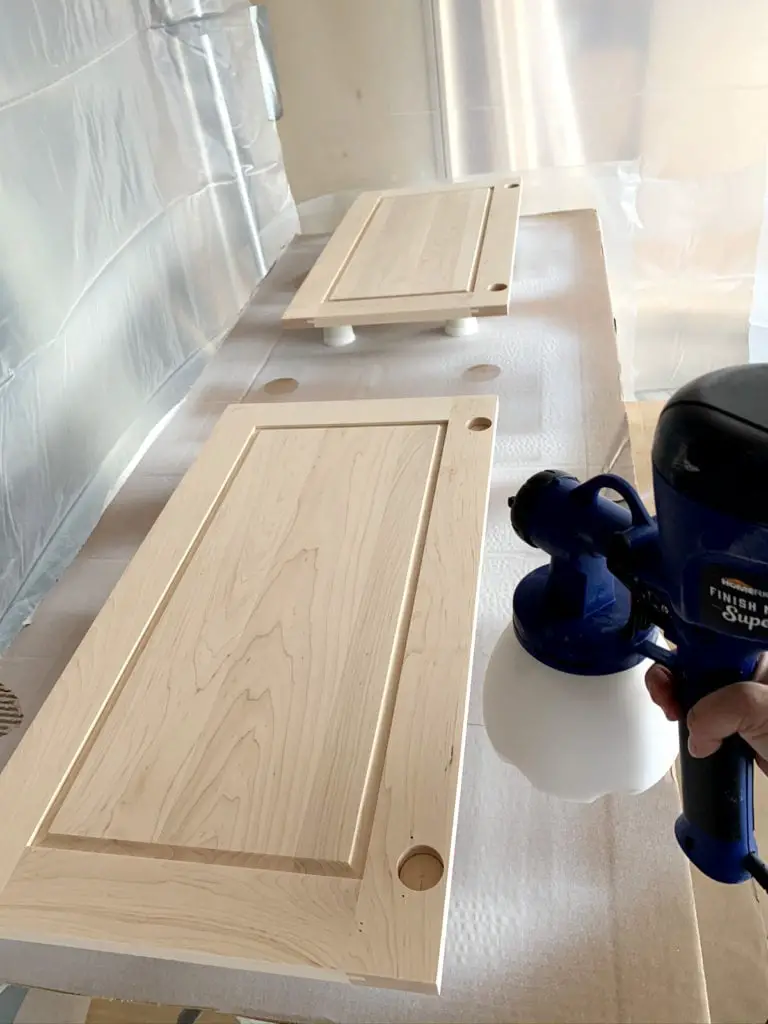
#3 – For the spray station, I sacrificed a folding table, and I just use small paper bathroom cups to prop up my cabinet doors. You can also use painting pyramids like these, or even try hanging doors like this and get twice as much painting done at once. Wouldn’t that be nice! If you have the space, you could also just line the floor of your garage with old sheets or cardboard and spray everything laid out at once.
Read More About Our DIY House Updates
Favorite Behr White Paint Colors
Closet Door Ideas to Update Any Room
How to Apply Gold Leaf to Glass Decor
Trends in Cabinet Hardware
Tips #4-7: Getting Started With a HomeRight Paint Sprayer
Here are some tips I’ve picked up along the way about my particular paint sprayer, the HomeRight Super Finish Max paint sprayer. I chose this model, rather than the lower-cost version because it has a little more power. I thought that might help account for thicker paint, but I’ve found that I still need to thin the paint. If you’re spraying stain, I bet this model would work right out of the box.
#4 – Practice is key. Get some old cardboard or even some cabinet doors to practice on before you attempt your real project. You can even start with just water to see how the sprayer works. Watch this video to see the sprayer in action.
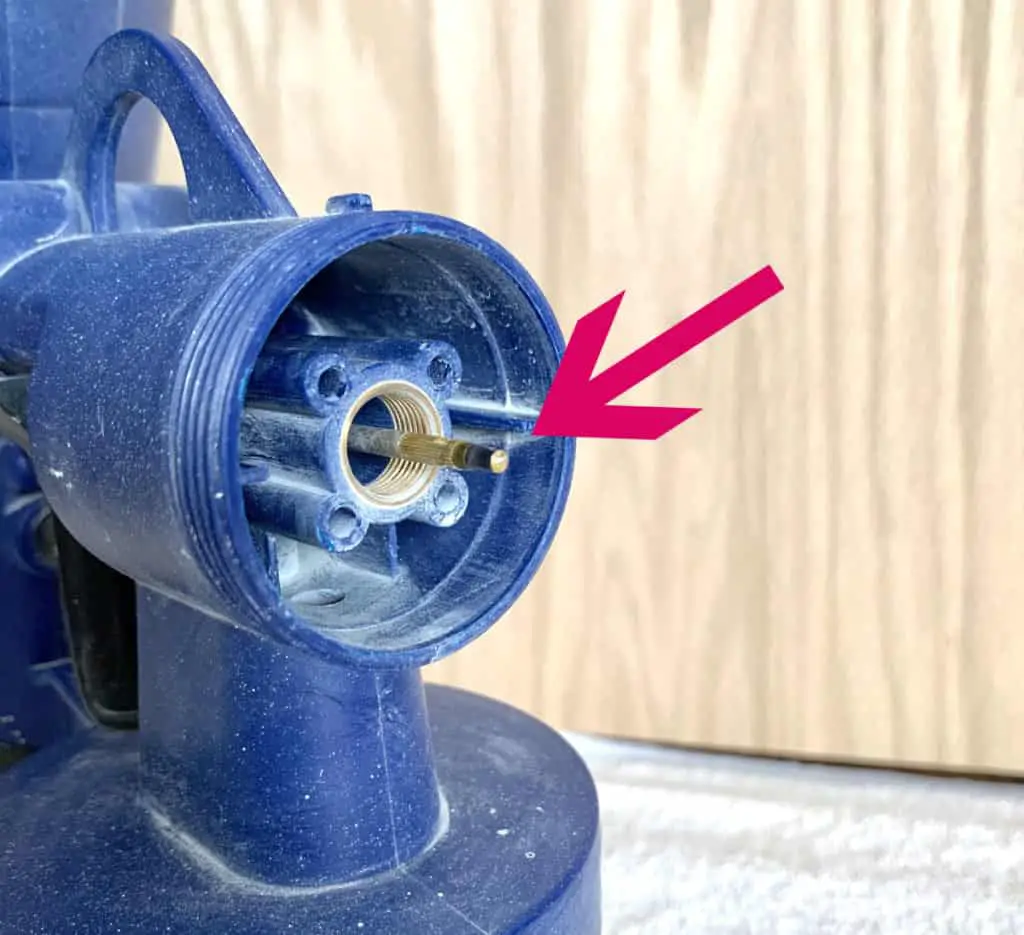
#5 – If you get everything set up and your sprayer won’t work, try loosening and then tightening both the spray tip and the paint cup again. I keep a small wrench nearby to loosen and tighten the spray tip, just a tad more than I can do myself.
#6 – If you’re planning to spray primer or paint, you’ll need to thin it to a fairly runny consistency. I’ve found that a 1:4 ratio of water to paint works pretty well with both my primer and cabinet paint. Whatever product you’re using, it will need to be THIN, or the sprayer just won’t work.
#7 – These disposable strainers have been KEY in avoiding any chunks or flecks of paint. Those will either clog your sprayer or ruin the paint finish on your sprayed piece. Take the time to strain the paint every time you fill the paint container. Trust me, it’s worth it. I’ve learned that lesson the hard way.
Tips #8-10: Helpful Hints
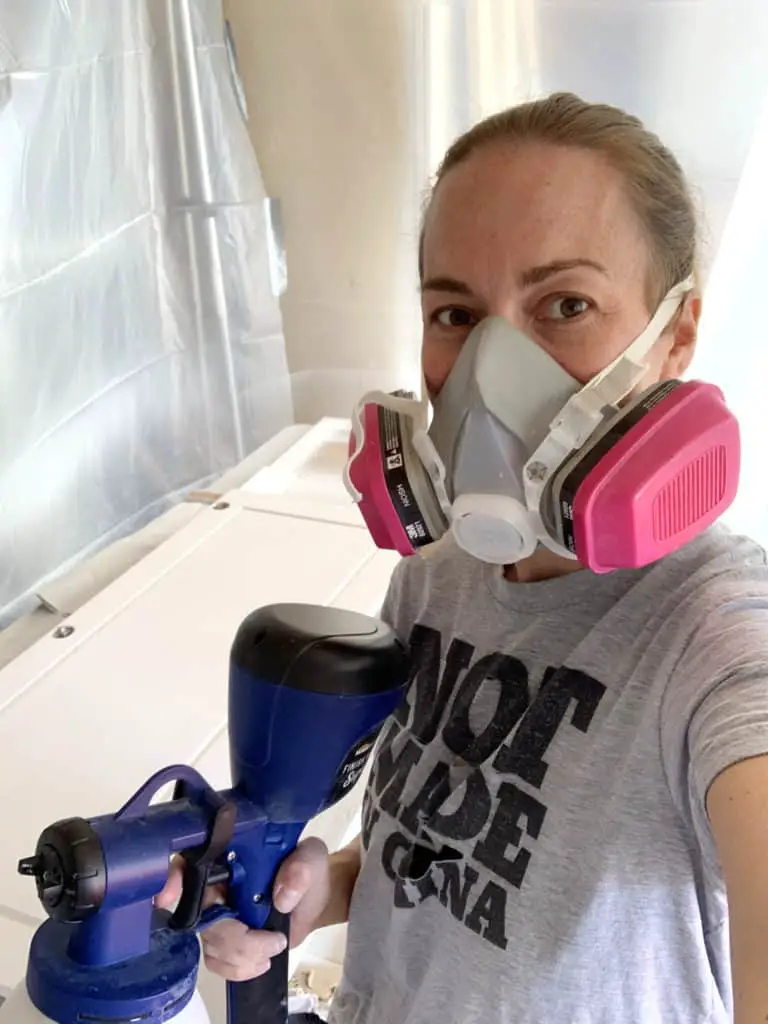
#8 – Use a respirator mask. I tried disposable masks and found that I was still breathing in microscopic paint particles. Yuck. My respirator mask is the real deal, especially in an enclosed space while spraying. I’ve also used it when sanding drywall and Wyatt uses it when he crawls in the attic or another “iffy” space.
#9 – Keep the spray tip clean. I keep a little stash of wet paper towels under my spray station. Each time I finish a round of spraying, I wipe off the tip of the paint sprayer, so the paint doesn’t dry while I’m switching out items to spray. This probably matters more in Colorado, where paint dries in a snap due to our climate.
#10 – I’ve found that the green spray tip is best for furniture or kitchen cabinetry. It sprays in a wide enough spray pattern for good coverage at a reasonable rate. I wish it was sold in three packs because I’ve already gone through two! (If the green tip is not available on Amazon, try this link to Home Depot.)
The inside metal tip component is pretty delicate. Don’t remove it until you need to change the tip color for a different spray pattern. However, it will get the job done if you’re careful with it.
Read More About Our DIY House Updates
Favorite Behr White Paint Colors
Closet Door Ideas to Update Any Room
How to Apply Gold Leaf to Glass Decor
Trends in Cabinet Hardware
Tips #11-12: Clean Up ASAP
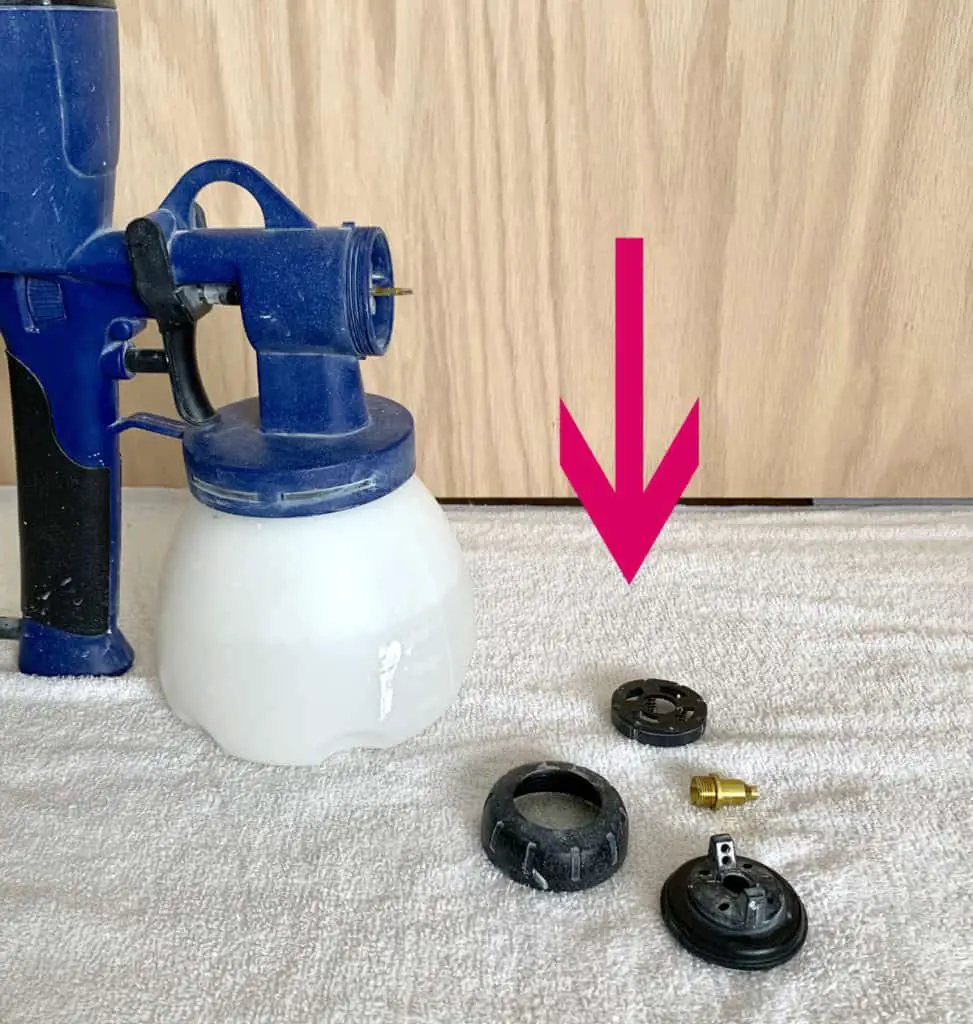
#11 – As soon as you’re done, clean out the paint sprayer, so you can avoid any paint drying in places you won’t be able to access. The instructions are simple: just detach your paint cup, rinse it with warm soapy water, reattach and spray into a bucket until the water runs clear. Then, clean the parts and pieces in warm soapy water. I don’t use the rapid cleaning tool because reviews make it sound unnecessary, and I’ve found the clean up to be easy enough.
If you’re planning to reuse the same color tip, you only need to remove the larger, outer metal piece. The smaller inside piece can stay attached while you clean. Also, the sprayer comes with a little scrub brush to access the interior parts of the tool. Here’s what I remove:
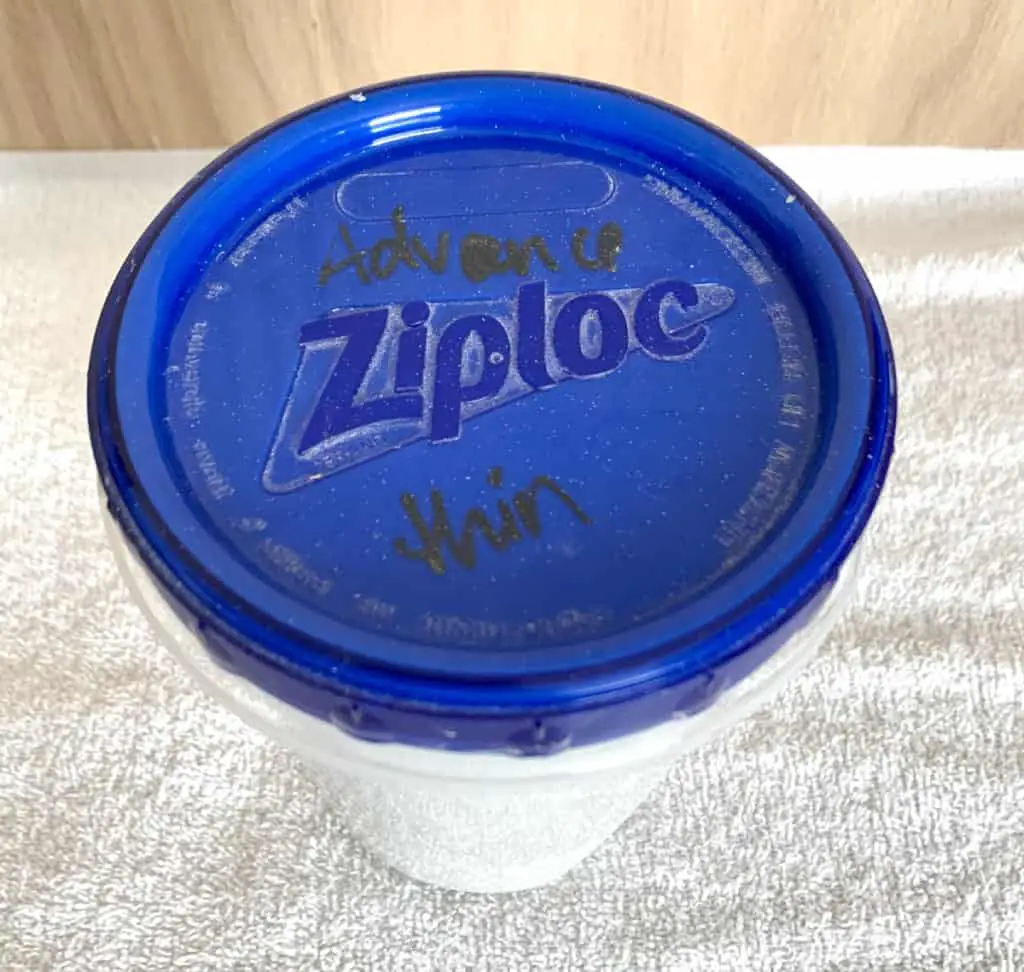
#12 – Save the leftover paint. When I first detach the paint cup, I save the thinned paint in a disposable container with a screw-top lid, like these. Make sure to label the container with “thinned (brand or color) paint” so you remember what it was for. Between primer and paint, it’s easy to forget which is which, and also whether or not it’s already been thinned. I’ve read about folks using plastic bags inside the paint wells to make cleaning up easier, but I wasn’t able to get the sprayer to work when I tried that. I’ve also found that the cleanup is pretty easy anyway. Just be diligent about it.
Now just wait for the paint to dry so you can admire your work! Hopefully, your HomeRight paint sprayer will turn out to be a great investment, like mine.
My Favorite Paints
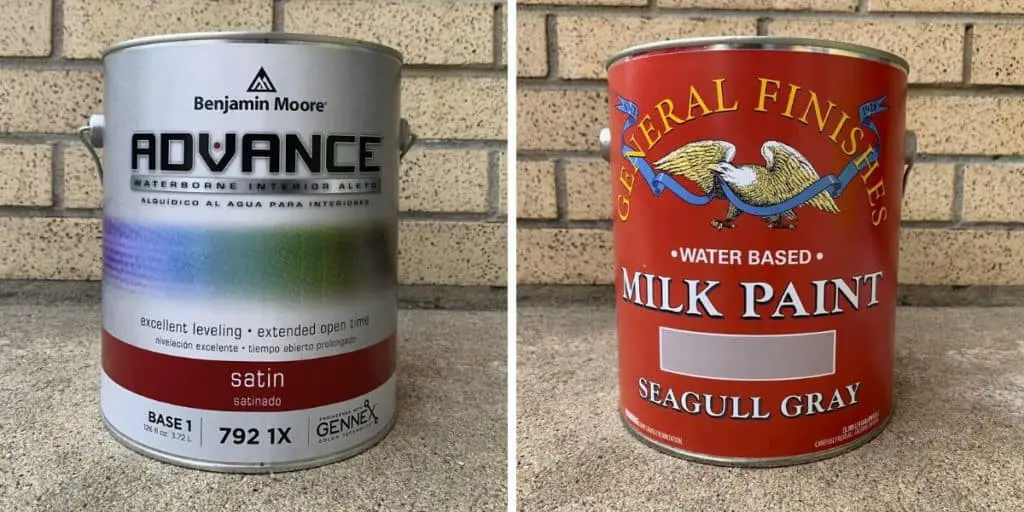
Wondering which type of paint works best? It depends. My current favorite cabinet paint is Benjamin Moore Advance in satin because it self-levels beautifully and dries to a super smooth finish. Self-leveling means that the paint evens itself out as it dries. I love General Finishes Milk Paints for smaller projects, like cabinets, that I don’t feel like sanding to a perfect finish.
For interior walls and trim, I love Behr Premium Plus, since it’s low VOC (doesn’t smell), great quality paint, and a reasonable price at Home Depot. You can color match any color you want, from any brand, and have it mixed in that paint.
Also, don’t forget the primer for any unfinished wood paint project! I’ve found Kilz 2 All-Purpose is great for walls (on bare drywall), Kilz Premium has turned out beautifully on our cabinets, and Zinsser Bulls-Eye 1 2 3 is a solid backup option. Good luck!
Read More About Related Projects

1 – Kitchen Trends in 2021 to Consider
2 – Yes, A DIY Kitchen Remodel is Possible – Part One
3 – The Best Paint for Kitchen Cabinets
4 – Choosing a Kitchen Backsplash Tile Layouts


Anyone know what material is used for the filter? I hate to spend 6.00 for replacement filters that re clearly just cut from a large sheet of something.
Sorry, I don’t! Good luck finding a sub.
So what if the paint I am using for furniture and cabinets says not to thin at all or another brand I use says to thin no more then 10%? I keep getting splatters and orange peel. I switched to the blue tip and it maybe helped alittle but still very frustrated with this. I have used several times and it still happens every time no matter what adjustments I try to make. Do I turn the dial to + or – to help with the splattering? Neither seem to do much for improvement.
Hi April,
That does sound really frustrating. What brand of paint are you using that says not to thin? If you’re getting orange peel through a heavy paint spray, try turning the dial to – to spray less paint. Honestly, I wonder if there is something wrong with the sprayer? Can you try to contact customer service to ask for a replacement? In my limited experience with this paint sprayer, I definitely see a difference when changing the +/- dial if the paint is thinned sufficiently, so I imagine you would too, if it’s working correctly. Good luck!
Erin
I also bought the HomeRight Super Finish Max around Feb 2022 and it is terrible. I read the directions and reread. Then took the sprayer apart to make sure everything was on correctly. This sprayer did more damage than anything. I used Valspar furniture and cabinet paint
Hi Patricia,
Thanks for the comment. That sounds super frustrating!!
Honestly, I would suspect the issue is the paint, not the sprayer. If you’ve thinned the paint accurately, it should function. I’ve used this sprayer with Kilz primer, Behr premium plus paint, and Benjamin Moore Advance. I had to thin all three products and test until I liked the results at various consistencies. The issue could also be the Valspar paint itself.
Good luck with your project!
Just bought it trying to paint my vinyl windows with sherwin william duration acrylic exterior paint and even after so much thinning it still giving me an orange peek textured. I feel so defeated especially when I heard so much good reviews from about it
Hi Binh, Thanks for the comment. Ugh, that sounds so frustrating! Just wondering – have you tried using smaller spray tips? I remember that orange peel happening when I used the larger spray tips (yellow and black) because I was trying to spray larger pieces more quickly. There was just too much paint, and I had to go back to multiple, thinner coats of paint. I got the best finish with the green spray tip for the thinned paint I used. If you decide to try experimenting on some cardboard, that’s what I would try next. Good luck! I hope it works out for you.
I’ve had bad luck with this sprayer… you have to thin the paint so much that it drips really easily.
Hi Curt, Thanks for the comment. Have you found a sprayer that you like better?