

Want to make a doormat with a custom stencil to personalize your entryway? Here’s how! This is such an easy and fun DIY project. Now that I have all the supplies, I’m even feeling inspired to make a doormat for each season! We’ll see if I can pull that off. Here are the supplies you’ll need and all the details on this project. I’m even sharing my custom stencil design, in case you want to make the same one.
This post contains affiliate links. Read my full disclosure here.
Gather Your Supplies to Make a Doormat
This is a flexible project, so you’ve got options on how to create a stencil, types of paint, doormats, etc. I followed a tutorial by my friend Paige on Instagram, and I used the same products she recommends, with only a few adjustments. Check out her video here.
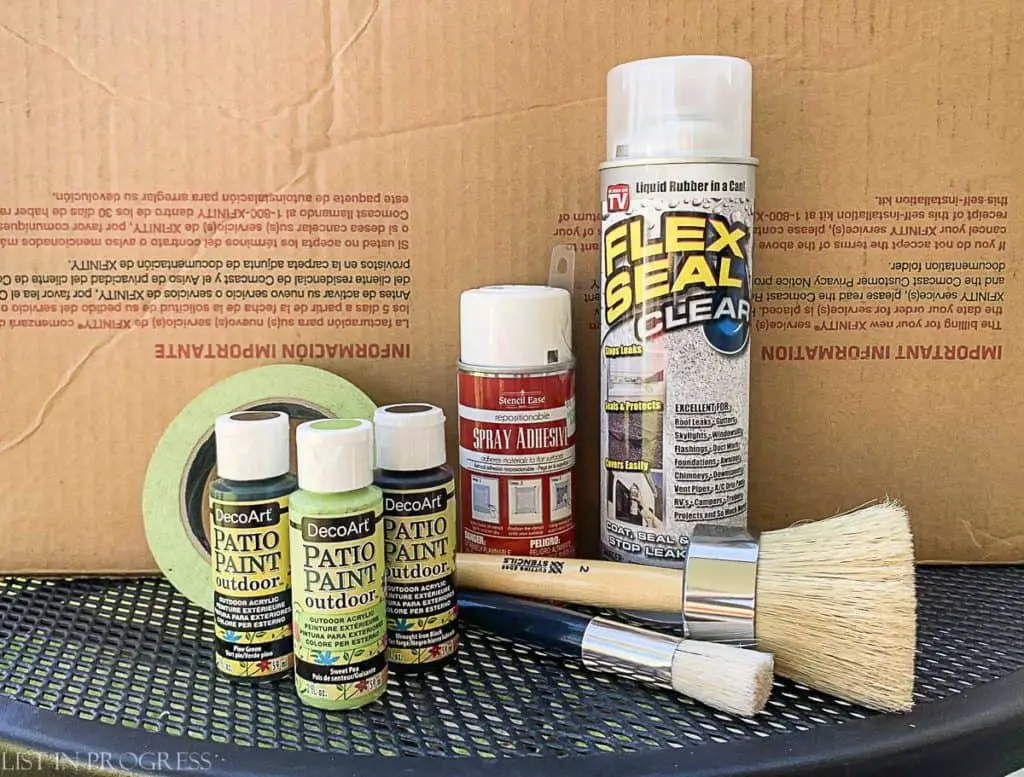
As for the doormat itself, you can find a plain coir doormat at almost any hardware or home goods store. Most doormats are about 20″ x 30″, but I prefer a wider doormat to match the full door width. Ikea sells one for $10, by far the best deal I’ve found. I located a few other larger size options at good prices, too. Here are all the essentials you’ll need:
Coir doormat – IKEA 24″ x 35″ | Target 23″ x 35″ | World Market 24″ x 36″
Stencil (read more below)
Spray adhesive
Paint – outdoor acrylic, like Patio Paint
Stencil brush – I used a wide brush like this one, or you can buy a set with different sizes
FlexSeal clear
Masking tape
Newspaper or cardboard scraps
Custom Stencil Options to Make a Doormat
If you already have a Cricut, you can make your own adhesive stencil for this project. I’m very tempted to buy the Explore Air 2 machine, but it’s staying on my wish list for now – because spending $230 to make a stencil would be nuts. Instead, I created my design in Photoshop with my favorite font and ordered a custom stencil on Etsy for $37. You can also just purchase a pre-made stencil, which is more affordable. Here are some fun designs:
Welcome ($17)
So glad you’re home ($16)
Come back when you have tacos & wine ($24)
I really hope you like dogs ($24)
I ordered a custom stencil from this Etsy shop called GoStencil. I’m really pleased with the quality and I would definitely recommend this vendor for custom work.
If you love my design, you’re welcome to download this jpg for FREE and order your own! (Right click on the image that opens in a new tab; choose Save As to save the jpg to your computer.) I bought a mylar stencil size of 22 x 30, and requested the design to be 11 x 26. The directions are clearly explained in the shop description; just email them with your requested stencil dimensions after you purchase the mylar size.

Prep Your Work Station
Before you start, make sure you’re setting up a paint station that can stay in one place from start to finish. Avoid moving your doormat mid-project, which will shift the stencil and mess up the paint. My project took about 4-6 hours, allowing for plenty of drying time, and I just left it on the floor of our garage. If you don’t live in our desert-like climate, you’ll need to plan for more drying time.
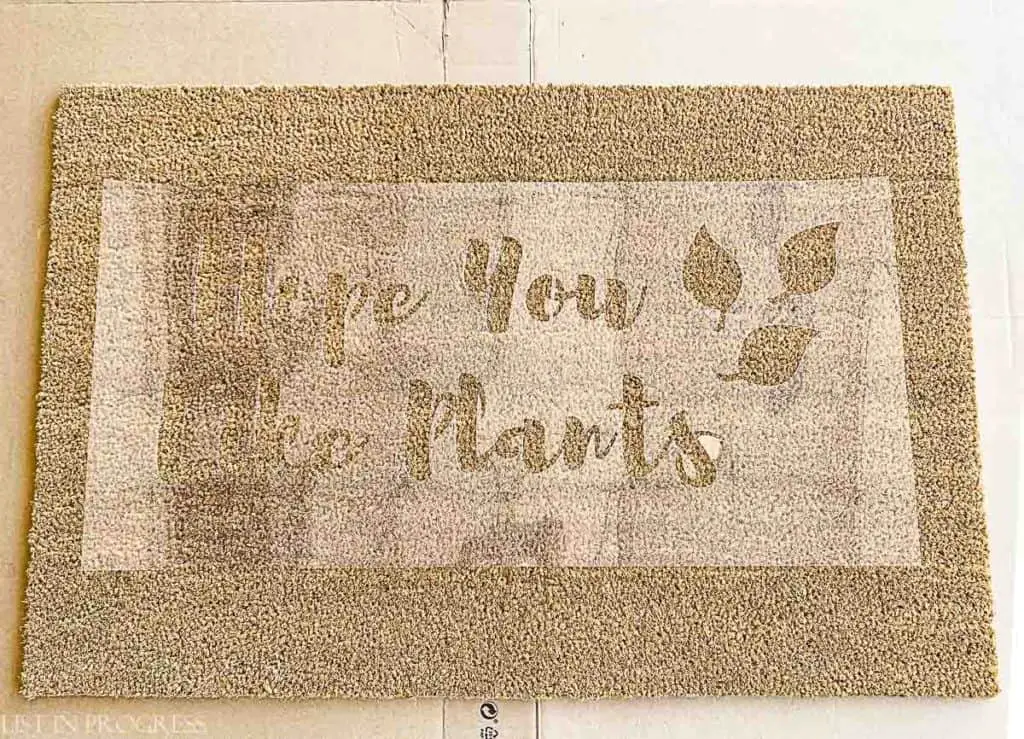
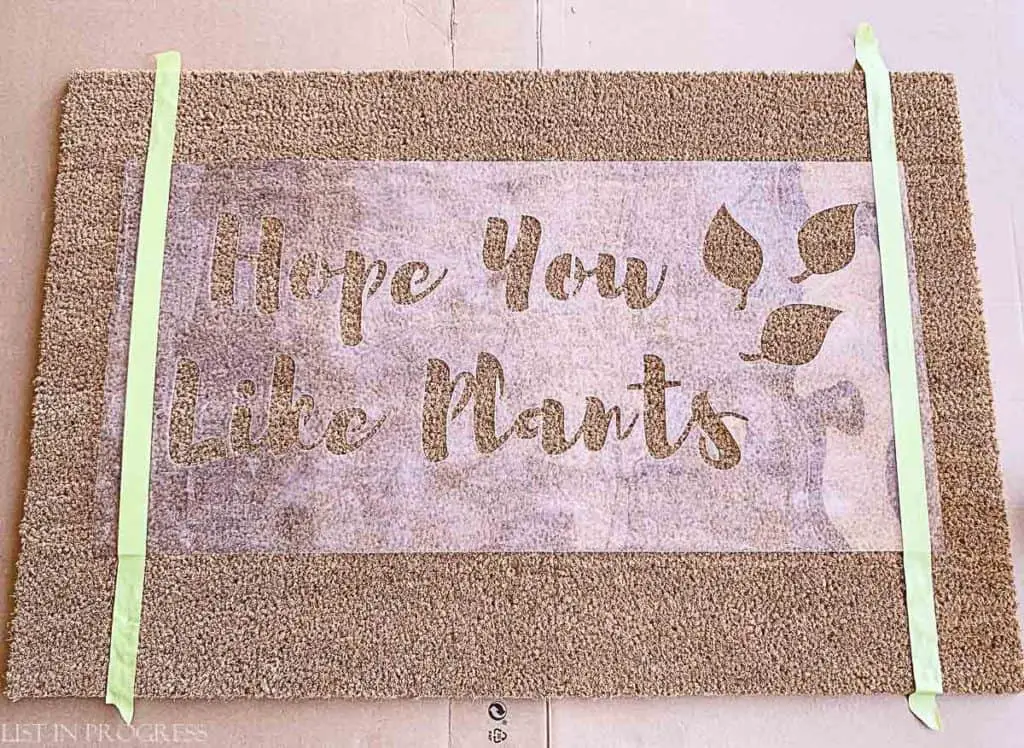
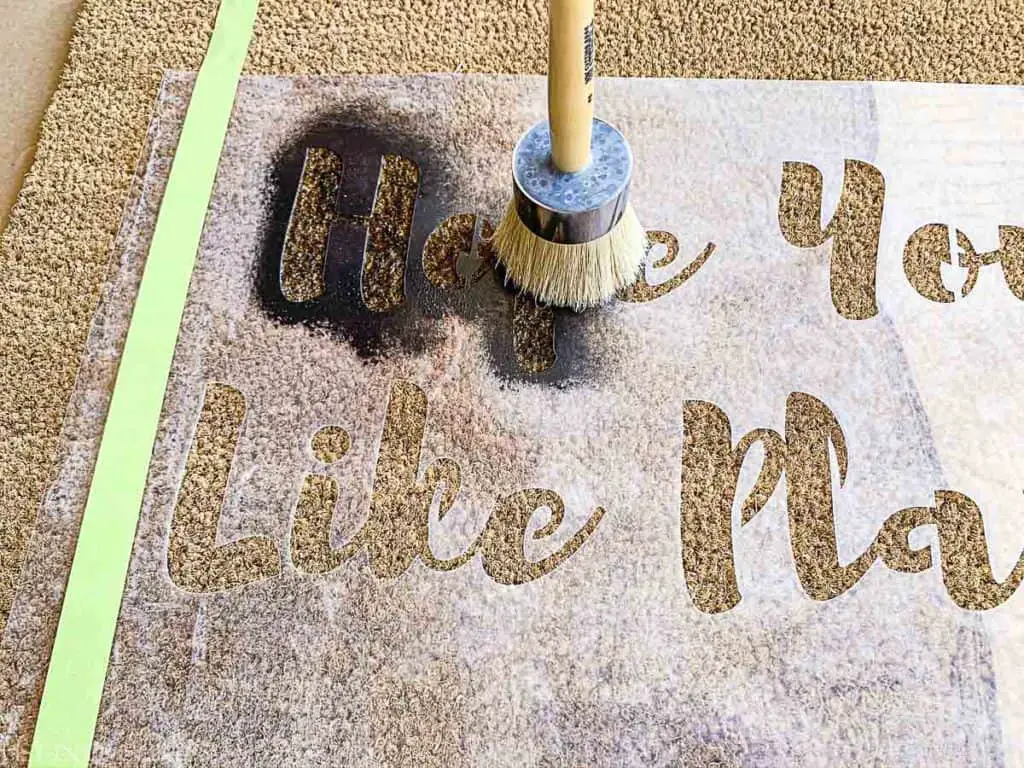
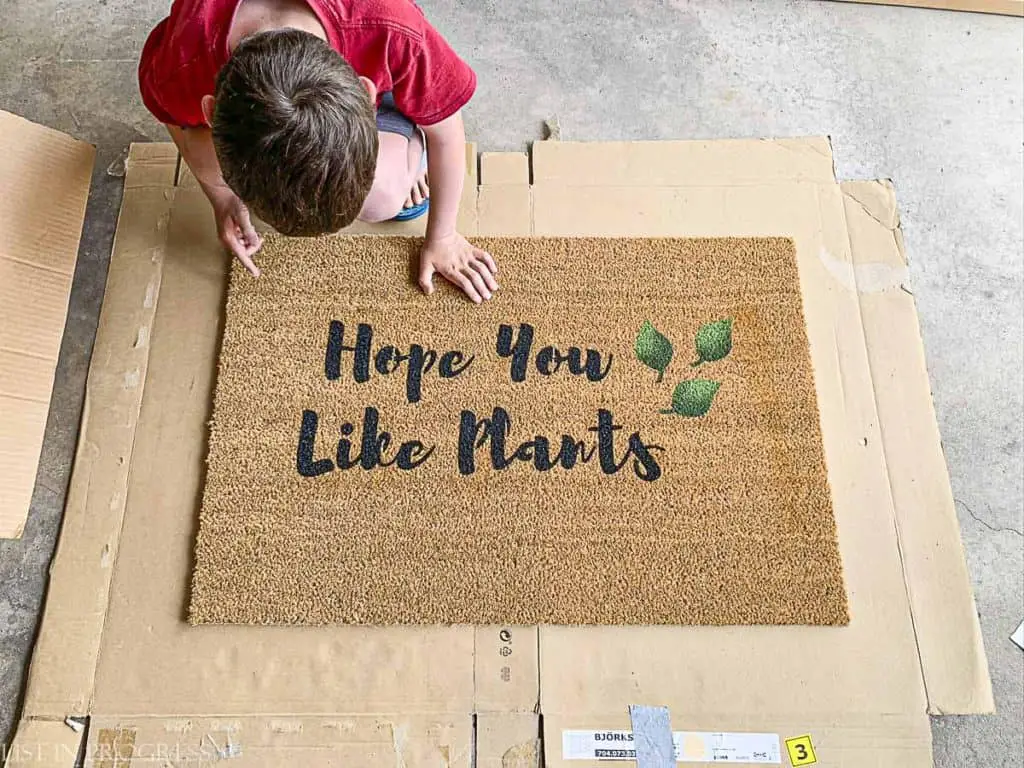
OK, now you’re ready to stencil! Position your stencil and apply the spray adhesive to the back, making sure to adhere the smallest plastic areas between letters. Just do the best you can.

Since I’m detail-oriented (sometimes), I measured to make sure my stencil was centered on the mat. I also taped it down, to ensure the stencil wouldn’t move around.
Stencil Away!
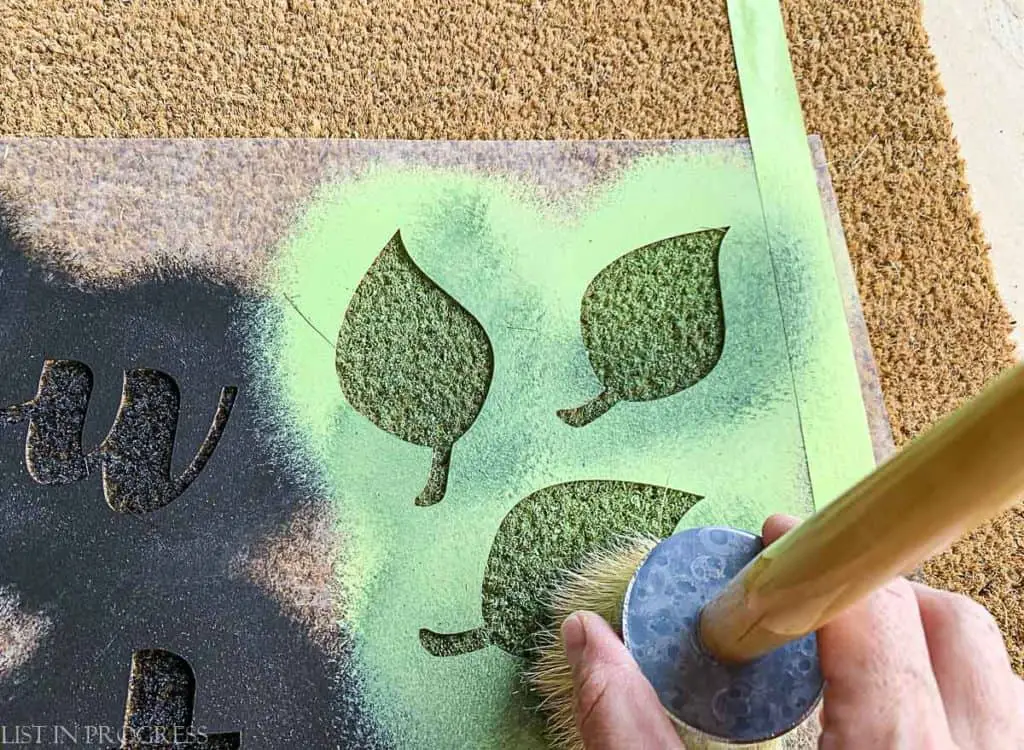
My best tip for painting is to apply multiple, light coats of paint. When you load paint on your stencil brush, make sure to offload almost all of the paint first – you just want a thin, even coat of paint on the brush. Dab straight up and down onto the coir, and don’t apply globs of paint. Take your time! It’s better to apply a few thin coats of paint over the course of a few hours, to get crisp paint lines on the doormat. I applied 4-5 coats, until the letters looked evenly black.
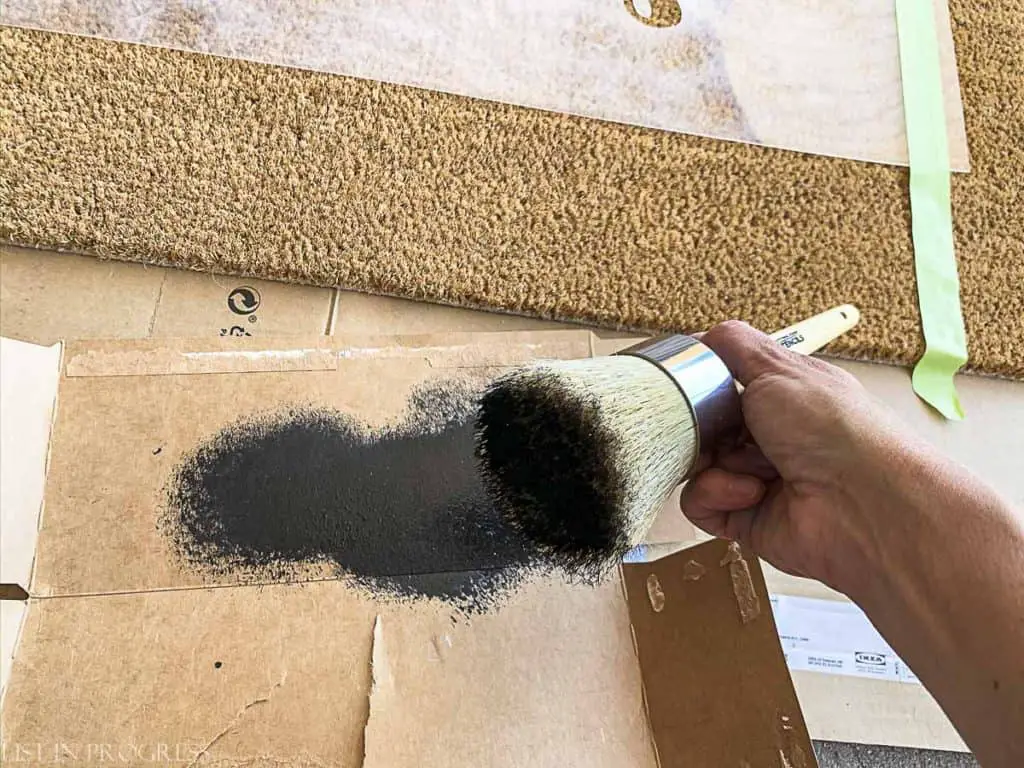
Hot tip: invest in a decent stencil brush! Cheap brushes shed bristles like crazy and are not worth the headache. This is my large stencil brush, and I love it, but here are some other options that get decent reviews. This large brush and this smaller set both get mostly great reviews on Amazon.
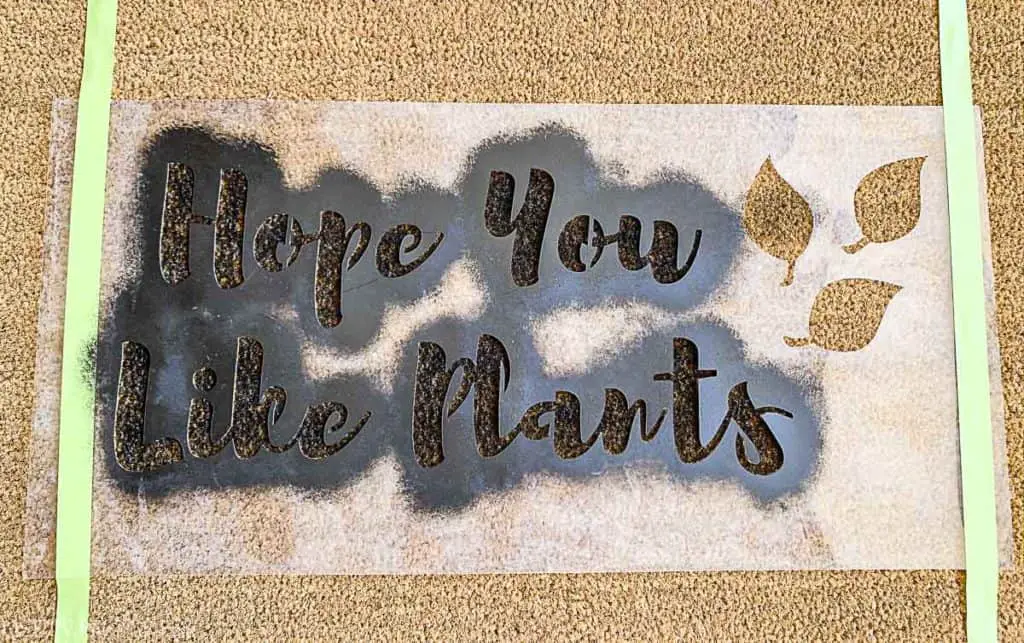
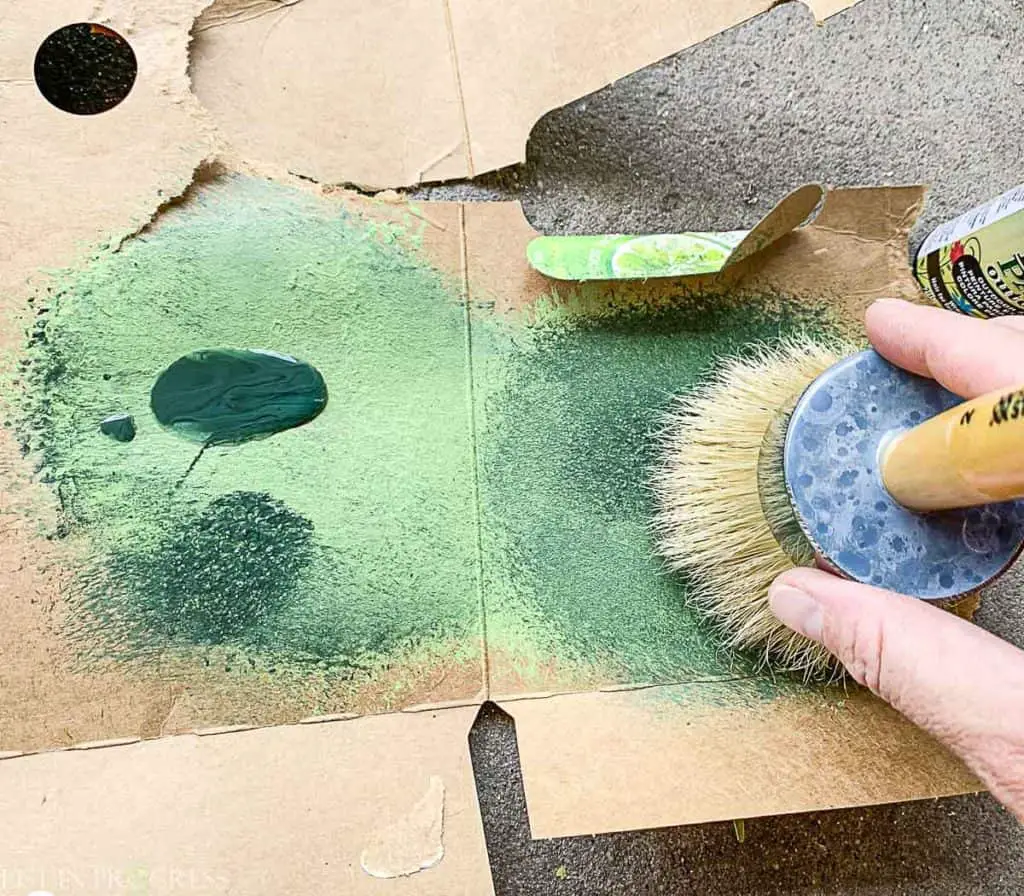
I started with black Patio Paint and stenciled the words first. Then I cleaned my brush and applied the green paint colors. For the leaves, I mixed two green colors – Sweet Pea and Pine Green. I started with the lighter color and painted Sweet Pea evenly over the leaves. After a few coats of Sweet Pea, I blended some Pine Green with it on my fancy palette (scrap cardboard), and then I just dabbed the darker color along the bottom edge of each leaf. Et voila!
Protect the Paint with a Top Coat
After giving the paint plenty of time to dry, protect it with a weather-proof top coat. I tried out FlexSeal on Paige’s recommendation, and it seems great. It’s sort of like a sprayable clear rubber, so I left the stencil in place and sprayed it over the entire design. I didn’t want a plastic coating on the rest of the coir, just the words and leaves.
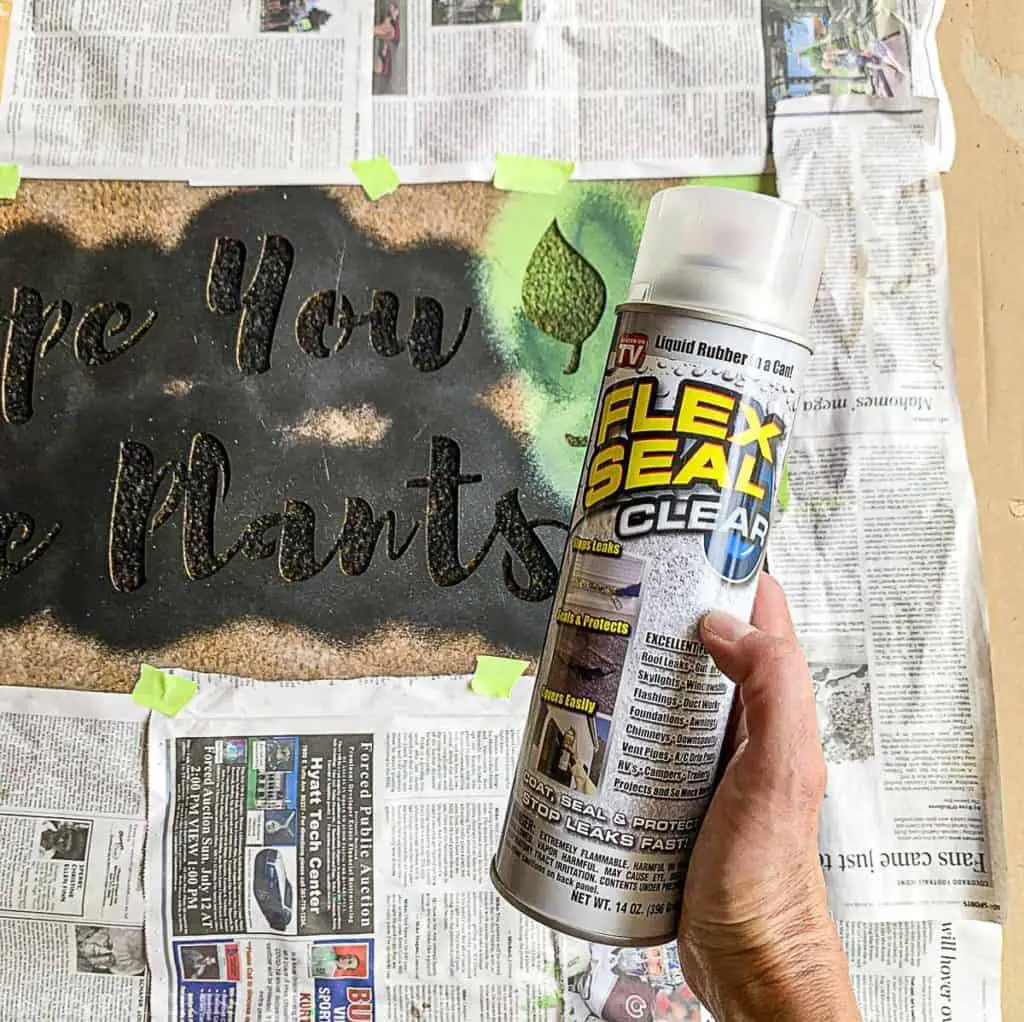
This stuff stinks. Make sure you have enough ventilation, and wear a respirator, if you have one. (I know you’ve got at least SOME kind of mask on hand, so use it!)
You could also try a sealant like Krylon UV-Resistant Clear or Varathane Spar Urethane. However, from my limited research, it seems like FlexSeal is the industry standard for doormat sealant. (The “industry” is DIYers. Ha!) I’ve been happy with it so far. By the way, I would suggest buying the mini size of FlexSeal clear, if you only plan to make one doormat.
Carefully Remove the Stencil
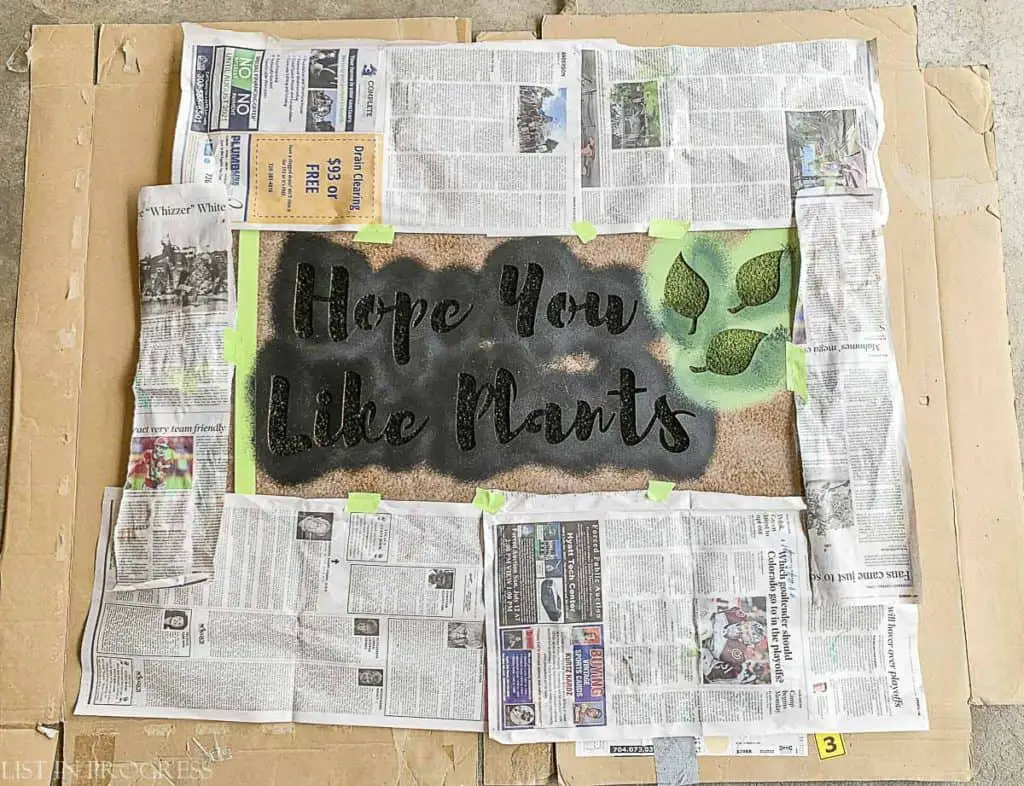
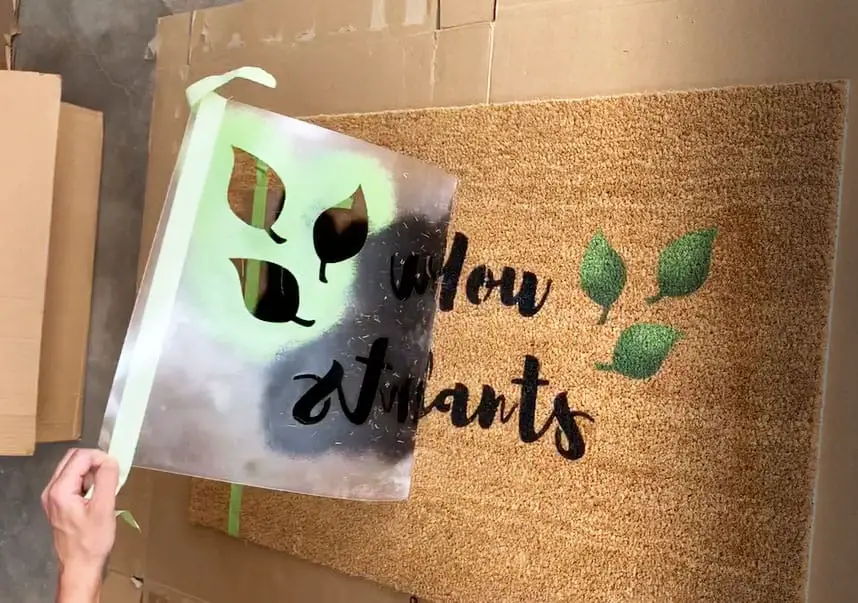
Give the FlexSeal about 20 minutes to dry a bit, and then carefully remove the stencil. If you wait until the sealant is fully dry, it might be hard to remove and damage your careful paint job. Just peel the stencil away from the coir and behold your beautiful new doormat!
Are you inspired to make a doormat? Or, do you have any questions first? Shoot them my way and I’d be happy to help. This is a fun and easy project. I hope you’ll give it a try!
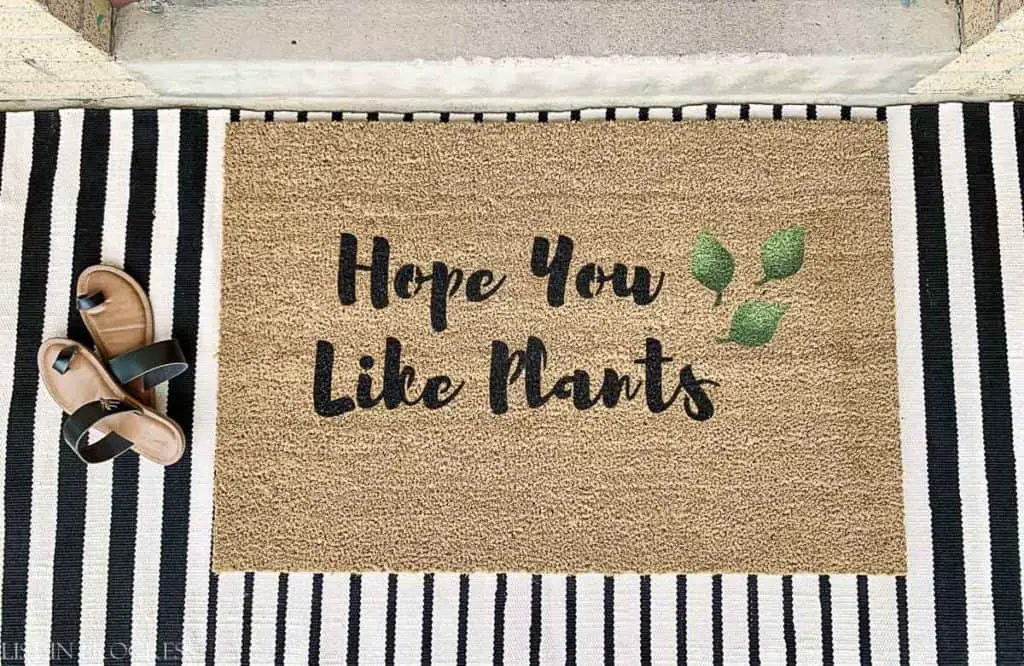
Welcome Home, New Doormat!
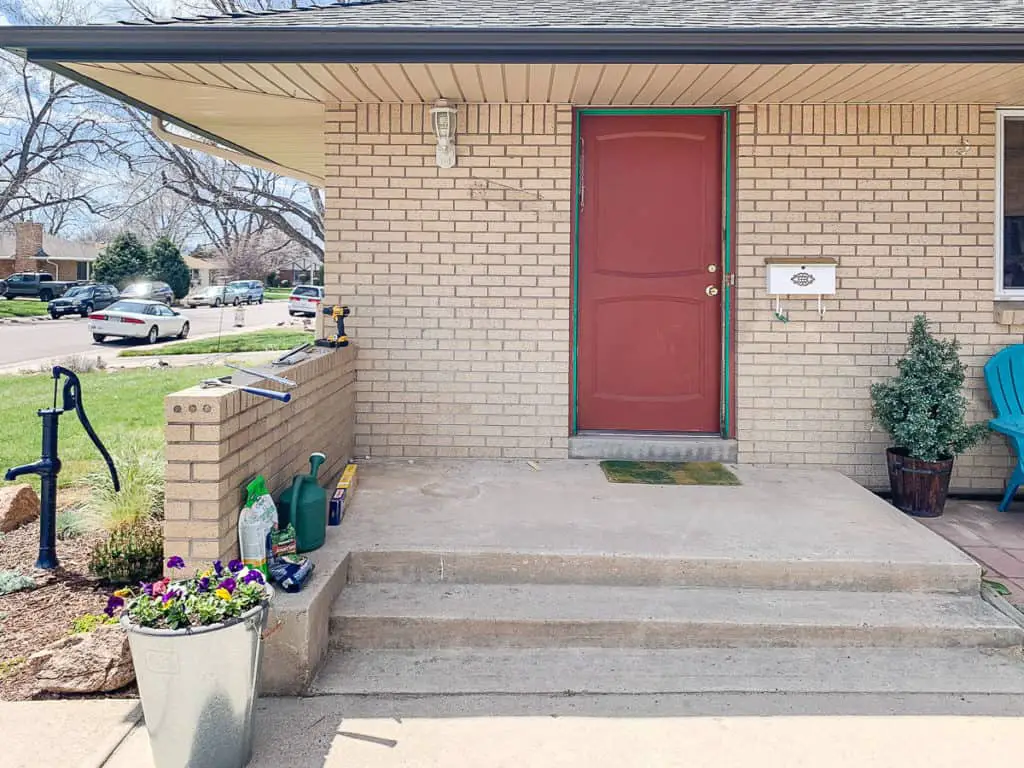
Someday soon, we hope to replace the front door and finish this porch project. In the meantime, the new doormat changes the whole look from this… (see how sad and wimpy the old 20″ x 30″ doormat looks?)
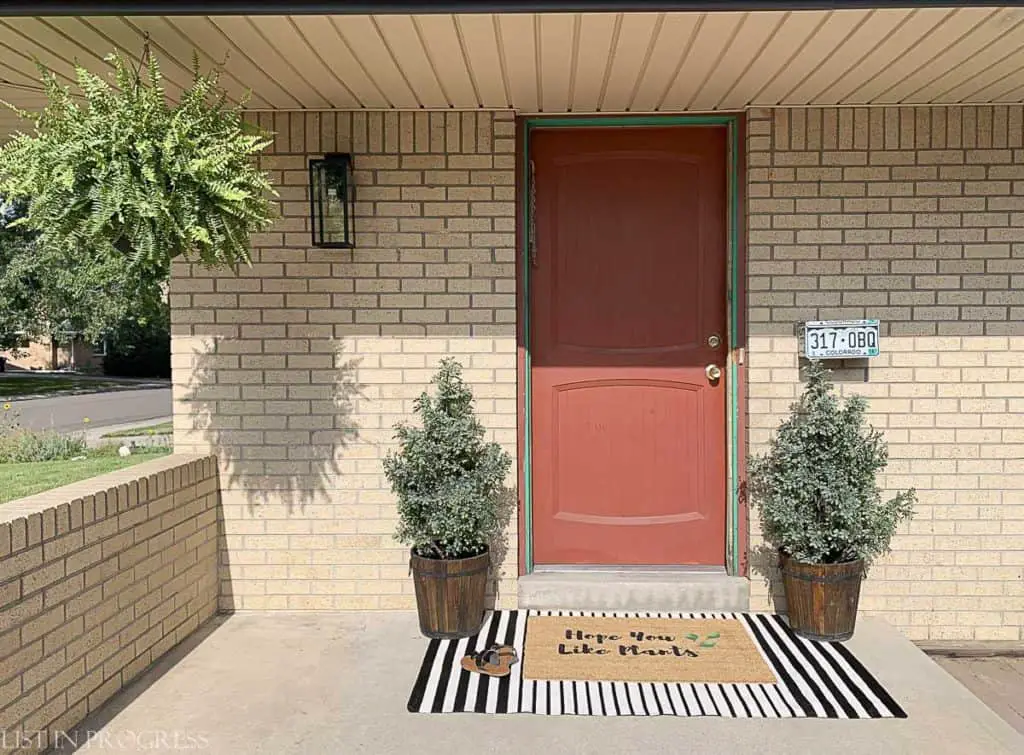
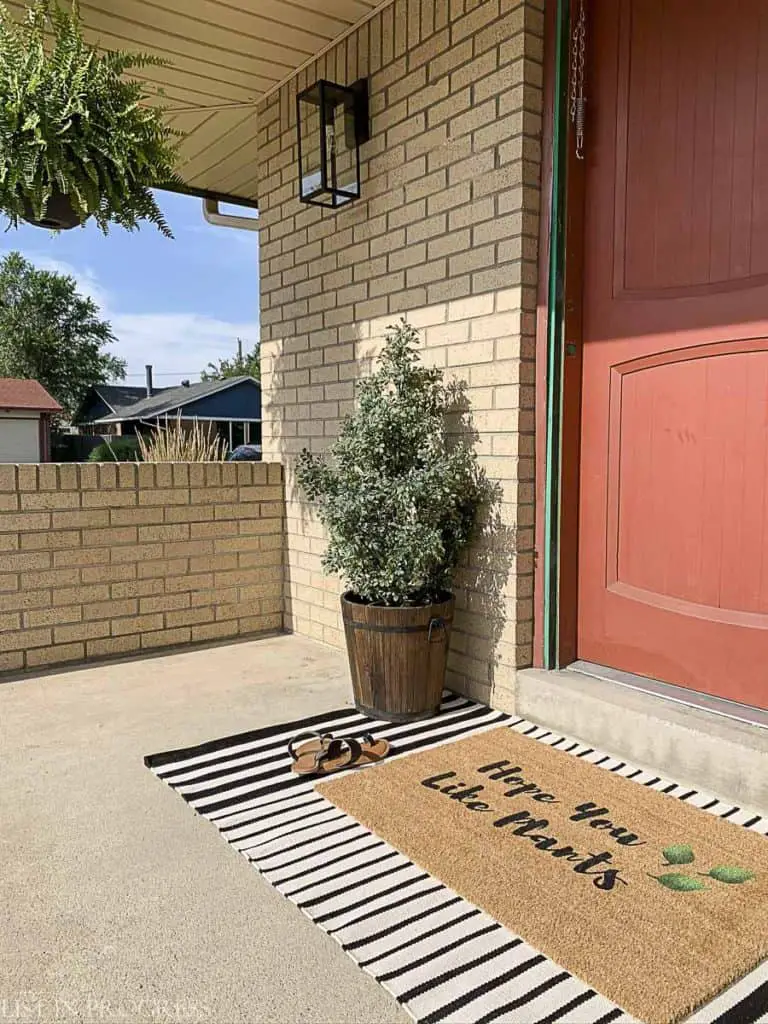
To this! We’ve made a few other changes, too. Hanging a Boston fern, installing a quirky mailbox, changing out the front porch light, and buying this fun 3′ x 5′ black and white striped outdoor rug to layer underneath.
Other Cute Doormat Ideas
If, by some chance, you’ve read to this point and don’t feel inspired to make a doormat yourself, here are some fun options to buy. When I started my research a few months back, looking for the perfect quippy doormat, I scoured Etsy and other retailers. Eventually, I decided to make my own, but here are some of my favorites from that search.
You could also order a personalized doormat from an Etsy vendor! This shop and this shop get great reviews, and there are many others.
More DIY Projects from List in Progress
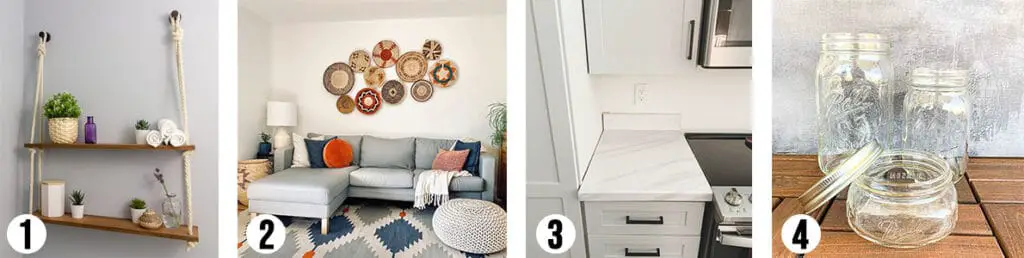
1 – Easy DIY Hanging Rope Shelves Tutorial
2 – How to Create a Basket Wall with Command Hooks
3 – 2 Affordable Laminate Countertop Update Ideas
4 – 12 Mason Jar Crafts to DIY This Summer
Subscribe and never miss a post!
I will only email you 2-3 times per week, MAX. No junk!
[mc4wp_form id=”402″]