

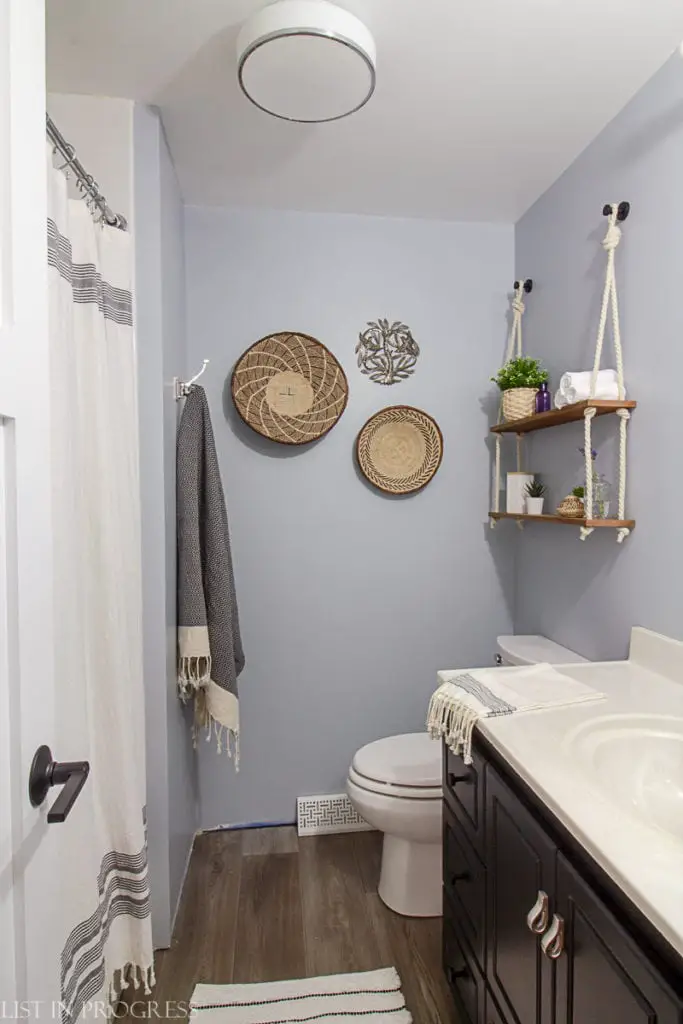
Today, I’ve got an easy tutorial to show you how to make DIY hanging rope shelves. If you’re looking for a simple project to fill wall space in your home, this is it! I hung these shelves in our bathroom recently, to create a spot for useful items or just decor. Here’s how you can create something similar.
Materials for Hanging Rope Shelves
1-2 pieces of wood*
16′ length of 5/8″ rope
1/2″ Forstner drill bit
Clear tape
Wall hooks of choice (I used these)
Drywall anchors
Level
*I used a leftover piece of cedar that we had on hand, and I cut it down to two pieces. I meant to make the shelves 24″ wide, but they are actually 28″. If I get motivated, I’ll fix that. Just sharing that mistake because this project is super flexible… you can make one shelf or two, and cut them as wide as you need for your space.

Prep the Shelves and Drill Holes
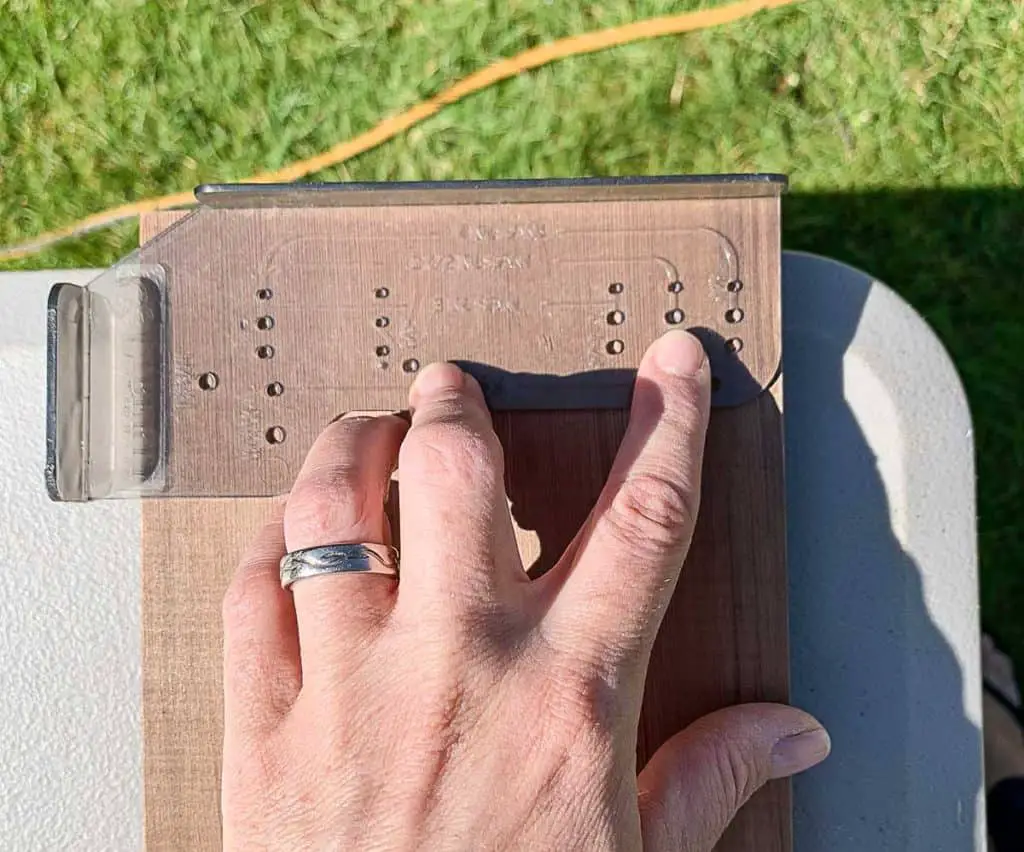
If you cut one or two pieces of wood for this project, you’ll need to sand the ends. Then, mark the spots where you plan to drill, two holes at each end of each board. I used this cabinet handle template to mark a spot about one inch from each corner and to make sure the placement is even. You could also just use a Post-it note as a template with square corners, and mark a hole where you want to drill.
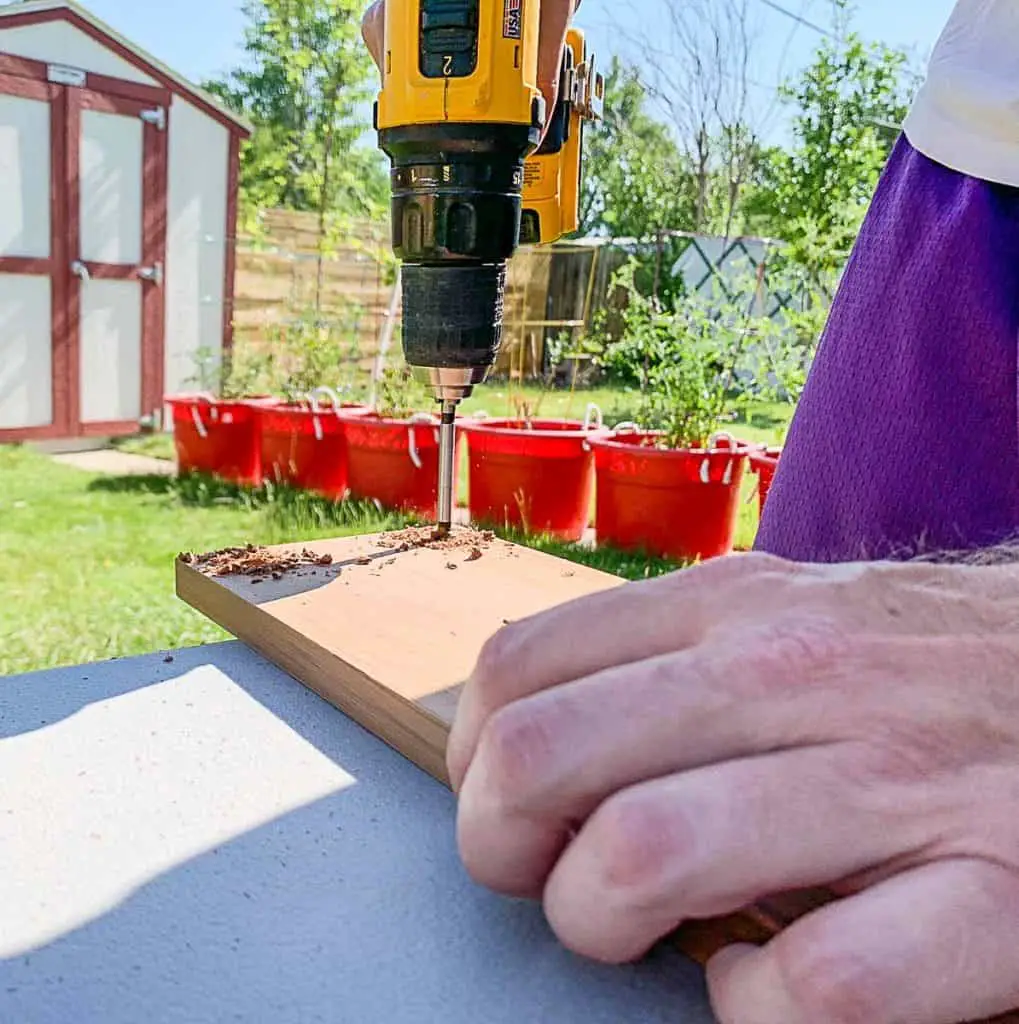
The next step is to drill the holes, and Wyatt recommends using a 1/2″ Forstner bit to create smooth-edged holes. (I learned something new on this project – this was my first experience with these drill bits, and I was impressed at how perfectly the hole turned out!) First, drill a pilot hole with a 1/16″ drill bit:
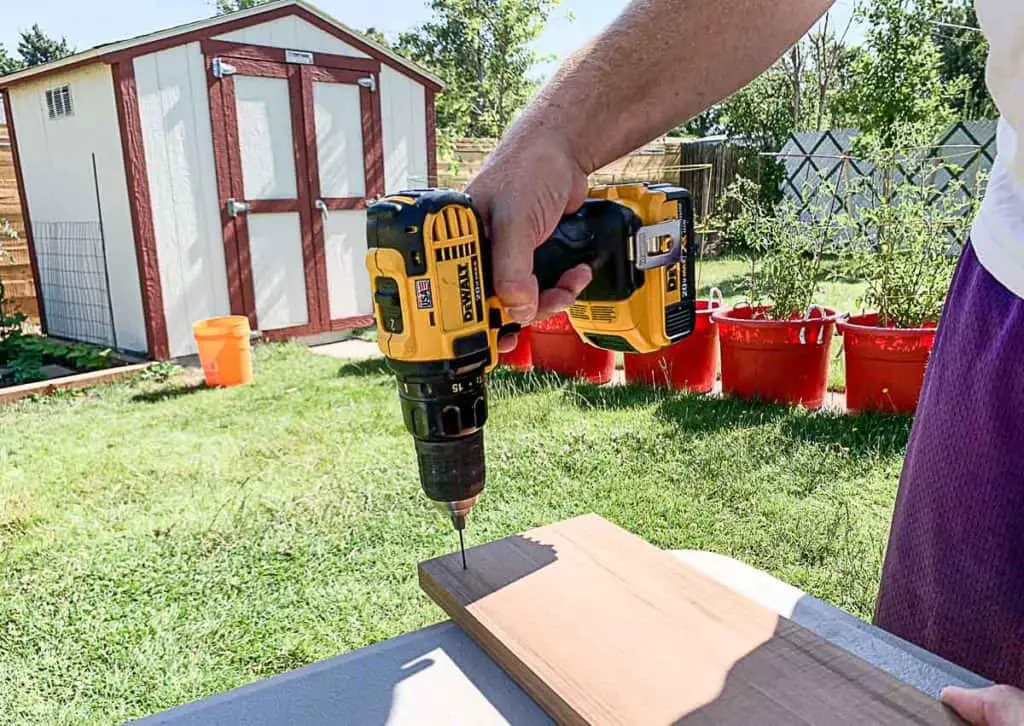
Then, use the 1/2″ Forstner drill bit; Wyatt drilled halfway through the board and then flipped it over to finish each hole. Here’s what that looks like:
Measure and Cut Rope Lengths
The easiest way to measure and cut the rope to the right lengths is to mock up the hanging rope shelves on the floor. You can start by cutting the rope in half, or if you don’t want to waste the extra length, measure out one side first. To do that, lay out the rope on one side and adjust the length until it looks right, adding at least 1 foot extra for the knots. Make sure you’re using no more than half of the rope for one side.

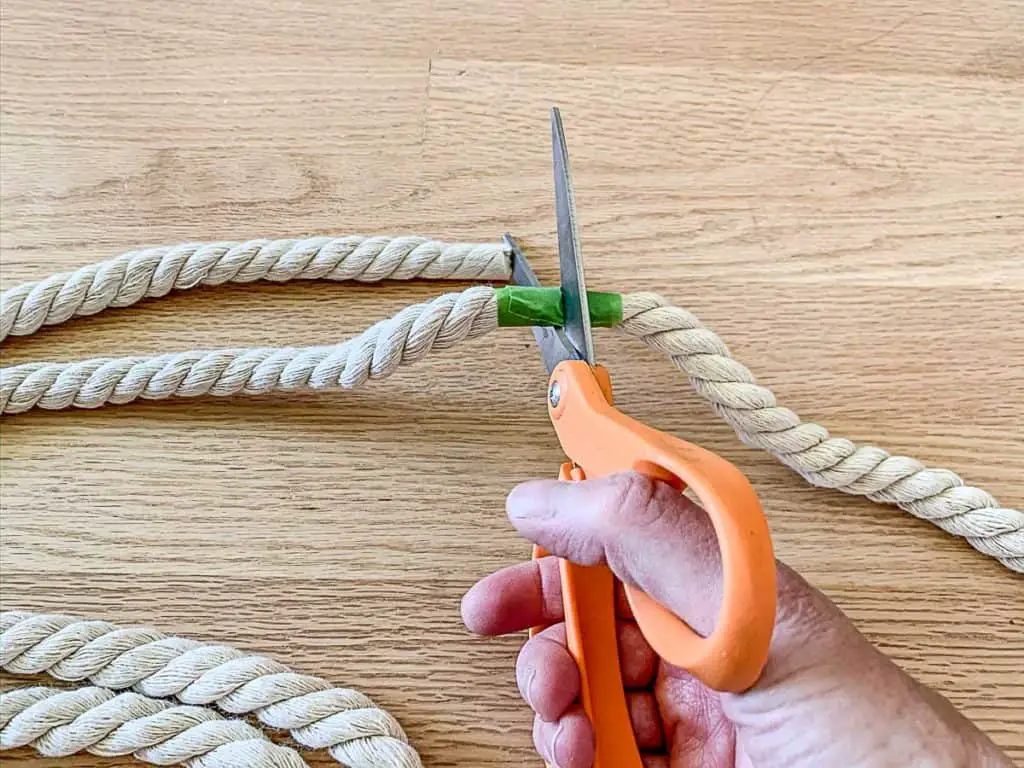
Cut the rope to create your second piece. To cut the rope cleanly, first wrap a piece of tape around the rope so it doesn’t unravel. Cut right through the middle of the tape.

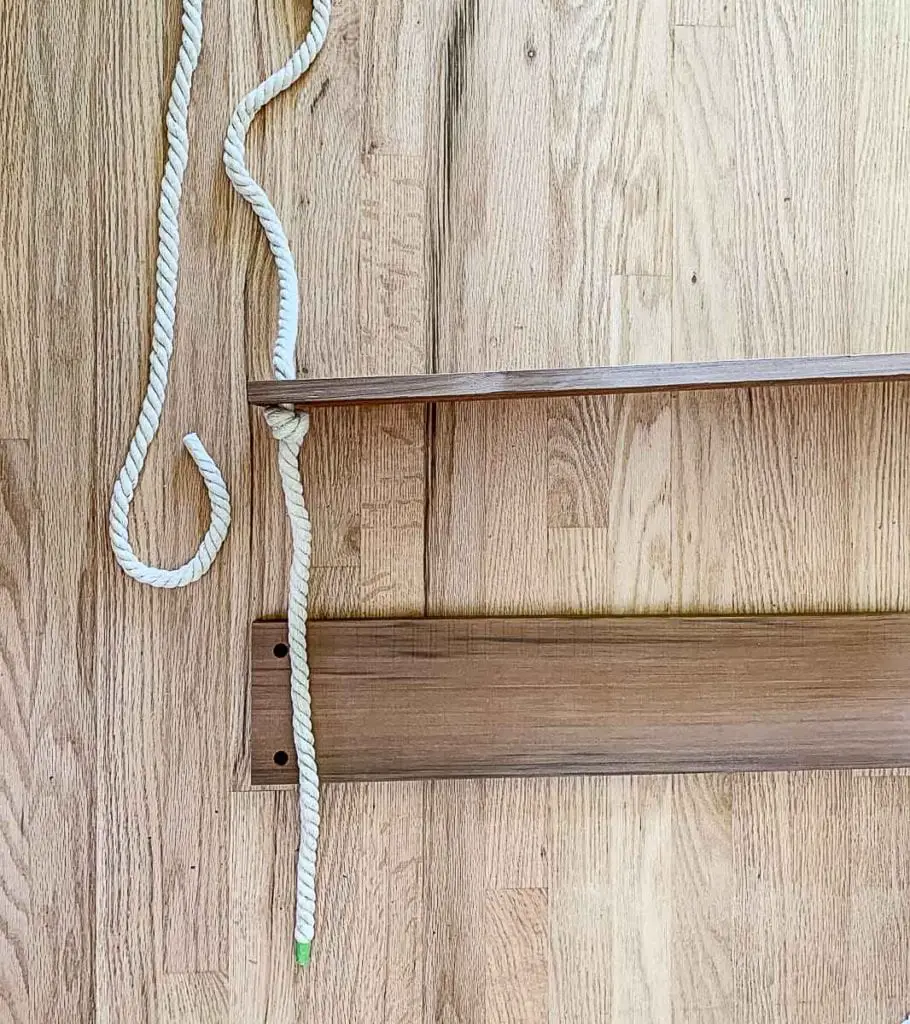
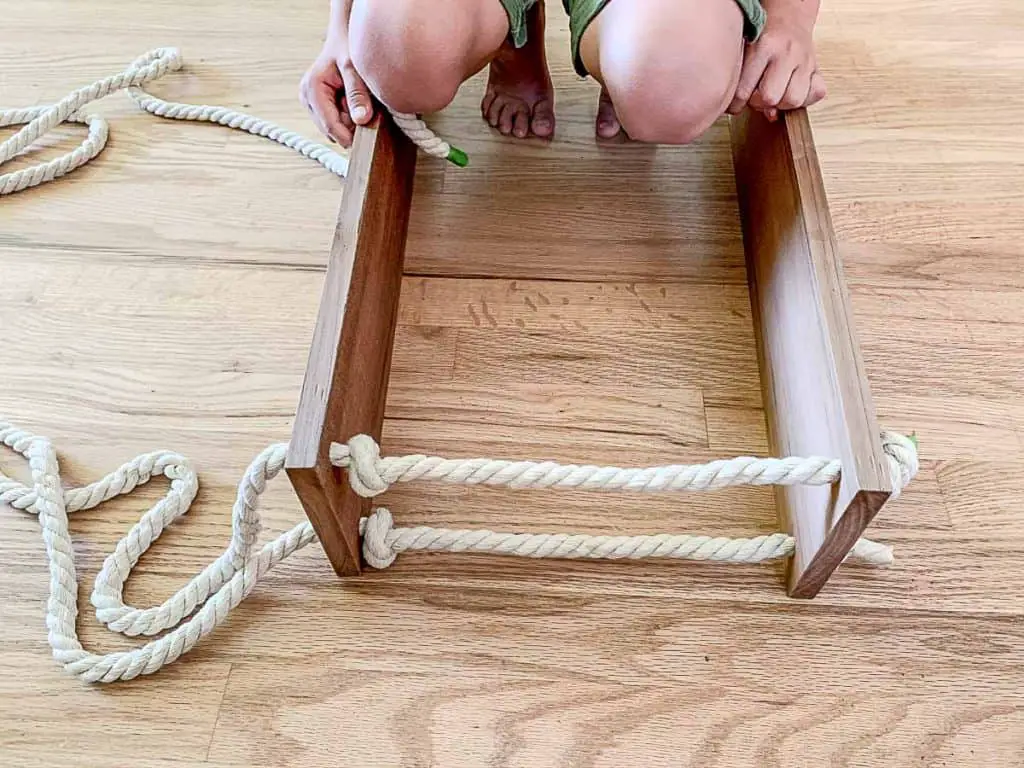
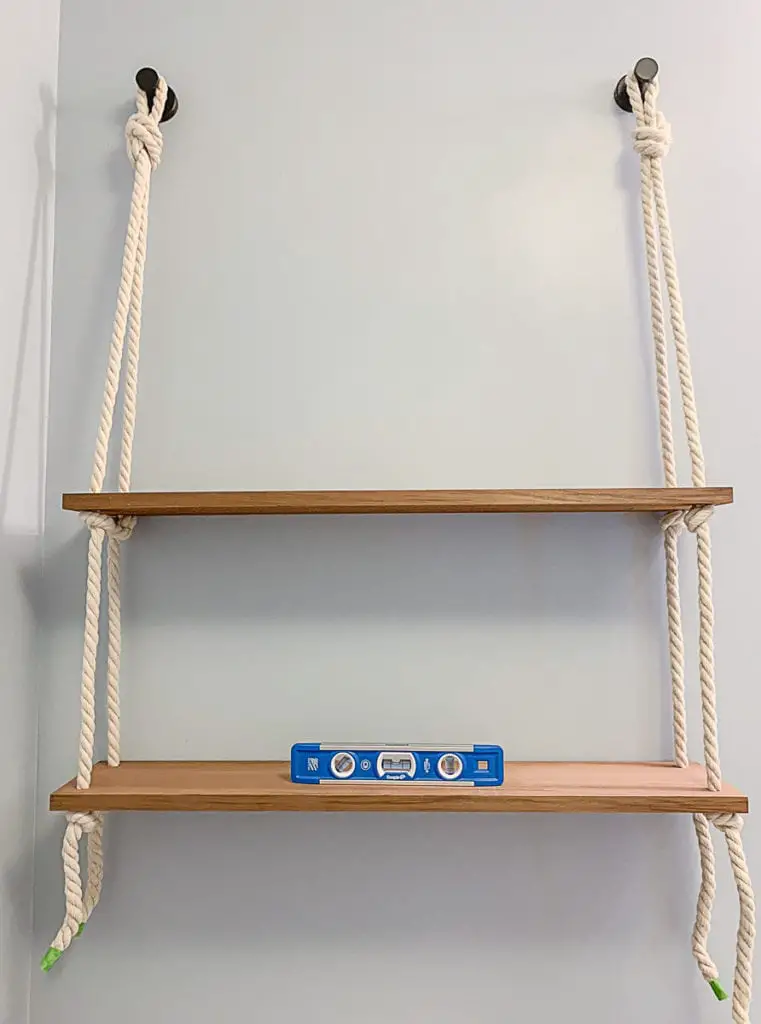
Thread and Knot Rope Through Shelves
Knot the rope under the first shelf, and then the second, but don’t make the knots too tight. You’ll want to be able to slide the knots and adjust the shelves for spacing.
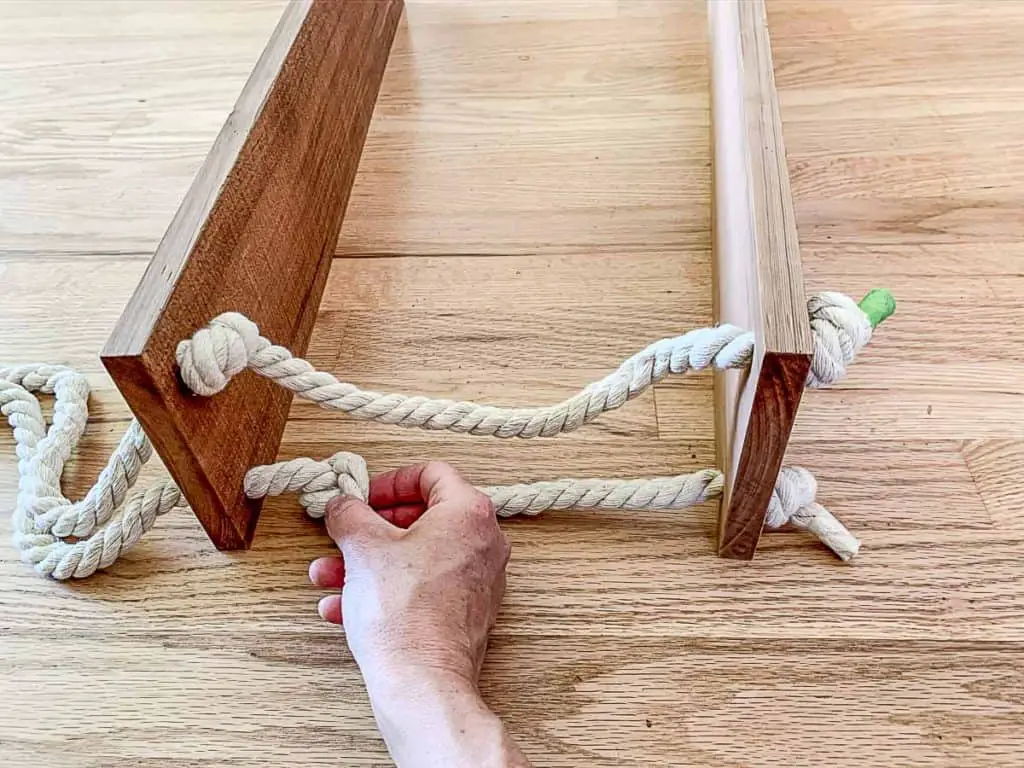
You might want to recruit a helper to hold the shelves steady while you move the knots.
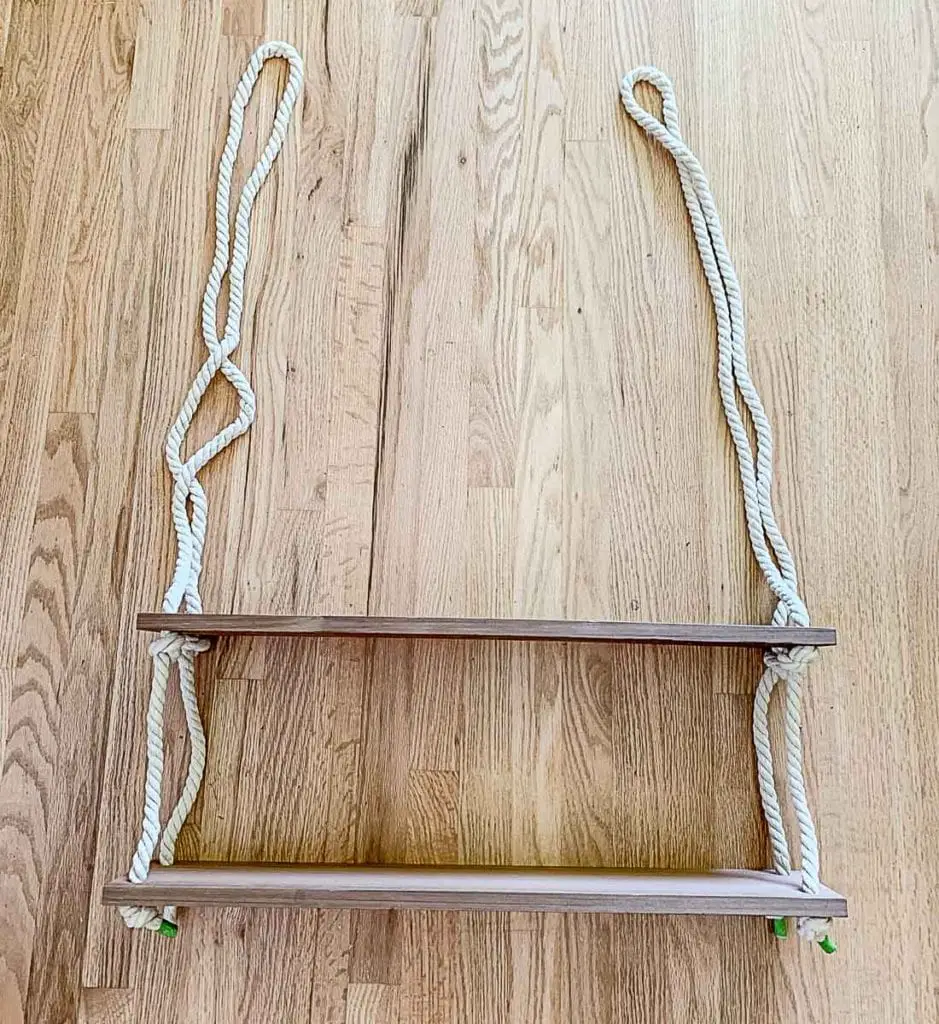
Once you have the hanging rope shelves assembled with fairly loose knots, you’re finished with this part of the project. Easy, right?
Read More About Our DIY House Updates
Favorite Behr White Paint Colors
Closet Door Ideas to Update Any Room
How to Apply Gold Leaf to Glass Decor
Trends in Cabinet Hardware
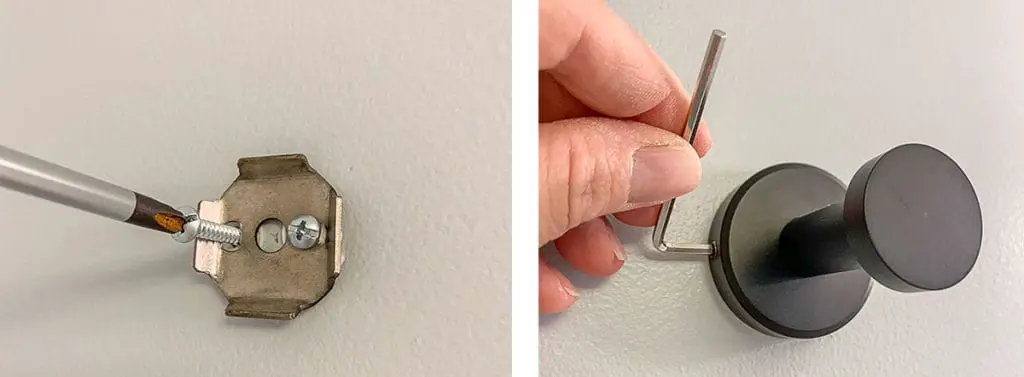
Install Hooks in the Wall
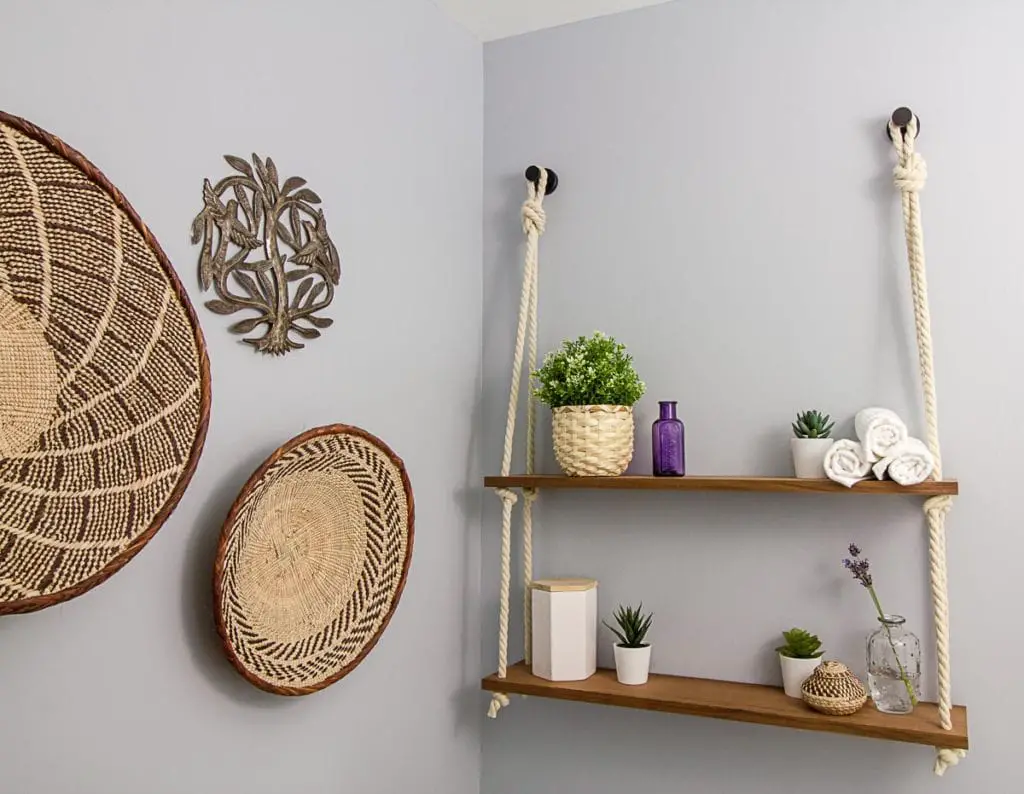
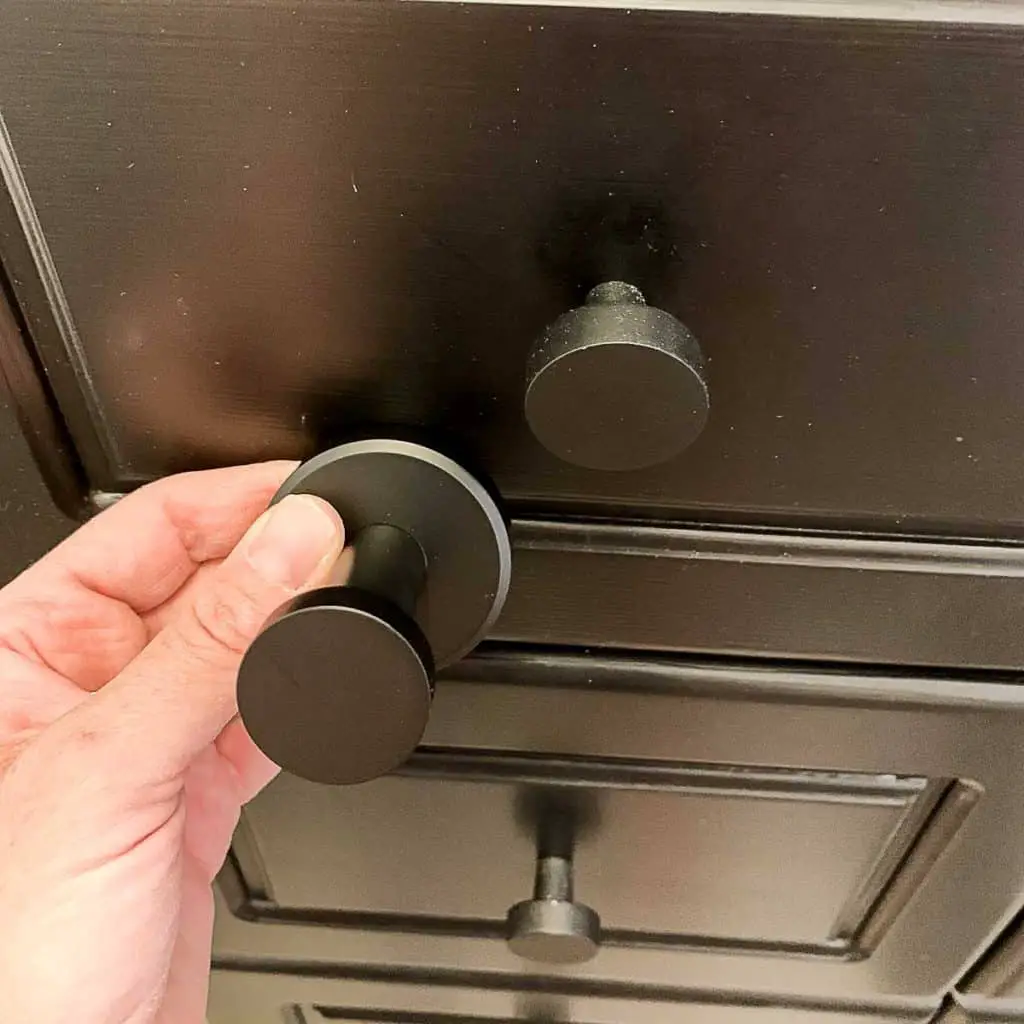
Since our shelves are hanging in a bathroom, I bought these robe hooks because I want something that won’t rust. You could use cheaper hooks if your shelves will not be in a damp space. I also chose these hooks because they match the style of the knobs on our black vanity. Please excuse the dust!
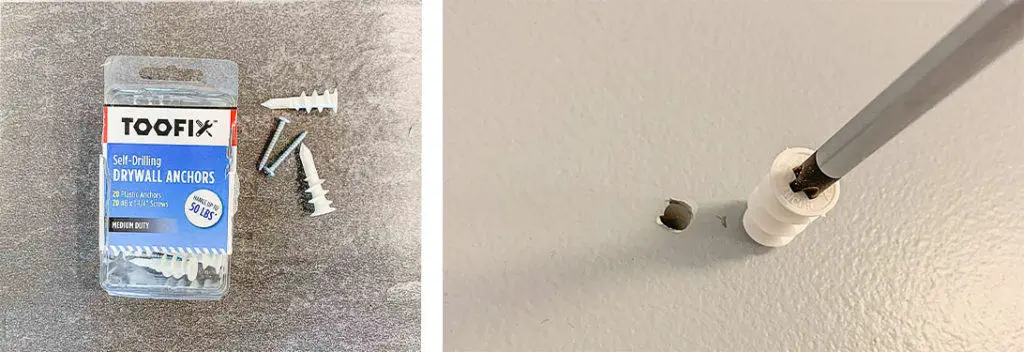
Because the shelves might hold more weight than a robe, I used these drywall anchors to ensure the hooks are strong enough. If you are able to drill into a stud, you won’t need anchors. My hooks came with dinky anchors, but I feel more confident that these 50-lb anchors will stand up to heavier weight, if needed.
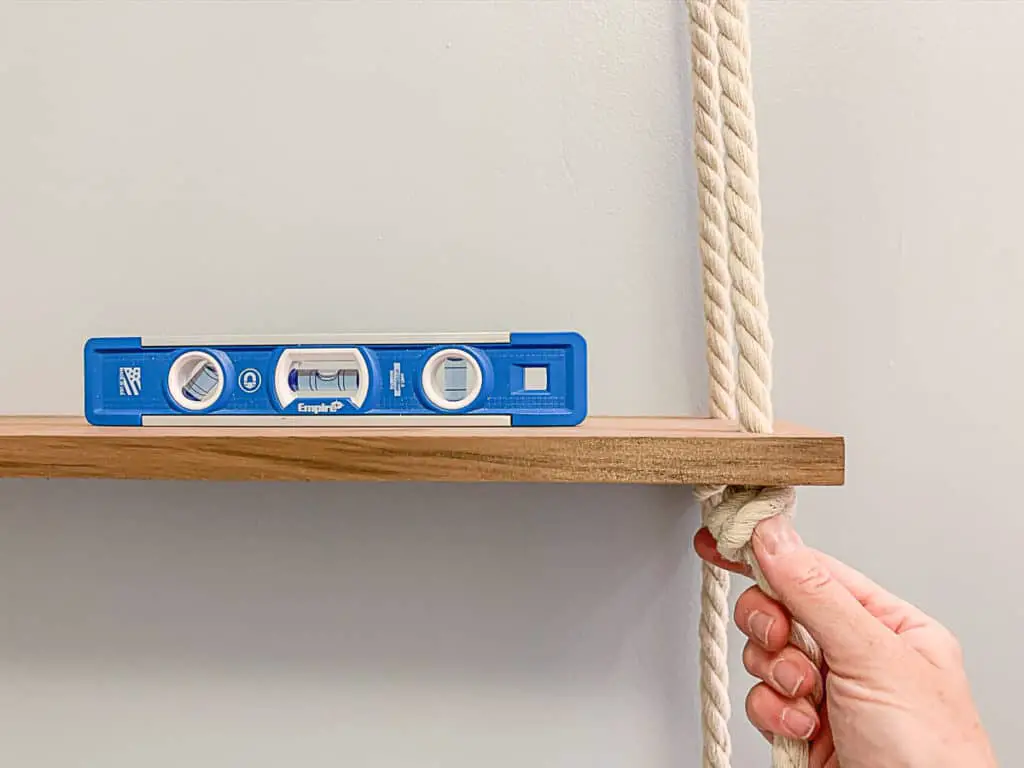
Try to make sure your hooks are level, but don’t sweat it if you’re a little off. That’s the beauty of adjustable ropes.
Hang and Adjust Your Shelves
Now for the fun part – set up your hanging rope shelves! You can make knots at the top of both ropes if they are a little long, but that’s up to you. Next, set a level on each shelf and adjust the knots until the boards are level from side to side and front the back.
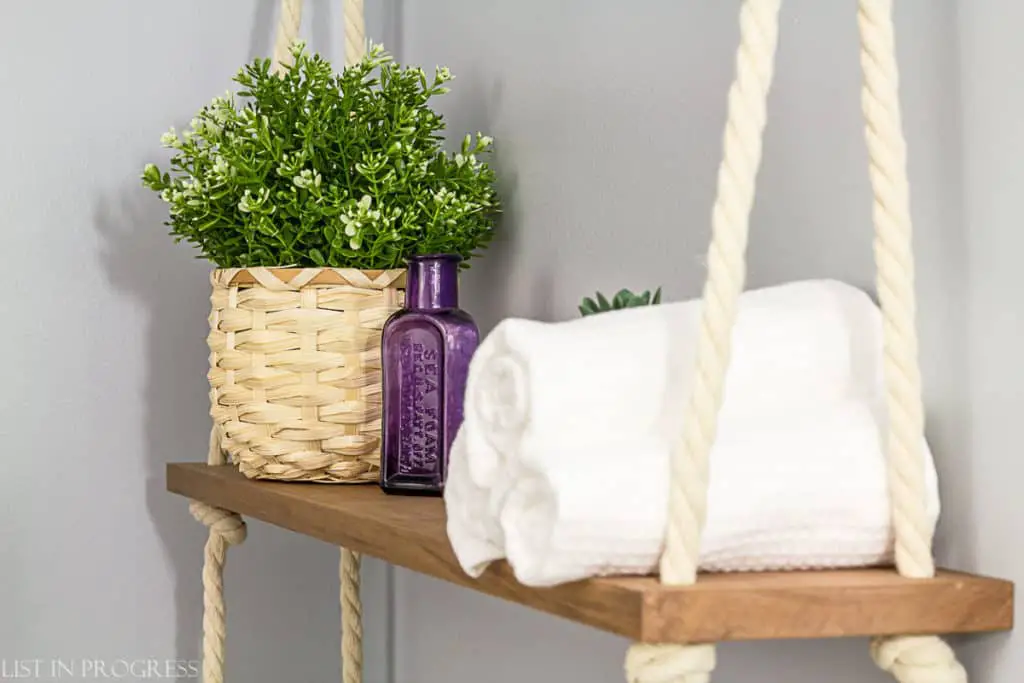
You can now style away! I made my first trip to Ikea in four months for a few of these items, but the purple glass bottle is a recent antique shop find. I learned that pre-1915 glass made with manganese turns purple when exposed to UV light. How cool is that!

If you want added stability, use a command strip like this to stick the back of each shelf to the wall, just in case they get bumped.
What do you think? If you make these shelves, I hope you’ll send me a photo! Have fun!
If you’re curious about the black bathroom vanity, read more about the easy paint makeover here. I’ve been working on an affordable bathroom refresh, and we’re about halfway through. These shelves have gone a long way to add some decor and storage to this space.
Read More About Our DIY House Updates
Read More About Our DIY House Updates
Favorite Behr White Paint Colors
Closet Door Ideas to Update Any Room
How to Apply Gold Leaf to Glass Decor
Trends in Cabinet Hardware


Thank you so much, this was a big help
With our bathroom project .
Great! I’m thrilled to hear that.