

I threw together this easy holiday sign on a whim over the Thanksgiving break. Today I’m sharing how I made it, in case you feel inspired to create something similar. The best part is this project cost $0, just using odds and ends from around our house. Win!
This post contains affiliate links at no additional cost to you. Thanks for supporting my blog!
First – Design an Easy Holiday Sign
My initial plan for this easy holiday sign was just four basic steps: print the words, trace onto nicer paper, mount (somehow), and hang the sign. That mounting step was tricky because I didn’t plan ahead, and if I were to remake this sign, I would size it correctly for a photo frame. More about that in a bit.
First, I designed the words I wanted in Canva, my favorite free online design program. Canva is very user-friendly and the free version works great for my needs (blog graphics, holiday cards, Pinterest images…). To make this, I created a new design and set the size at 8.5 x 11 inches, so I would be able to just print it. Then, I added the text and switched the font to one of my latest favorites – Twister. With a rough vision in mind, I enlarged the words over four pages, so the largest capital letters would fit on one page, knowing I could piece the word “jingle” together afterward. It looks like this:
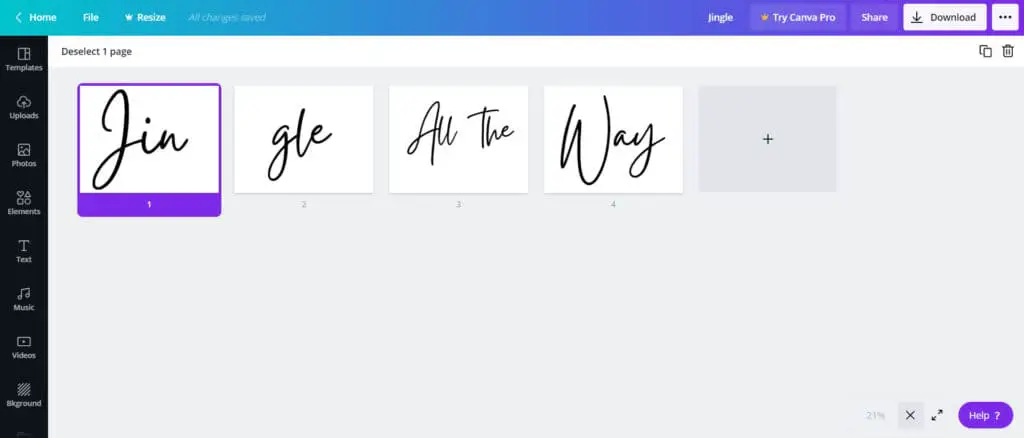
You’re welcome to download my free template, if you happen to like this phrase, too. Beware – if you want to resize it, you’ll have to make your own design.
Second – Trace the Printed Text onto Sign Paper
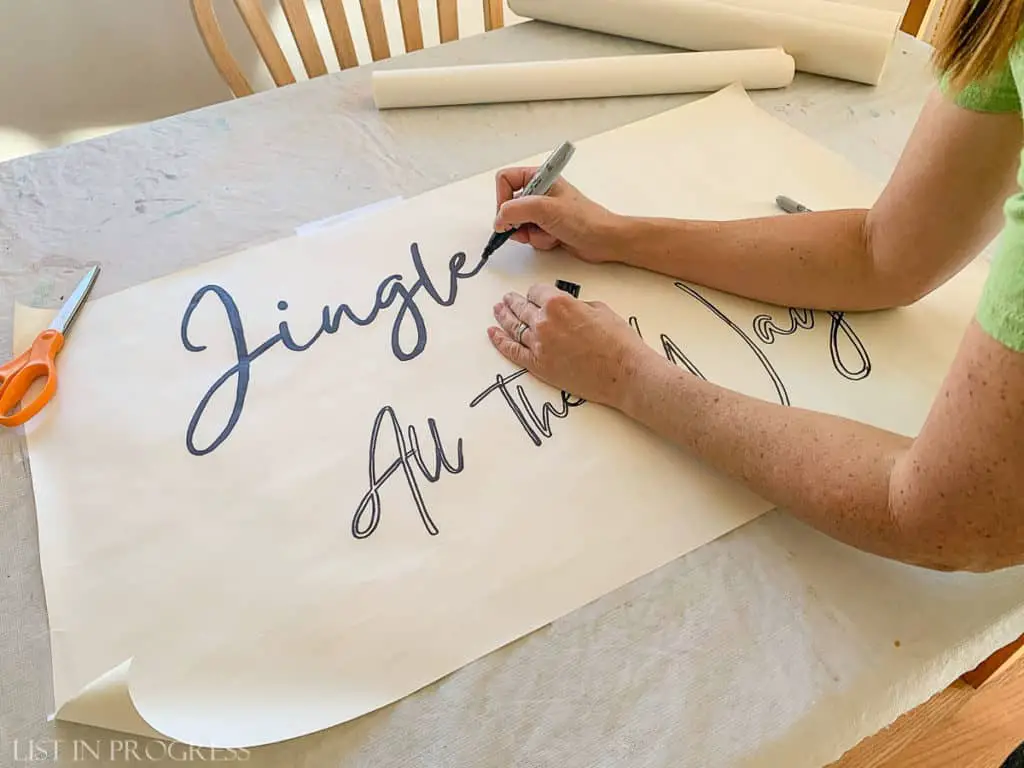
Next, I printed the four pages and laid them out on my workspace until I was happy with the text spacing and layout. I cut and taped the “jingle” pieces together, and then I taped all of the pages to the table protector.
Then, I taped a smooth section of easel paper over the design. I borrowed this paper from my kids’ IKEA art easel, but you could use any large piece of butcher paper or brown kraft paper. Using a regular fine Sharpie marker, I carefully traced the words and then filled them in with a chisel tip Sharpie. Done!
Third – Mount the Sign
This was the trickiest step in my project, because I didn’t plan the mounting in advance. Learn from my mistake…
I would recommend repurposing an existing photo frame in your home for this project. Start by measuring the size of the frame, and then size your text and layout to work with those measurements. Because I don’t have a frame that’s large enough for my sign, I had to get creative.
Alternative mounting options… for some reason – don’t ask – we have plastic strips from an old set of blinds in the garage. (I think my son dug them out of the trash for some creative art project. Let’s go with that.) I just taped two of those strips to the top and bottom of my sign paper and then taped a scrap of ribbon to the back to hang it. You could also cut strips of cardboard or buy balsa wood dowels for a DIY frame.
> Christmas Decor to Grab Before Its Gone <

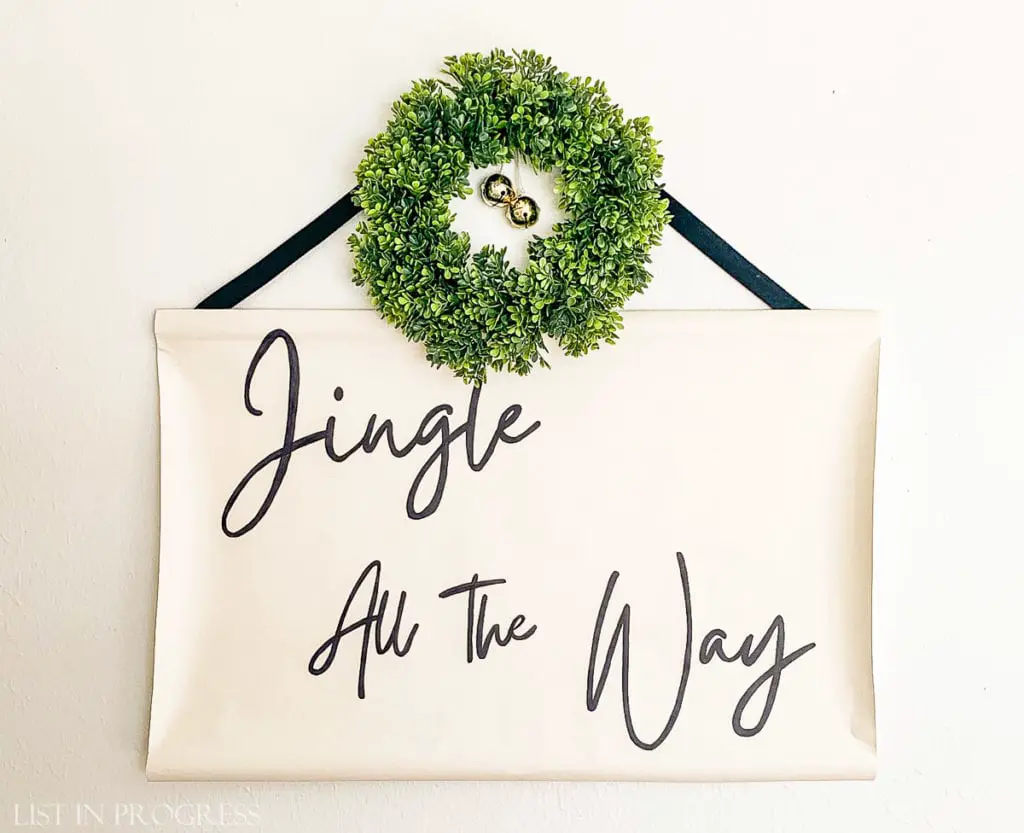
My sign looks a little rustic because it’s just loose paper hanging on the wall. If you frame your sign in a traditional frame, you’ll upgrade the entire look of this DIY sign. Much classier!
Last – Spice Up Your Easy Holiday Sign with Decor
On my latest trip to Target, I nabbed this $10 boxwood wreath and a $5 box of jingle bells. After stringing two bells on the wreath, I tacked it to the same nail from which the sign is hanging. Combined with this great faux pine garland, bottle brush trees, and a ceramic house, I think it all came together pretty well. This shot is an accidental ad for Target, since I’ve been collecting their affordable holiday decor over the past few years. Go figure!
I hope you feel inspired to make an easy holiday sign and spruce up your space!
> See More of Our House Here <