

When I get the urge to move around photos or hang something new, a laser level is my go-to gadget. It definitely makes hanging a gallery wall a snap! Here are the basics on how it works, shown with a quick “command center” project I completed last fall. This only took me about 10 minutes, max. I’ve also included links to laser levels at a variety of price points, at the end of this post, if you want to try one.
This is not a sponsored post. Just a tool that I really love and want to share. There are affiliate links in this post, should you choose to click through and make a purchase. Thanks for supporting my blog!
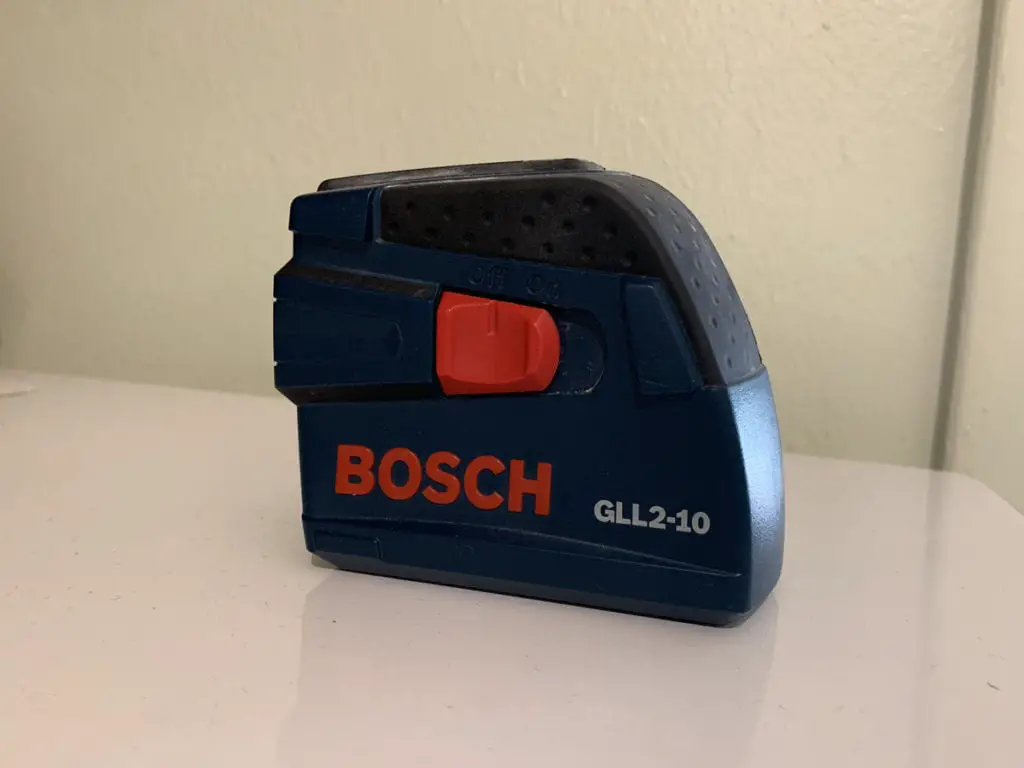
We have the Bosch laser level shown above, which is about 15 years old. It runs on AA batteries and turns on and off with the red switch on the side. Wyatt bought this years ago for construction projects around the house, and it still gets a ton of use – and not just on my gallery wall projects! I bet there are a few more bells and whistles on newer models, but the basic self-leveling function remains the same.
A Quick Laser Level Tutorial
Our mudroom is basically a hallway between our kitchen and family room in the back of the house. It’s on the list to update, but we haven’t gotten to it yet. Last year, I stuck a big bulletin board on one wall, to organize my kids’ school info and artwork. However, since they attend two different schools, I wanted a better system this year to help me keep schedules and supplies straight. I decided to try a few baskets and bulletin board tiles, clustered together as a kid command center.

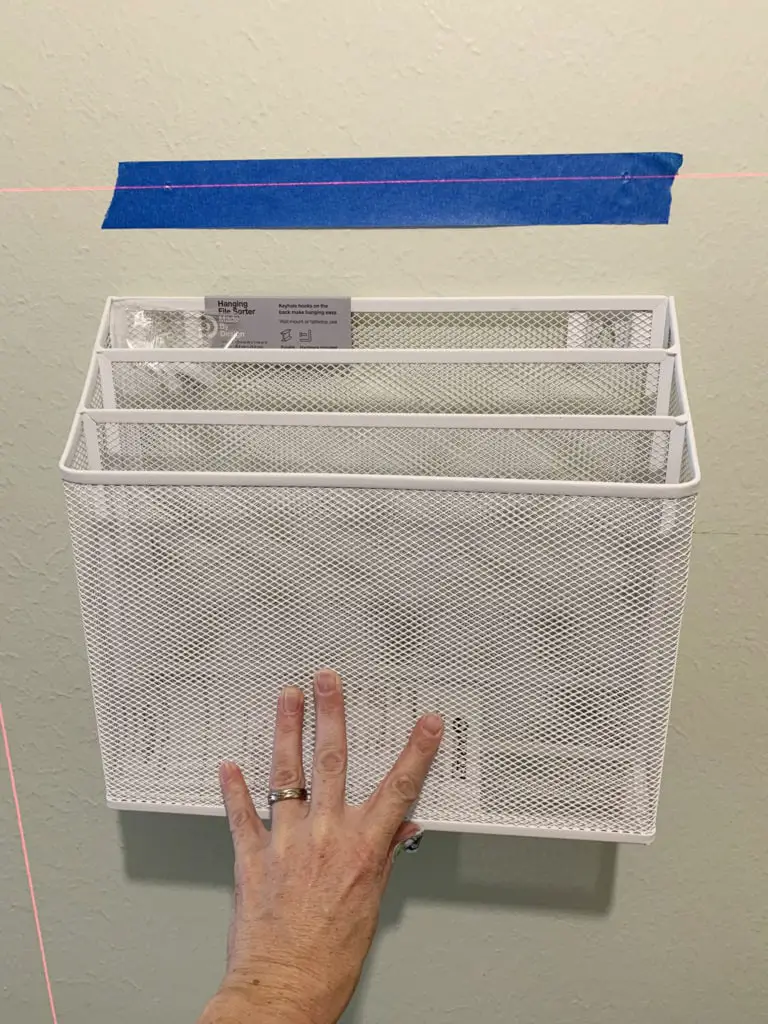
I grabbed these metal hanging file sorters and these foam/cork tiles at Target back in August. After a quick layout planning session on the floor, I decided to dive in and just reorganize the wall later if needed. I started by stacking the laser level on top of some empty Amazon boxes (on top of the dryer), and picked a reasonable height for the hanging file sorters.
Note: the height of the laser level will reflect directly on the wall, so you’ll need to raise and lower it accordingly. Ours doesn’t tilt (I’m not even sure if any do), because it self-levels at the height at which it’s placed on a flat surface. The beauty of a self-leveling laser level is that the lines will automatically settle into level (horizontal) and plumb (vertical) lines, so you only need to worry about adjusting the height. I’ve hung plenty of frames with a old-school level and this is waaaaay easier.
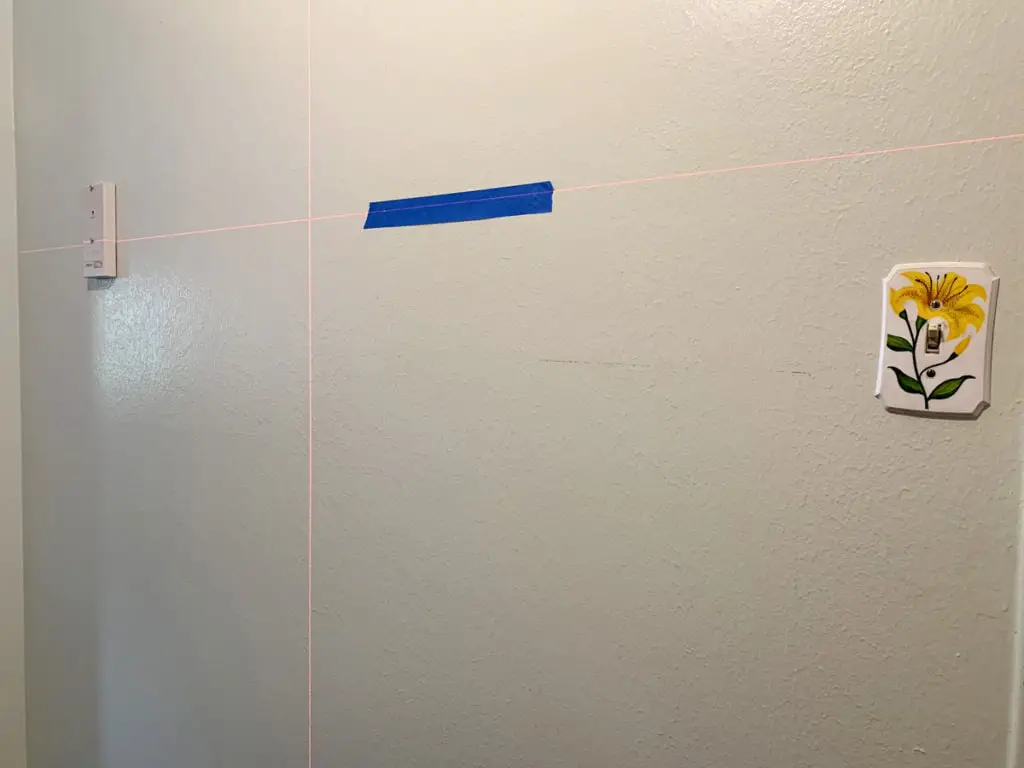
Once you have the lines projected where you need them for your starting point, you’re all set. I started with the hanging file baskets and figured out the height that seemed best. Then I used a piece of tape to mark where the screws attach to the basket and then placed the tape on the wall as a guide for my drill. Here’s a good tutorial, if you need help with this something like this.
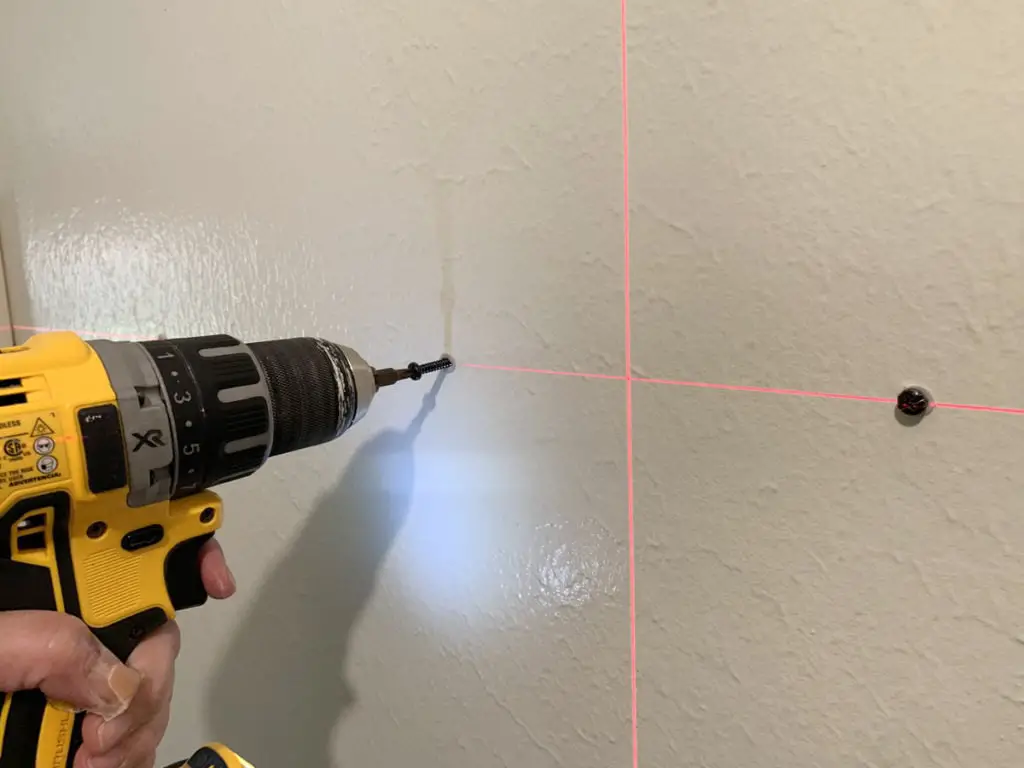
After drilling holes and tapping in the anchors, I attached the screws. As you can see in these shots, I just leave the laser level turned on through the entire process, to ensure I’m keeping everything level and plumb.
Once the baskets were attached to the wall, I moved the laser level a little higher to align my foam hexagons in this layout. (These measurements were just eyeballed, which is my preferred method…)
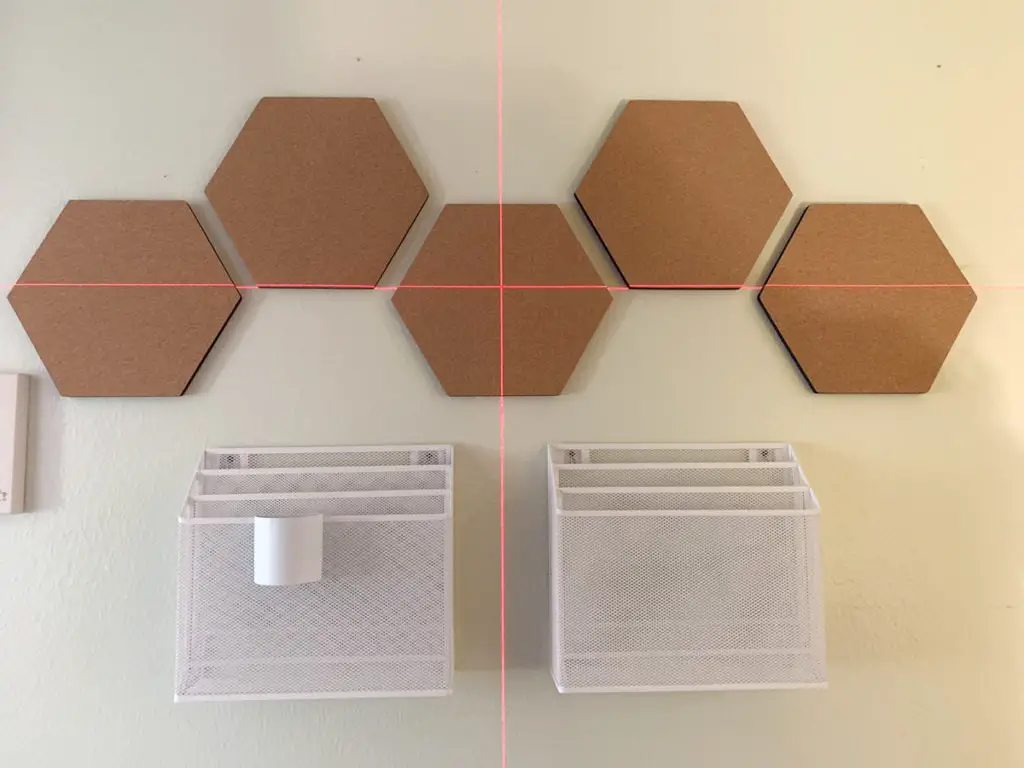
I stuck some handy dandy velcro Command strips on the back and then positioned the foam tiles on the wall. Done!
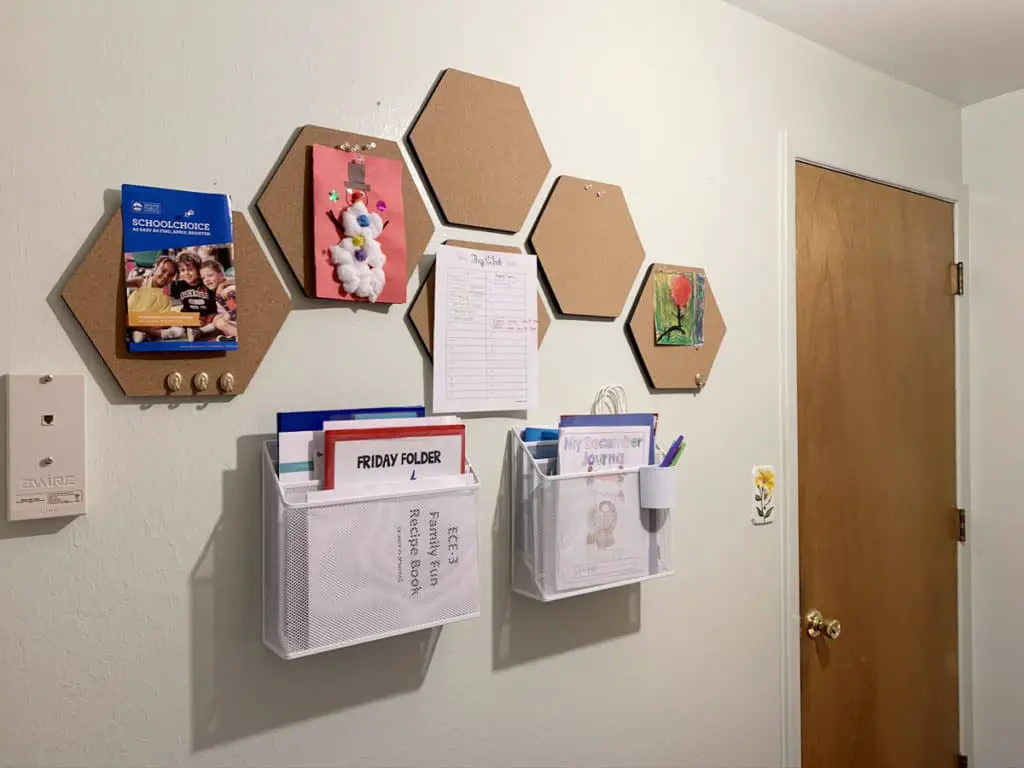
While not the most complicated command center I’ve seen around town, this is working out pretty well at my house. I can keep my kids’ homework folders and schedules organized and even have a little space to display their art. Next up, paint and a light fixture!
Laser Levels at Different Price Points
These all get decent reviews, although you’ll probably get a nicer level with longer range if you’re willing to invest a bit more. Just a guess. I’m also not including anything over $50, because if you’ll only use this to hang pictures, a cheaper one will do!
Under $20 | | Under $30 | Under $40 (great brand + on sale!) | Under $50
To read about some of our other DIY home projects, check out these posts:
How to Create a Basket Wall
The Best Paint for Kitchen Cabinets
How to Create Craftsman-Style Door Trim


