

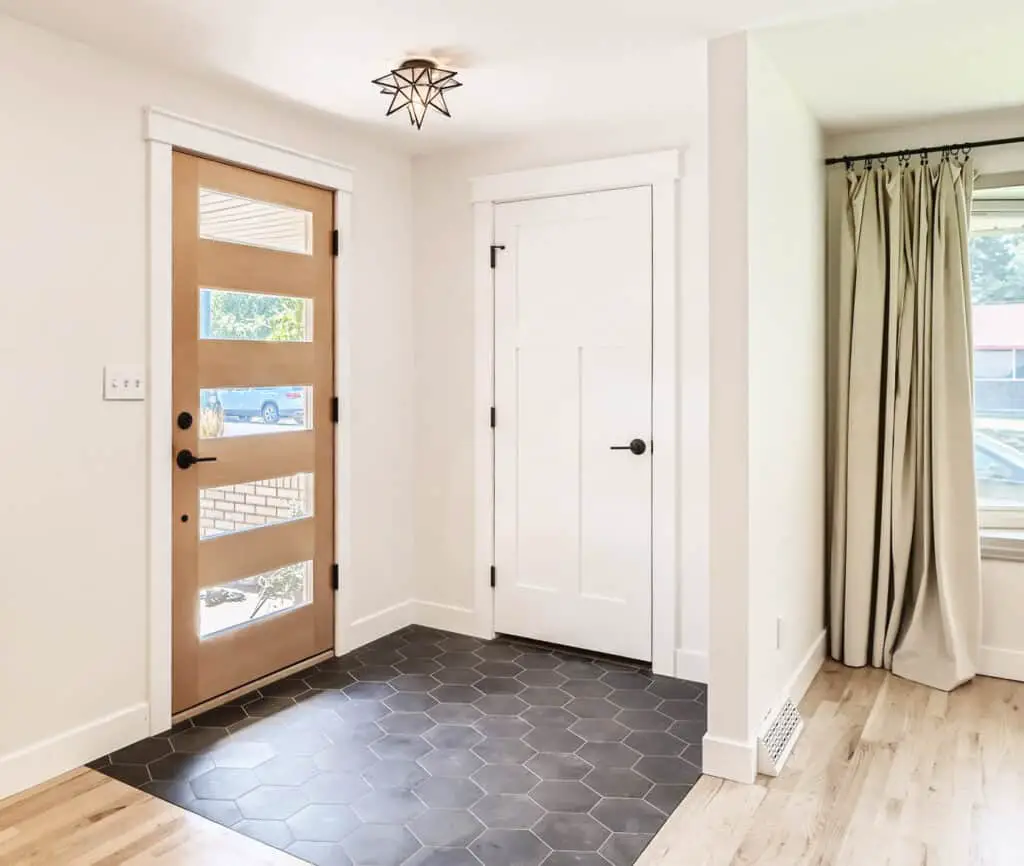
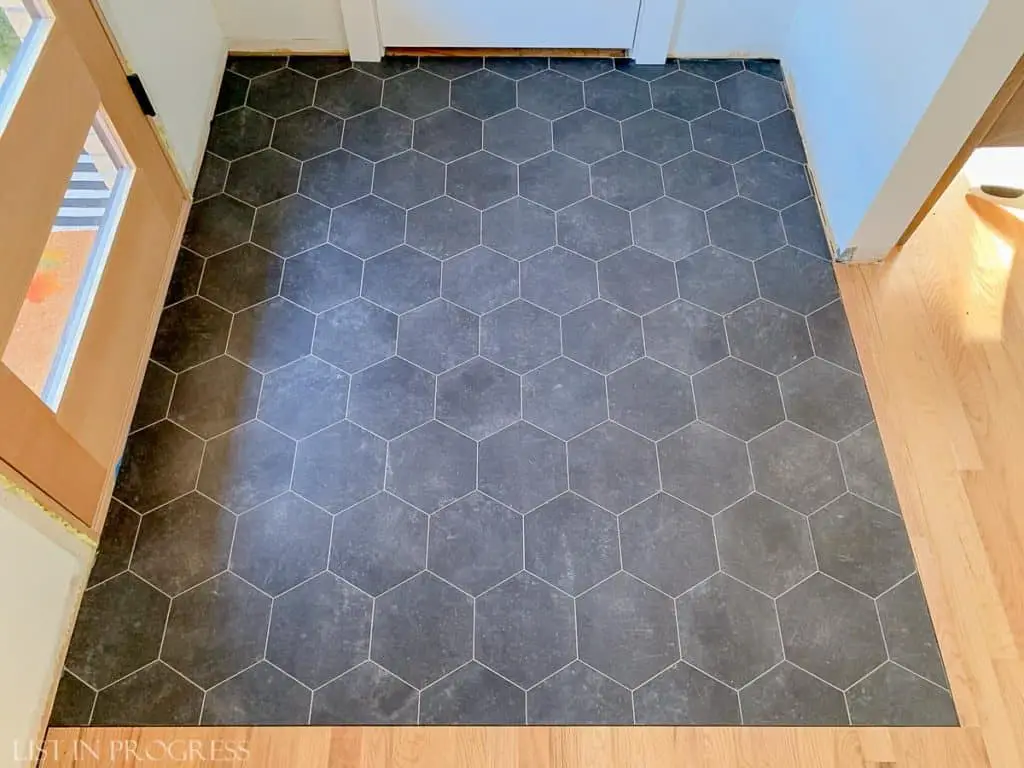
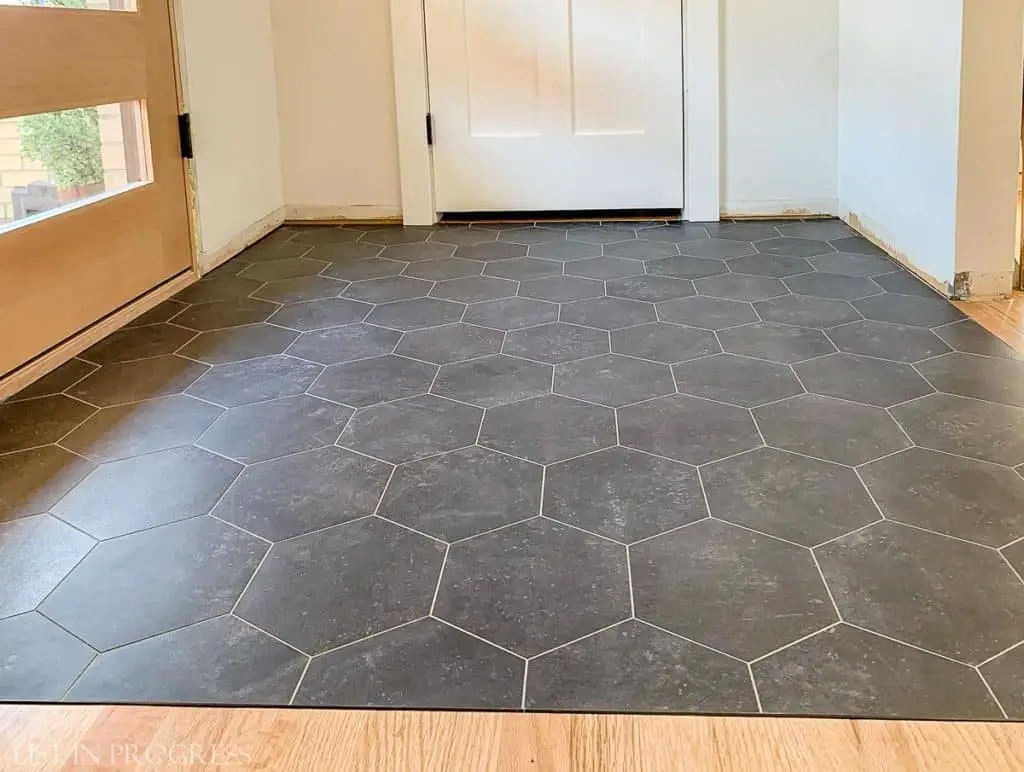
Today I’m going to introduce you to a revolution in the world of flooring products: groutable vinyl floor tile. Maybe you’ve already heard of it? We’ve installed three of these floors in two houses and don’t plan to stop anytime soon. Groutable vinyl floor tile is affordable, easy to install, durable, water-resistant, and looks great! Wyatt just installed it in our front entry, and today I’ll walk you through it. #punintended If you have a flooring project coming up, I hope you’re inspired to try out this DIY-friendly project!
Tour Our Remodeled Denver House
Tour Our Remodeled Denver House
What is Groutable Vinyl Floor Tile?
Vinyl flooring ranges from planks to sheet products, and today we’re talking about peel-and-stick tiles. Once the tiles are installed, a special grout is applied that is formulated for vinyl tile. I’ll share retail options at the end of the post, but just know that groutable, peel-and-stick vinyl tile is roughly half the cost of luxury vinyl tile (LVT) or luxury vinyl plank (LVP).
If you’re here researching LVP or vinyl plank flooring, check out this post: 15 Tips for Installing Vinyl Plank Floors. I share allll the lessons learned to save you a bit of headache.
The Best Flooring for Every Room in Your House
Vinyl floor tile is nothing new in the flooring world, but the added dimension of grout between tiles is a game-changer. With grout, the flooring suddenly looks comparable to porcelain tile, unless you examine it closely. Even then, I’m not convinced that the average person can identify that it’s not conventional tile. Plus, vinyl is generally more durable than porcelain and certainly easier to replace if you damage it.
Because there are some health concerns about the safety of installing vinyl flooring, I encourage you to research products first. We installed these tiles in a small area of our home, with plenty of airflow, so I’m not too concerned about off-gassing VOCs. Many products also advertise whether they are phthalate-free and formaldehyde-free. You can read more about the health and environmental impacts of vinyl in this article.
Supplies You Will Need for This Project
Basics:
Tile product +10% extra (we used this hexagon tile)
Appropriate subfloor – lauan is recommended
Vapor barrier (optional)
Schluter tile edge trim (if using)
Gorilla Glue
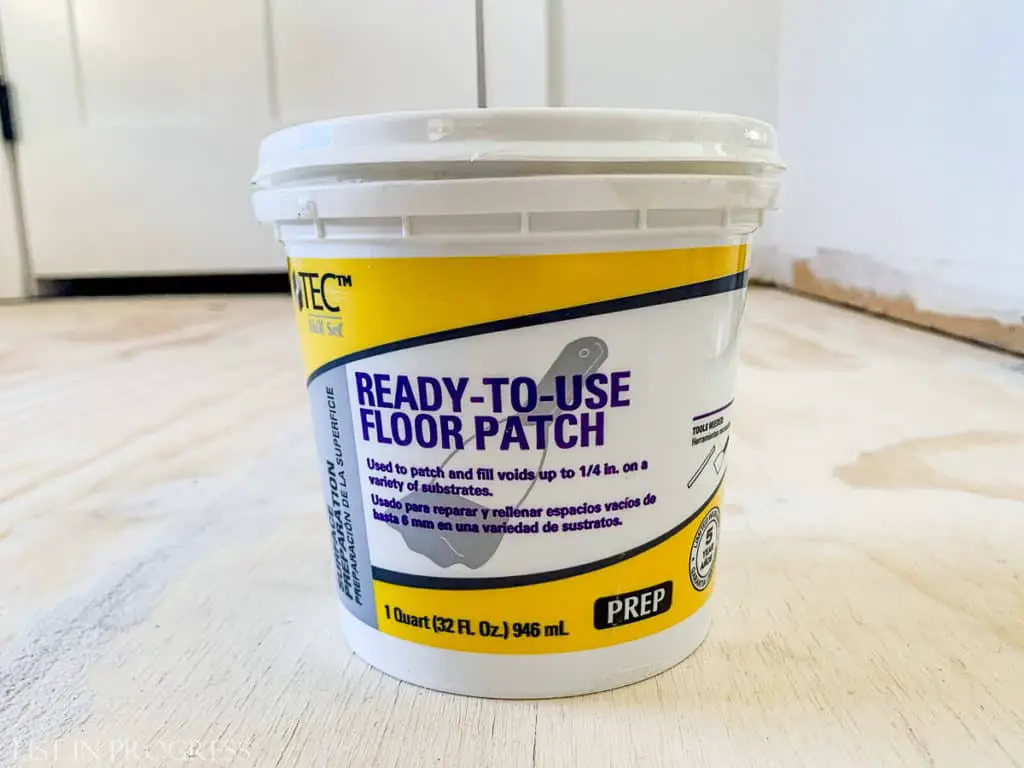
Floor patch
Putty knife
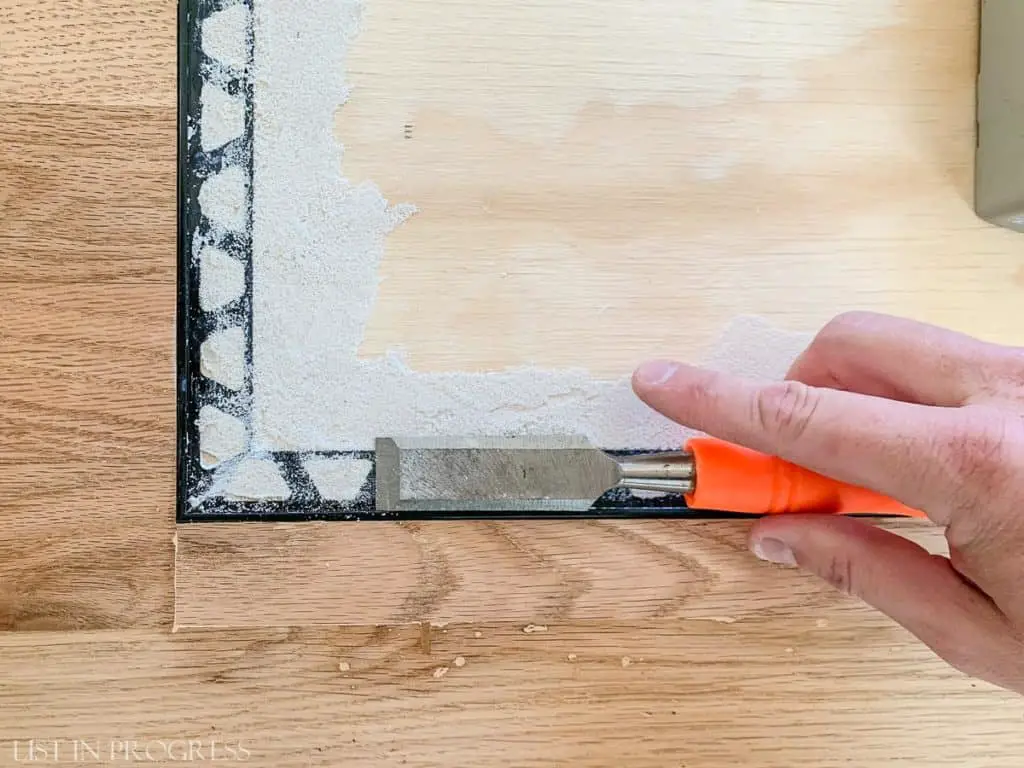
Chisel
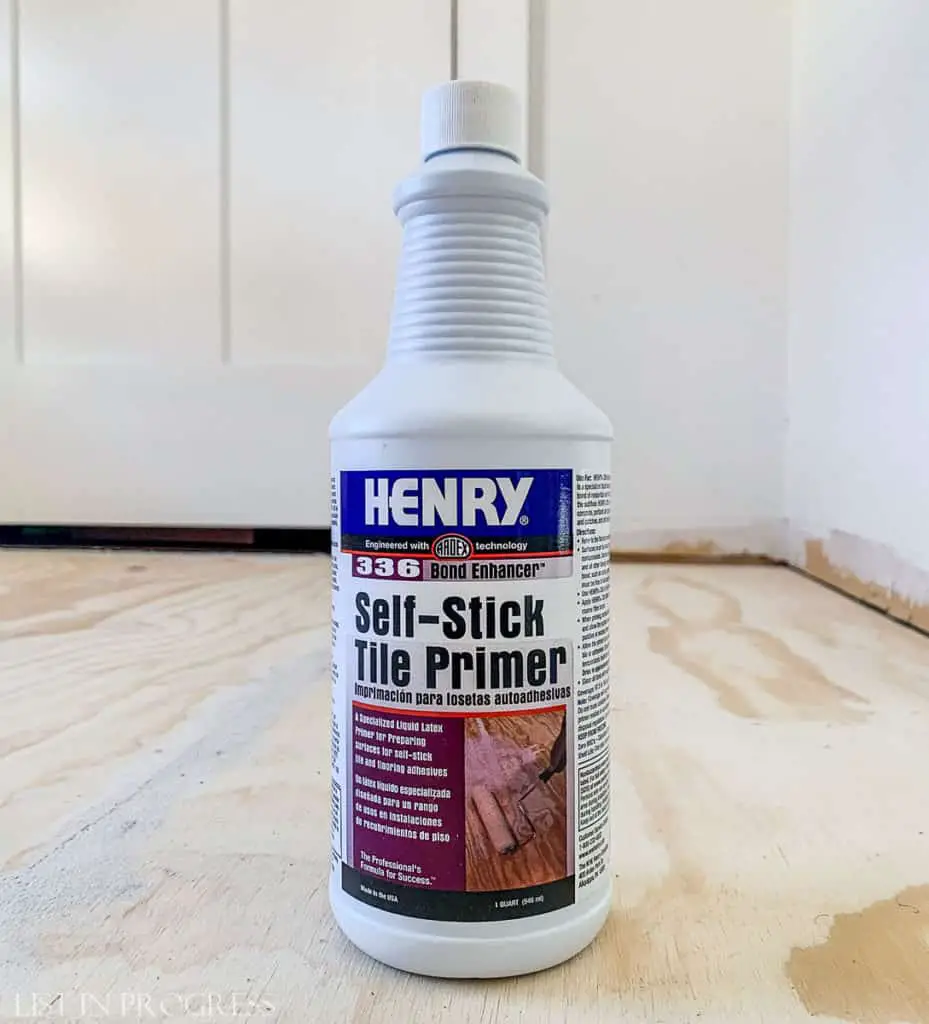
Primer
Paint roller + tray
Spacers
Utility knife
Grout
Float
Sponges + water
Highly Recommended:
Vinyl tile cutter
Adhesive
Trowel
For Those Who Like Visuals… Here’s Everything but Tile + Grout:
Read More About Our DIY Home Updates
Favorite Behr White Paint Colors
Closet Door Ideas to Update Any Room
15 Tips for Installing Vinyl Plank Floors
Trends in Cabinet Hardware
Prep Steps Before Installing Vinyl Floor Tile
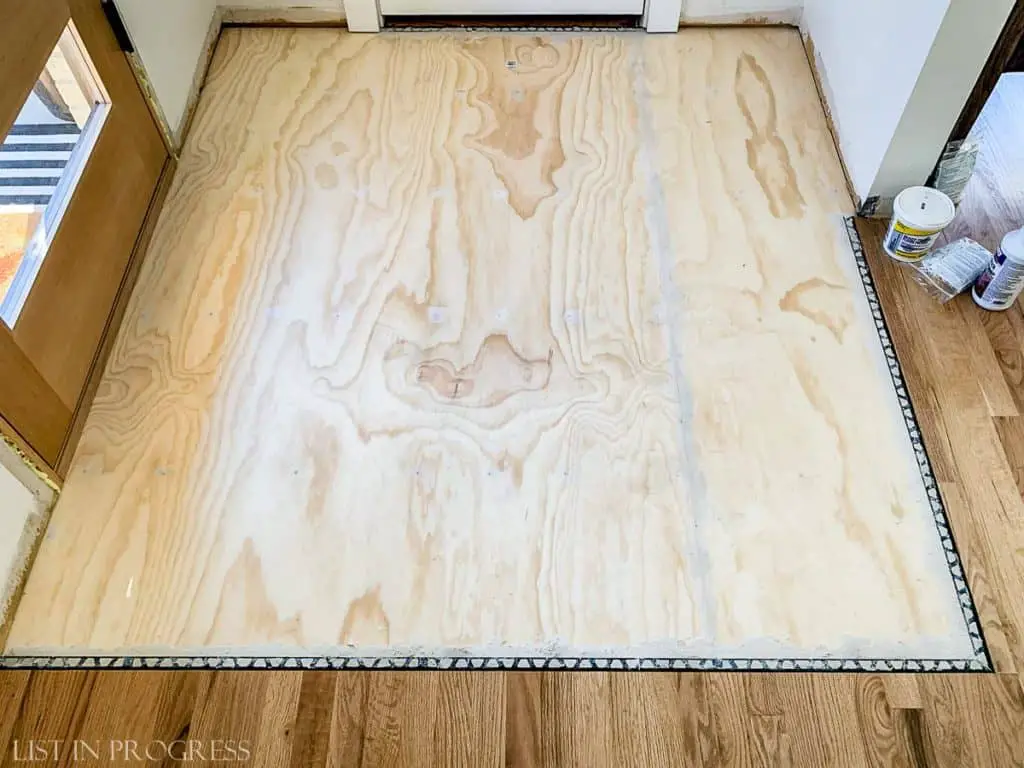
First, you’ll need to prepare your subfloor for vinyl tile installation. For this hexagon tile, the manufacturer recommends attaching the tile to lauan, which is basically a very thin, smooth plywood. Due to the depth of our existing subfloor, Wyatt subbed a 5/8 inch A/C plywood (similar) to bring the subfloor up to the right depth for the tile to be flush with our hardwood floors. (A/C plywood is a product with a nice smooth “A” side and rougher grade on reverse.)

You’ll also notice that I labeled the black layer of felt paper under the new plywood. This might not be strictly necessary, but because there is rosin paper under our hardwood floors, Wyatt decided to add a vapor barrier beneath this new section of floor. You could use either material for this purpose, rosin paper or roofing felt paper.
Next, he installed this Schluter edge trim. I chose a black metal transition to match the Schluter strip between our hardwoods and porcelain kitchen floor tile. This 1/8″ depth works with the vinyl floor tile. Wyatt just glued it down with a general super strength glue like this.
Wyatt then applied this floor patch/filler with a putty knife to all seams, screws, and uneven spots. Because vinyl is so soft, it will show imperfections from below, so the filler helps to create a smooth base.
He also used filler to grade the transition from metal trim to the subfloor. This step was his idea to create a smoother base and to prevent a seam from showing through the vinyl tile. (FYI, it worked, so we recommend it.) Once the filler dried, he gently scraped off the excess with a chisel to smooth it out.
Last, he painted on this primer, as recommended by the tile manufacturer. Honestly, we’re not sure that it had much effect, which I’ll explain in a moment. He used a small roller but the application doesn’t really matter.
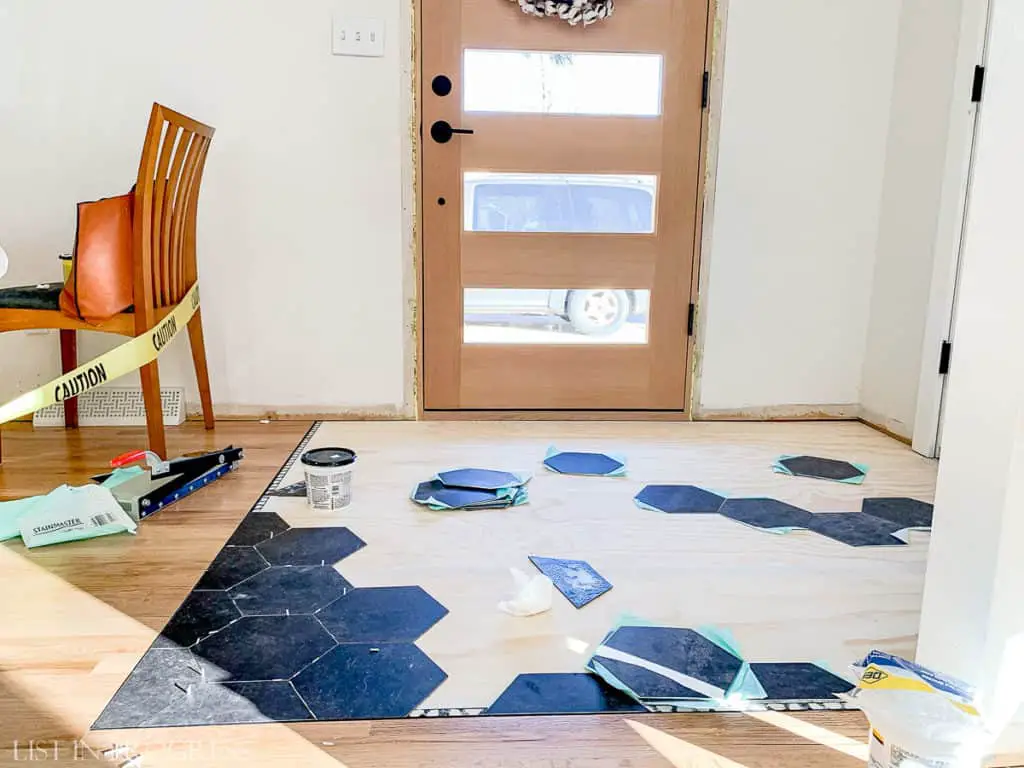
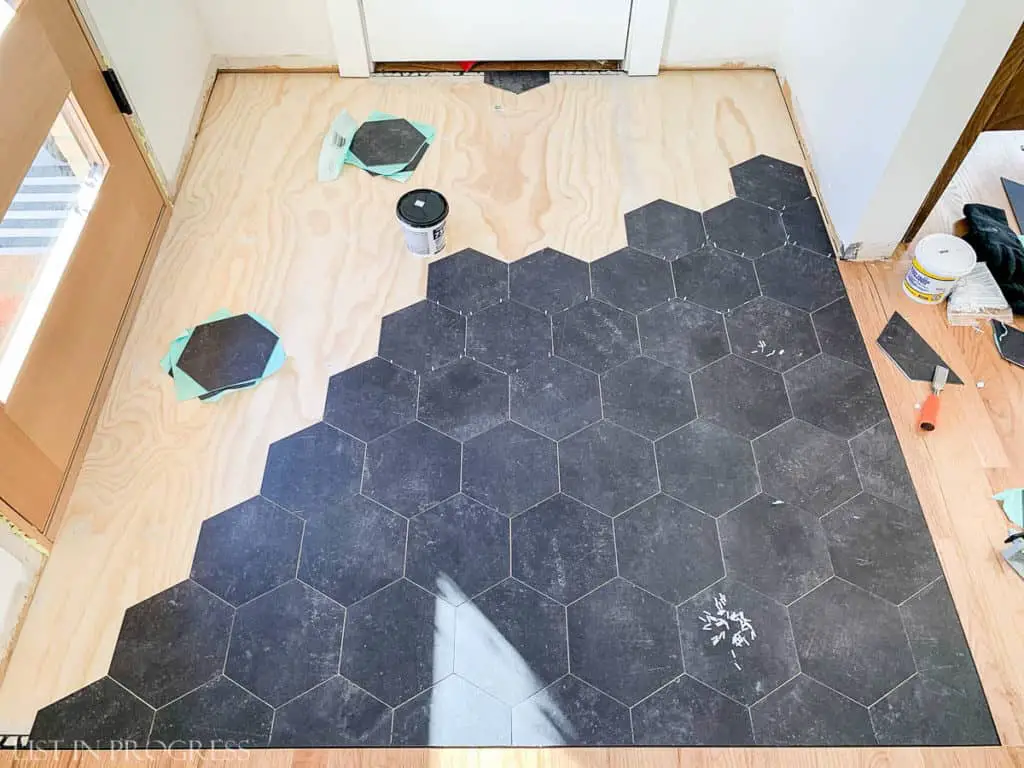
Mock up a Design Before Installing Tiles
Before installing the tile, we did a little math and mocked up this layout. We wanted to avoid having a row of skinny pieces of tile on one side of the floor. Don’t forget to account for grout lines; we used these spacers for 1/8″ lines. It’s worth planning your layout first, to make sure you like the overall design.
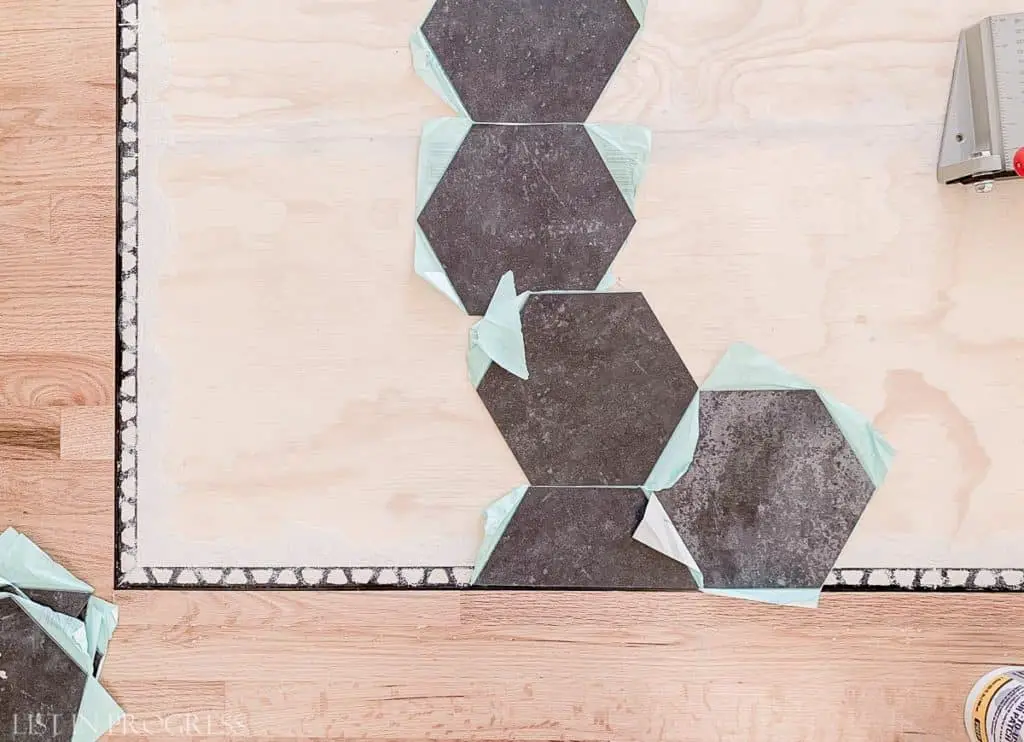
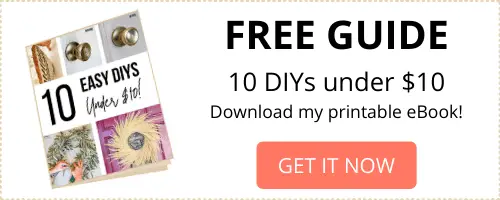
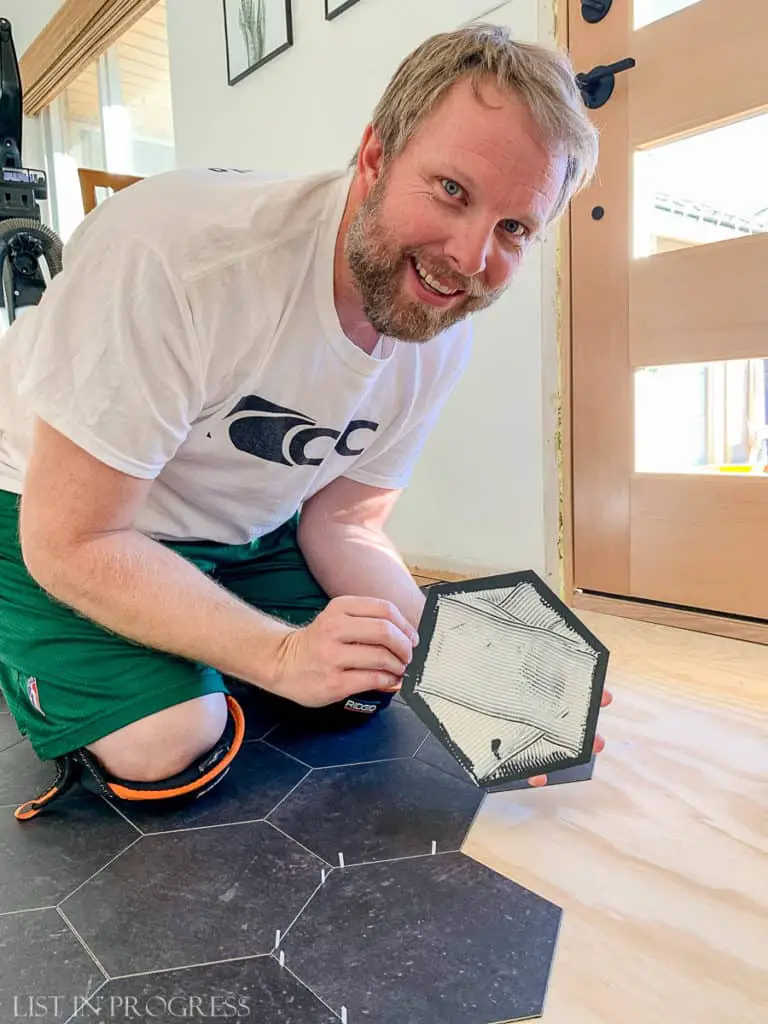
This is also why you should buy at least 10% extra tile, to account for partial tiles and mistakes. We actually bought at least twice the amount we installed, because we picked out the most uniform-looking tiles. Want to guess which one is the reject, above? Since you can purchase these hexagon tiles per piece, it’s easy to be selective. You can usually return unused product, as we did.
Read More About Our DIY Home Updates
Favorite Behr White Paint Colors
Closet Door Ideas to Update Any Room
The Best Flooring for Every Room in Your Home
Trends in Cabinet Hardware
How to Install Peel-and-Stick Vinyl Floor Tile
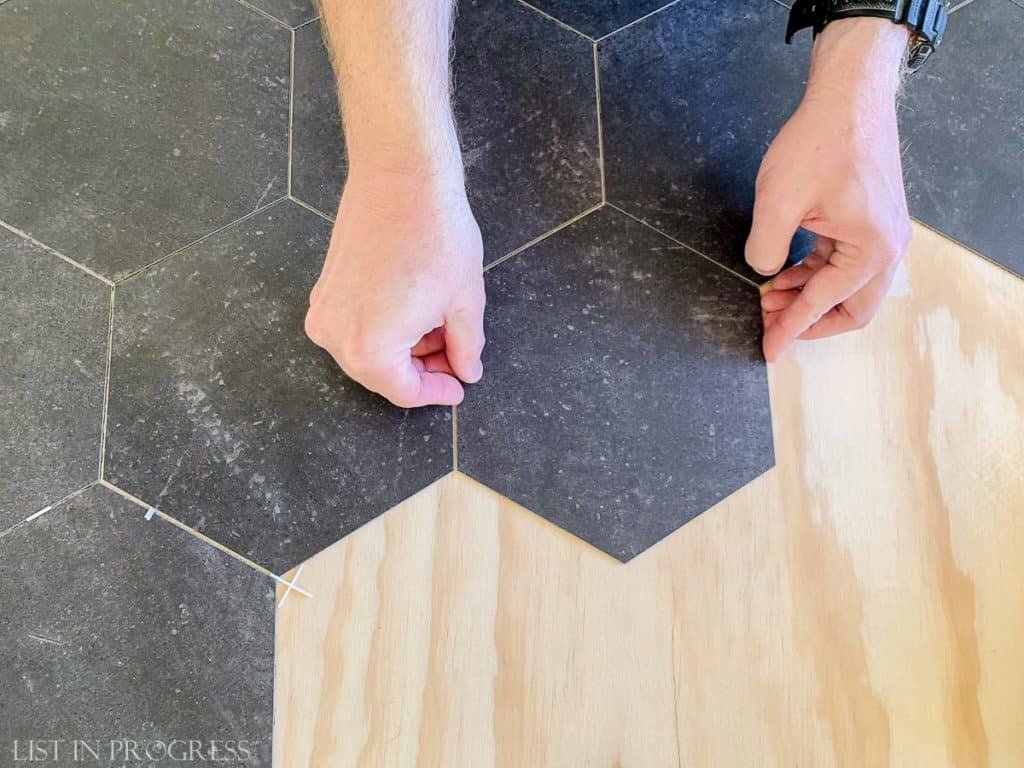
Ideally, you should be able to just peel off the paper backing and stick the tiles to the primed subfloor. That’s how we installed groutable vinyl floor tile in both bathrooms at our first house. Easy peasy! So, we started out installing this tile as usual.
Our First House – Tour the Red Brick Ranch
As long as you can peel and stick your tiles, the last step is to rent a 100 lb vinyl floor roller. FYI, the last step is also the biggest hassle, but it’s still important. You can rent a 100 lb floor roller from a tool rental service (ex: Home Depot or independent tool rental) to go over the floor. This helps the tile fully adhere to the subfloor.
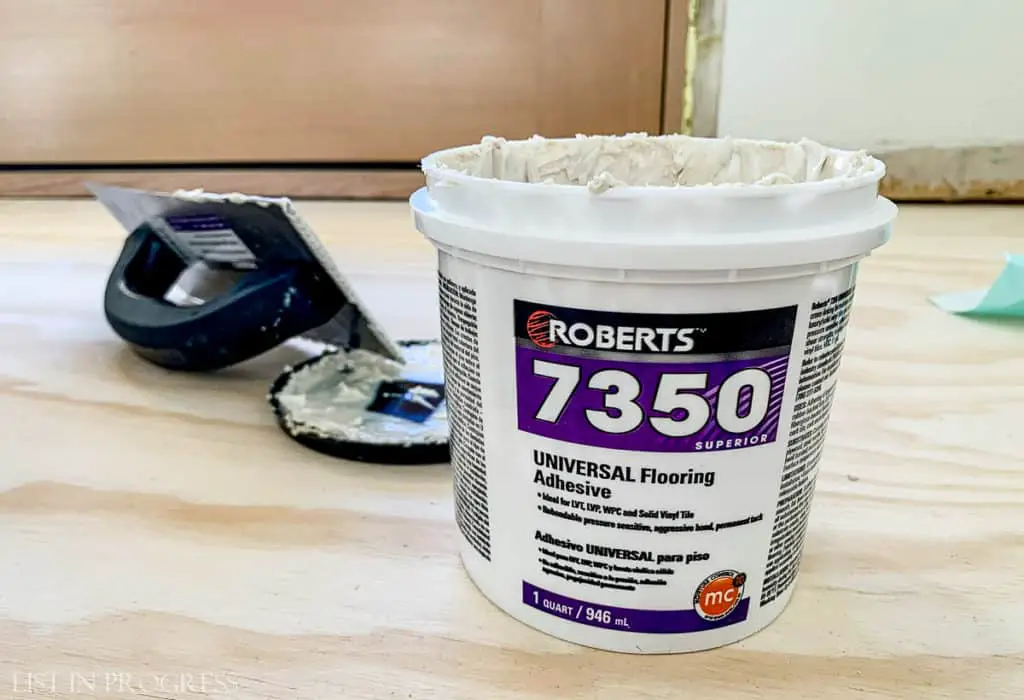
However, we found that these particular hexagon tiles did not stay stuck to the primed plywood, as they should. After reading reviews, it sounds like a common problem with this particular product. To solve the issue, Wyatt applied a thin layer of adhesive with a trowel, to directly glue the tiles to the subfloor. We waited 24 hours for the glue to dry, and we did not rent the 100 lb roller, because the tiles had been glued down.
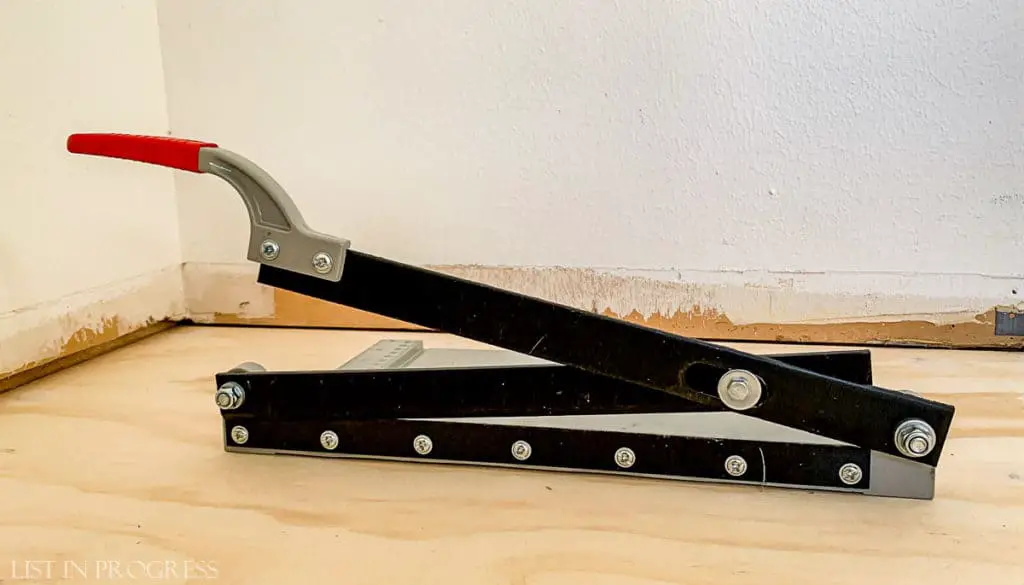
Hot tip: invest in a vinyl tile cutter – it’s worth it for smooth, straight cuts. You can use a utility knife to cut these tiles, but you’ll get a raised edge where you make the cut. When you cut the tiles with a tile cutter, the edge stays flat. It wouldn’t matter for tiles that will be covered by base trim around the edges of a room, but you’ll feel the raised edges anywhere else in the space. Wyatt bought this one because it was the only option at the store, but there are more choices online.
Read More About Our DIY Home Updates
Favorite Behr White Paint Colors
Closet Door Ideas to Update Any Room
The Best Flooring for Every Room in Your Home
Trends in Cabinet Hardware
How to Grout Vinyl Floor Tile
After letting the glue dry for 24 hours, it’s time to apply the grout. You’ll need to buy a grout that is specifically made to work with your tile product. I chose this sanded acrylic product in Saddle Gray, but I wish a darker color had been available (it’s not).
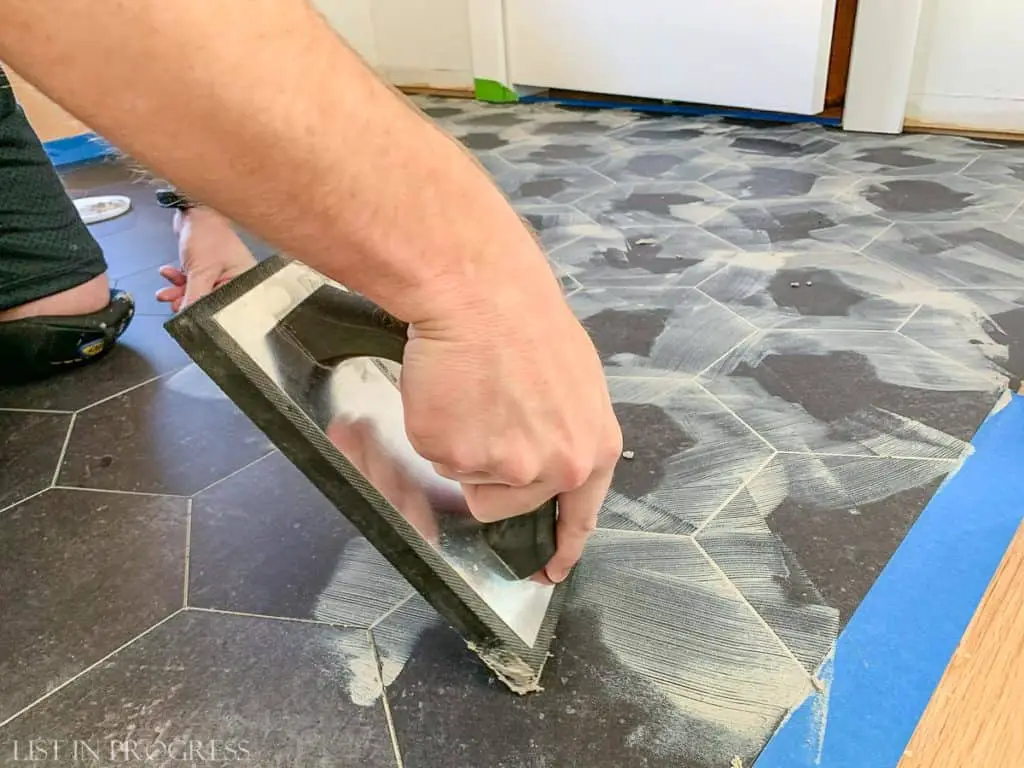
Wyatt applied the grout with a float (here’s a how-to video). He worked in sections and quickly wiped it off the tile with a damp sponge. We’ve learned to work as quickly as possible with grout, although this product seems a bit more forgiving than regular cement grout.

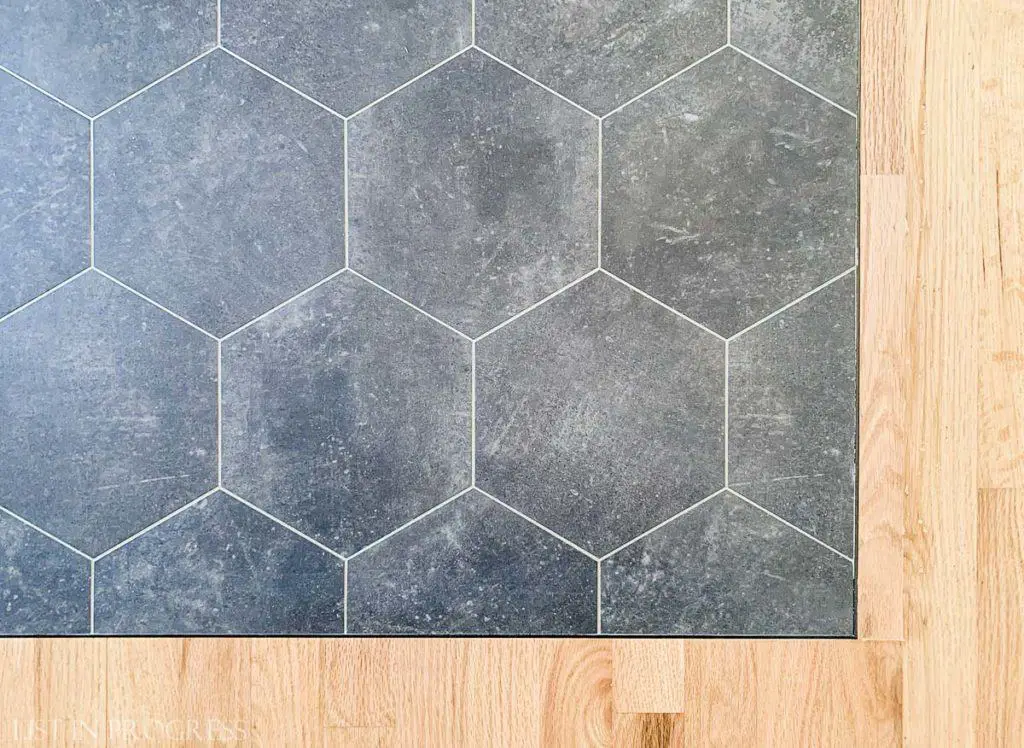
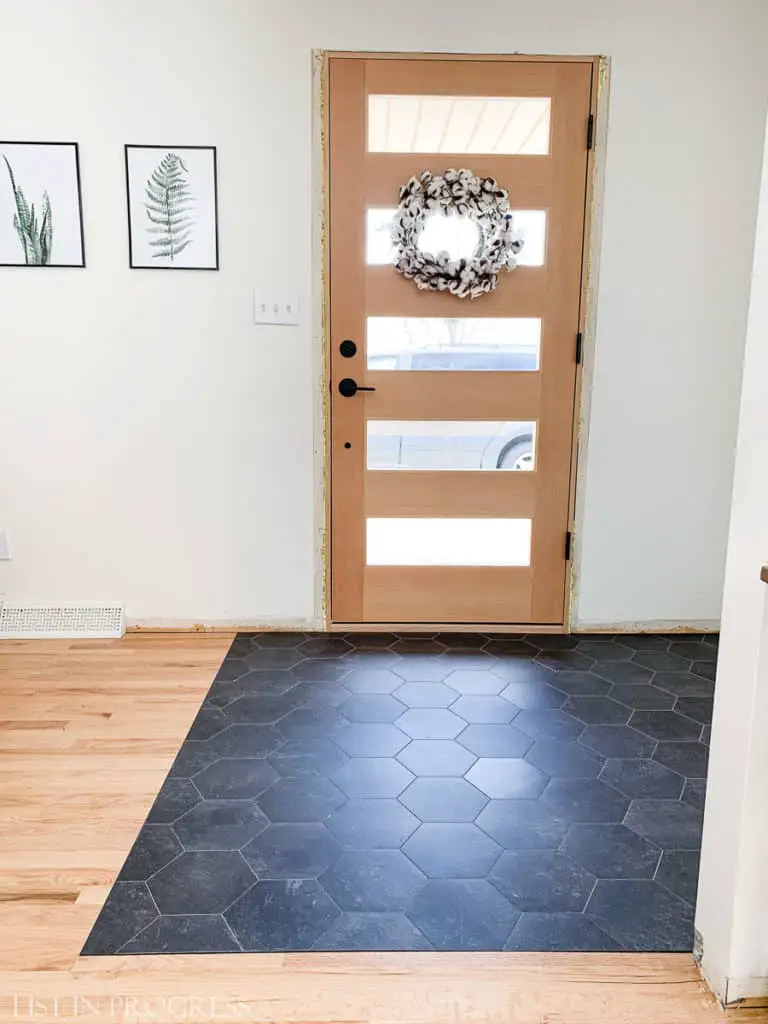
Stay off the floor for a good 24 hours and keep it dry for a few days. A full week is best, if possible. The longer you can leave the floor to cure undisturbed, the stronger and more stain-resistant your grout will become. Here’s the finished floor. Doesn’t it look great? I love it!
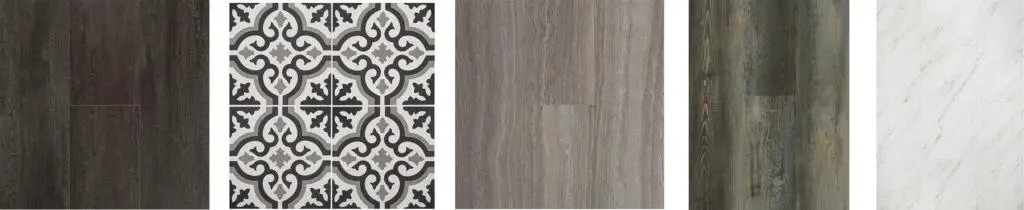
Where to Buy Groutable Vinyl Floor Tile
Here’s the fun part. Groutable vinyl floor tile must be growing in popularity because there are more choices now than just a few years ago. The most affordable options are from Home Depot and Lowe’s, where peel-and-stick tiles are priced at roughly $1 per tile. You can buy them by the case or individually.
We have installed the three different tile products listed below and have been happy with the look of each floor. (You should know that I receive no compensation for any links to Lowe’s; this is what we purchased, along with my honest opinions – as always!)
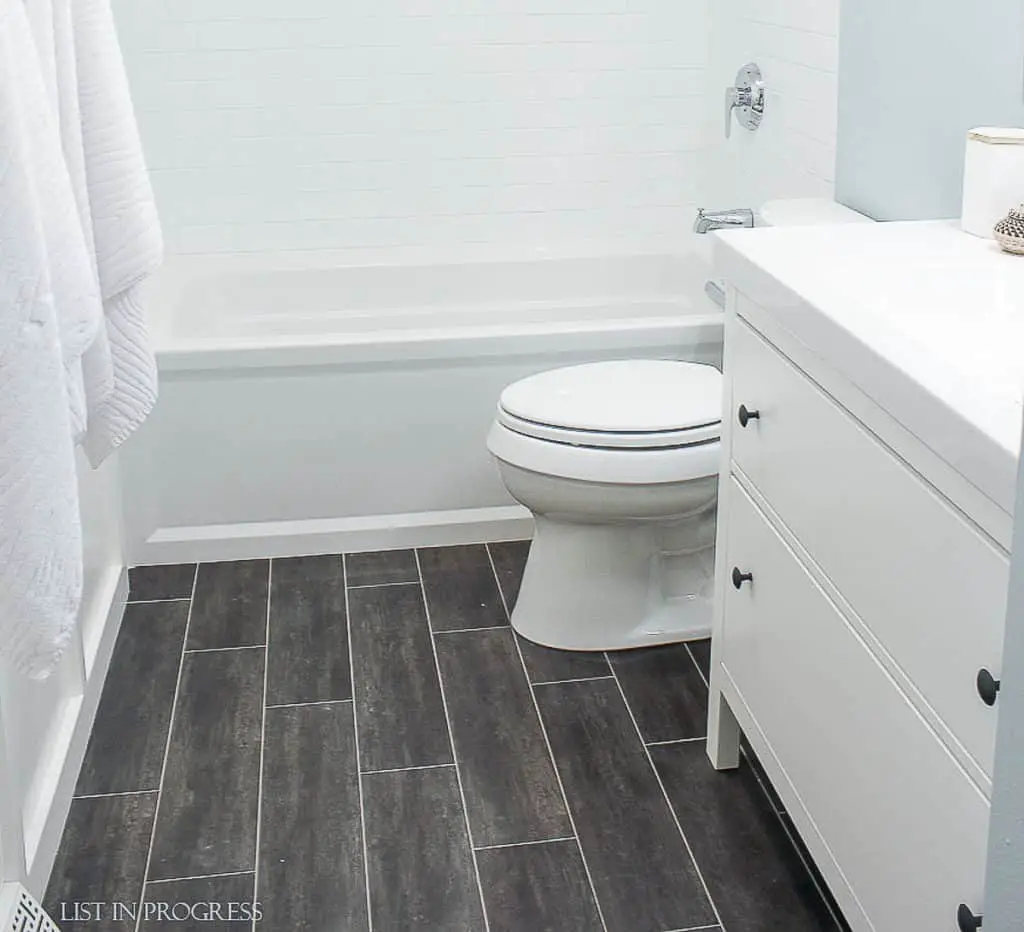
Bathroom 1 – Casa Italia color 6″ x 24″ planks with Saddle Gray grout
Bathroom 2 – Chateau color 6″ x 24″ planks with Saddle Gray grout
Entry – Obsidian hexagon tile with Saddle Gray grout
Here are the Casa Italia planks in one of our previous bathrooms:
My Favorite Vinyl Tile Options From Lowe’s:
More Groutable Vinyl Tiles From Home Depot + Wayfair:
Read More About Our DIY Home Updates
Favorite Behr White Paint Colors
Closet Door Ideas to Update Any Room
The Best Flooring for Every Room in Your Home
Trends in Cabinet Hardware
Do You Feel Inspired?
Would you try installing a groutable vinyl floor tile after reading this? Please let me know if you have any questions or comments to add. We are not flooring pros, but we have a few seasons under our belts at this point. I love how this tiled floor turned out, and once we finish the front door trim, this updated entryway will be complete!
2023 Update
Check out our fully remodeled house right here:
Tour Our Remodeled Denver House

If you’re debating other flooring options, check out this post. I wrote that comprehensive article last spring on flooring for your entire house. From ceramic to slate, it’s all here:
The Best Flooring for Every Room in Your House

More DIY Remodeling Inspiration from List in Progress
1 – How to Create Craftsman-Style Door Trim
2 – Best Exterior Behr White Paint Colors
3 – The Best Flooring for Every Room in Your House
4 – 2021 Cabinet Hardware Trends


Your guide makes installing groutable vinyl floor tile simple and approachable. The step-by-step instructions and helpful tips ensure a professional-looking finish. Well done!
Hi Erin, this is a really easy-to-follow guide on installing groutable vinyl tiles. I agree; they are attractive, cost-effective, and durable. As a local tile installer, I’ve done a few of these, and the results are impressive. Good article, will share this with some of my clients and friends who might be interested in doing the same in the near future.
-Reed
Thanks Reed!