

These tips for installing vinyl plank flooring are about to break your brain. If you’ve done any other research, and I assume you have, because my blog post has not yet skyrocketed to the #1 Google search result, you’ll find new info here. I’m going to lay it all out. (That’s a flooring pun. We’re gonna need some humor to get through this one, friends.)
Know This Before Installing Vinyl Plank Flooring
It’s easy, they said. It’ll be fun. Ok, maybe no one said it would be fun, but I had mentally categorized vinyl plank flooring installation as a beginner-friendly DIY project akin to painting.
The short of it is this: the internet lies. This is not an easy project. Vinyl plank installation is finicky and you’ll need plenty of patience to get it right. There is a learning curve, but with time and effort, it’s certainly doable.
I’m not going to explain how to install the floor because the internet is already clogged with those how-tos. Here’s a good overview video that covers the basics. Plus, you’ll need to follow instructions specific to your vinyl plank flooring.
This post is about my tips for installing vinyl plank flooring – all the tricks you need to know for success.
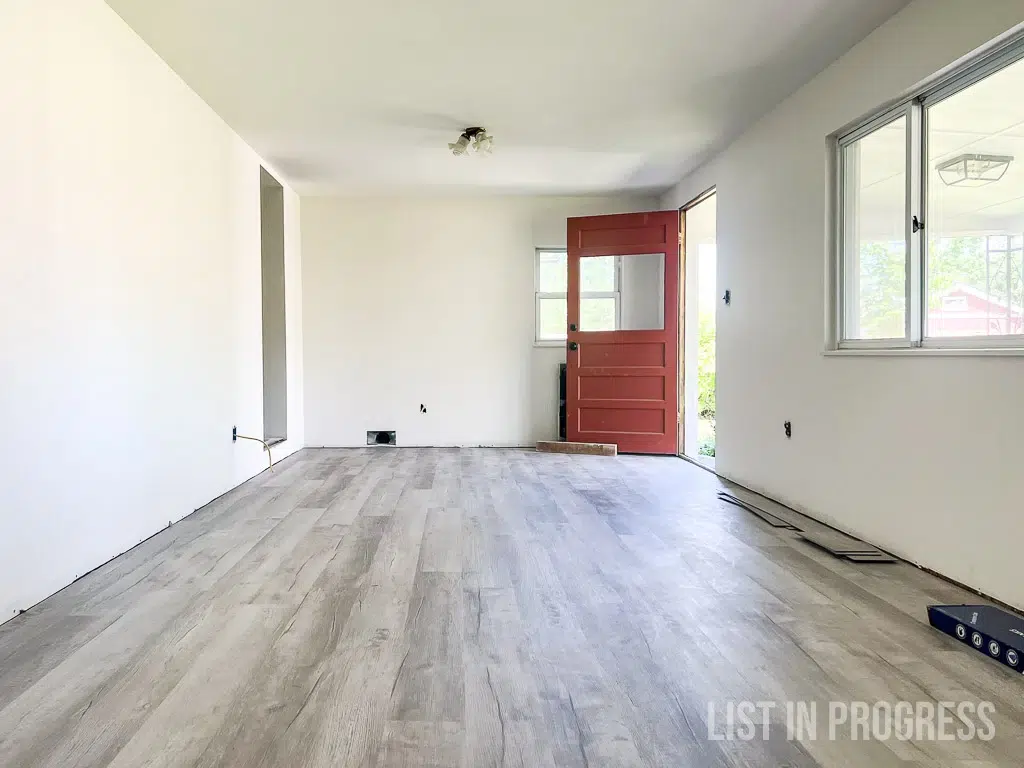
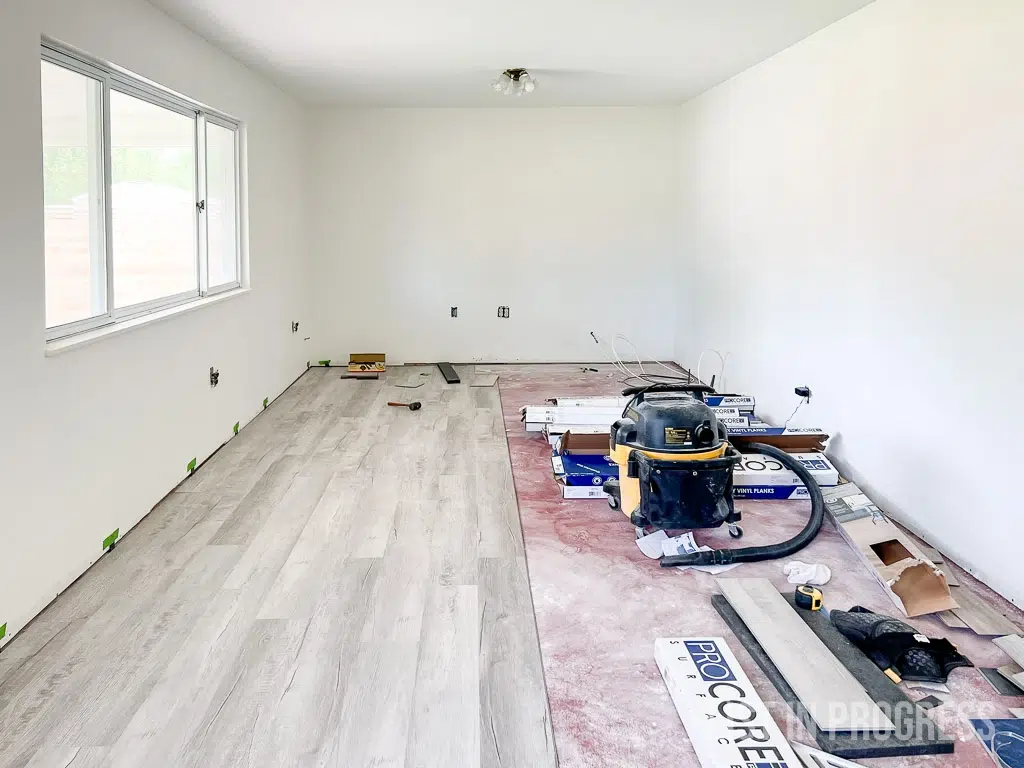
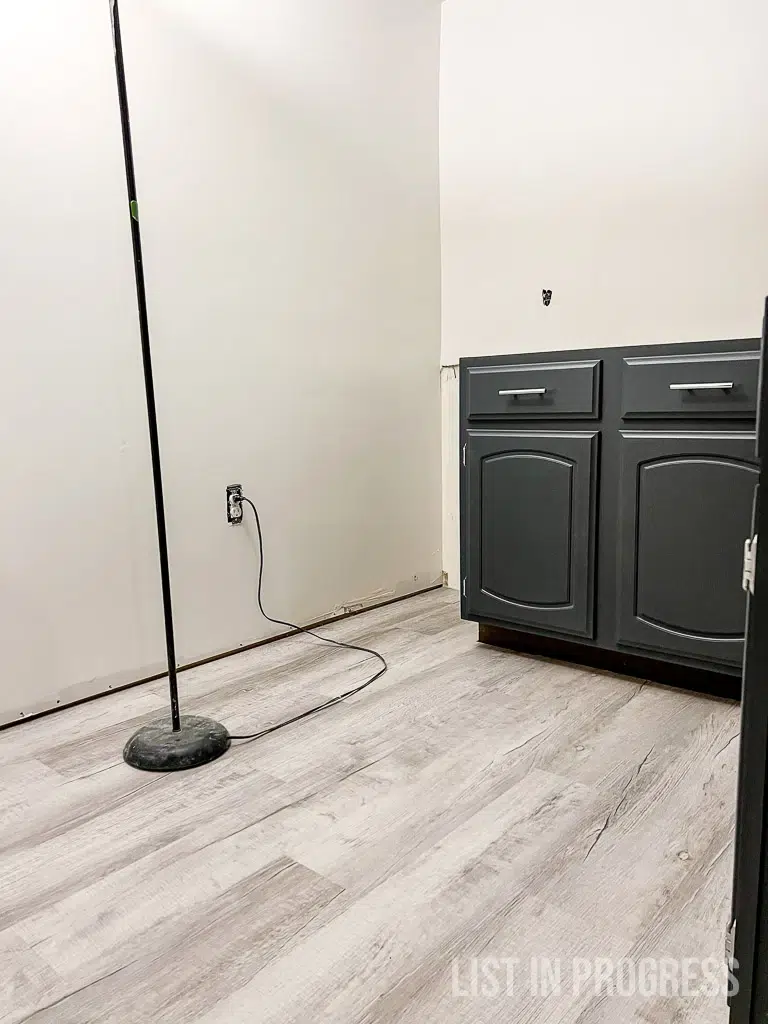
Here’s the finished product of the first floor I installed, before the final touches in the room.
Project at a Glance
Here’s the big picture and steps you’ll take. This overview will help you understand my tips that follow.
- Choose the *right* product
- Remove baseboards
- Remove old flooring
- Prep subfloor and walls – allocate plenty of time for this
- Prep and plan vinyl plank flooring layout – yay, math!
- Lay the new vinyl plank floor
- Reinstall baseboards, touch-up paint
- Enjoy a margarita (ahem, I mean, admire your new floor)
LVP vs Vinyl Plank Flooring
First, choose your flooring product. That will impact your installation steps and prep. Here’s a little background on vinyl flooring.
Luxury vinyl plank (LVP) has become a catchall term for vinyl plank flooring these days, but that’s not entirely accurate. There’s also a waterproof, rigid-core vinyl plank product, which is more durable than traditional LVP. Here’s a good breakdown of the different types of vinyl plank floors.
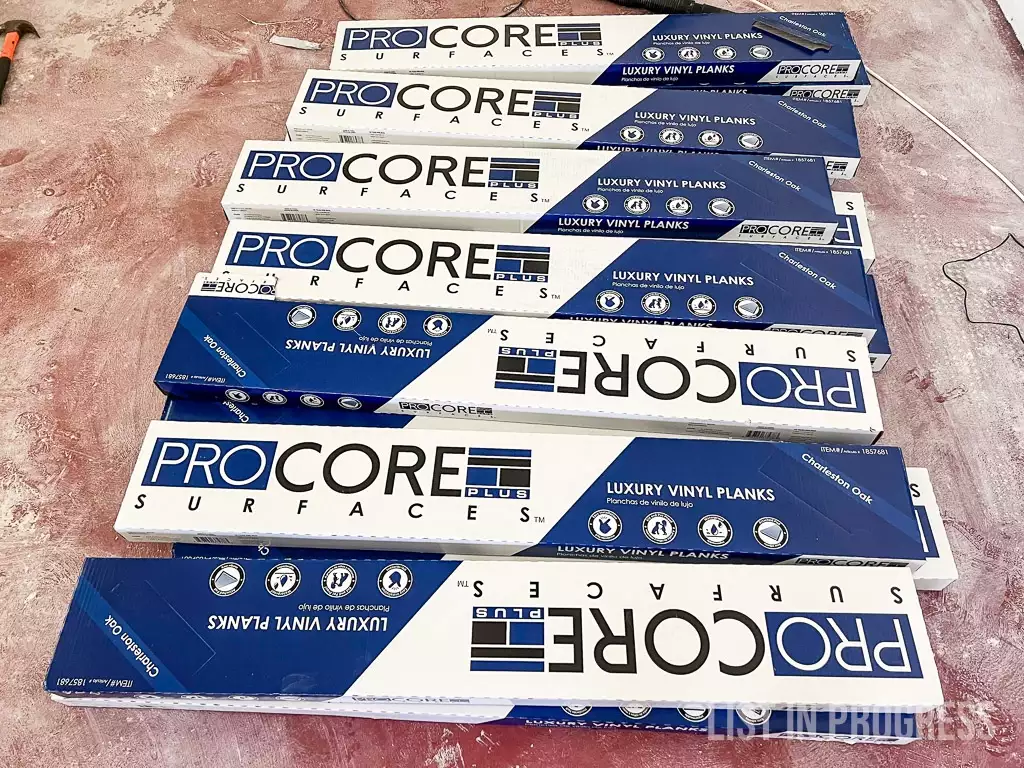
I think the current LVP/vinyl plank manufacturers are blending the two categories. I bought this product at Lowe’s because it’s click-lock and waterproof. The description calls it LVP and rigid core. So there’s that. Maybe some flooring dude will explain this in the comments below.

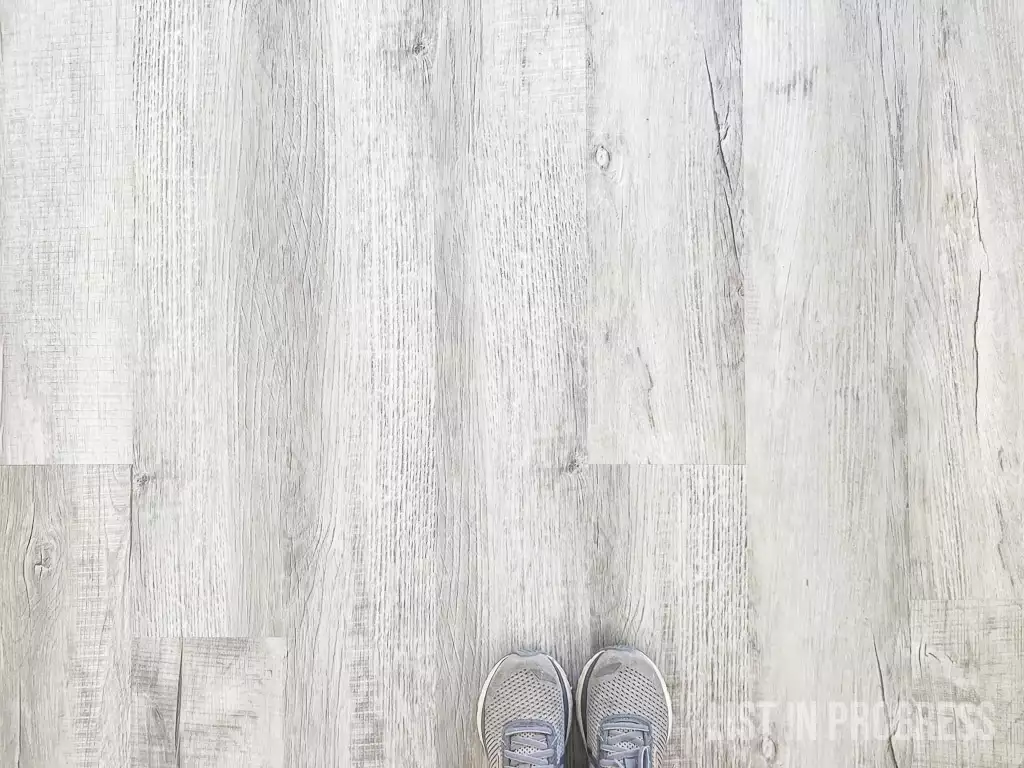
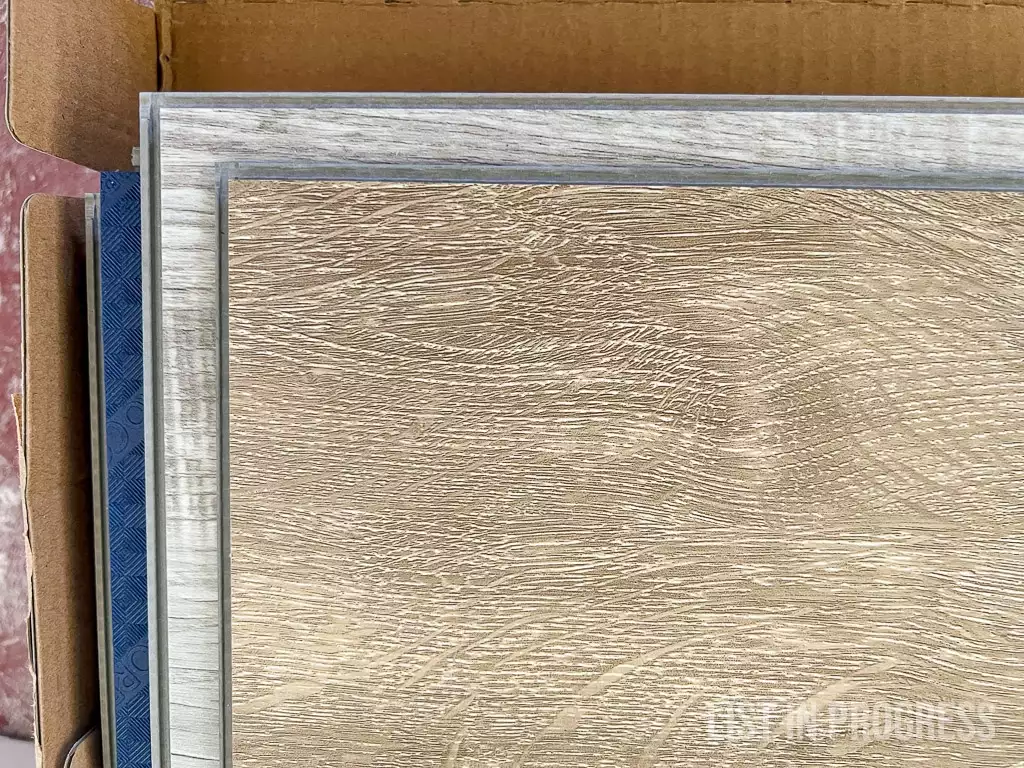
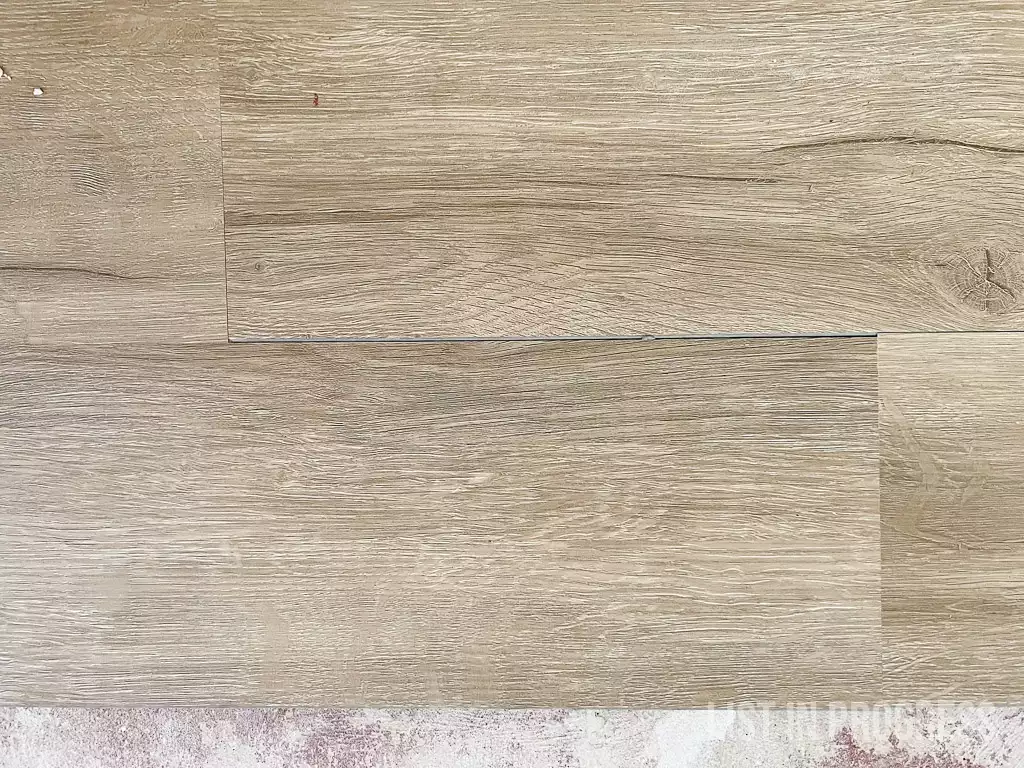
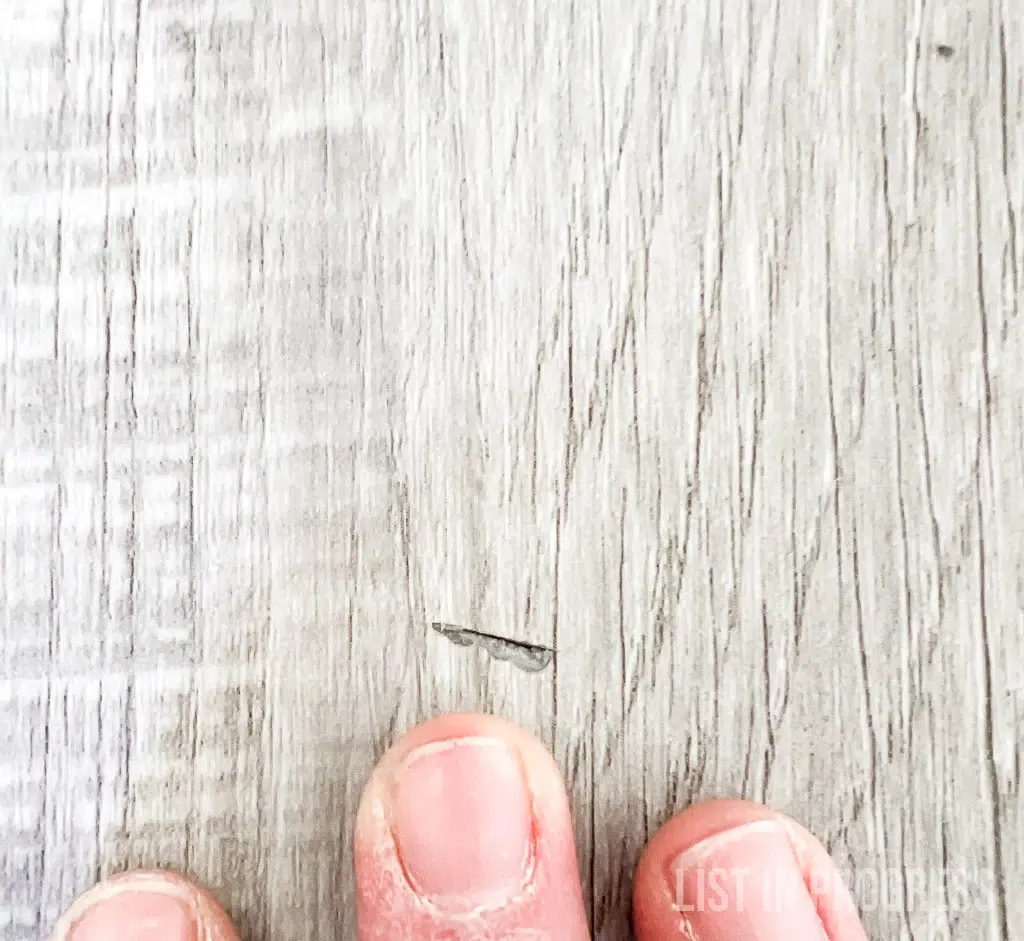
This flooring is called either Style Selections or Pro Core Surfaces in the color Charleston Oak. It’s a nice medium gray oak pattern with a somewhat subtle design variation among planks. The close-up photo above is pretty accurate for how it looks in person.
Just research the type of vinyl plank that works best for your space. You’ll need waterproof plank for kitchens, bathrooms, and basements. Some LVP involves glue-down installation – do you want to mess with that? Many products incorporate an underlayment pad on the back of the decorative plank, so you won’t need an underlayment layer over your subfloor. Just read the directions and warranty specs.
Tip #1: Buy Click-Lock Vinyl Plank Floors
Newbies, be advised. Please buy click-lock vinyl plank floors. Whichever product you’re considering, please read the reviews to ensure reviewers hear the “click” mechanism. Don’t rely on product descriptions alone.
Some flooring claims to be click-lock but might just be tongue and groove. You’ll need the planks to lock together, because the floor is essentially floating in the room and not anchored to any wall for stability.
Without the click-lock mechanism, you’ll be constantly pushing and tapping and nudging to get the floor system to cling together as you add new planks. Trust me, it’s a nightmare.
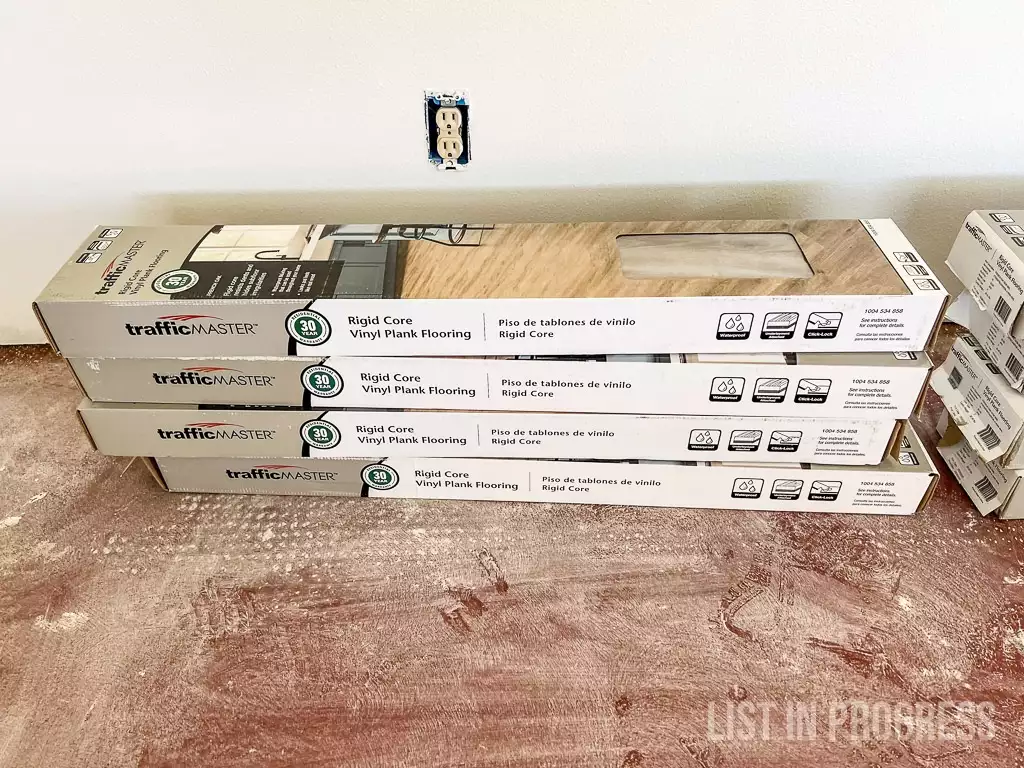
Tip #2: Don’t Buy This Garbage Flooring
That’s a nice segue to what not to buy. I started my project with this Traffic Master vinyl flooring in French Oak from Home Depot because many colors are $1.99/sq ft and it appears to get 4 stars. Sadly, I didn’t read the reviews first. I think Beth sums it up best with her comment: buy it if you want to experience intense anger.
The price got me. This floor looks great straight out of the package, but the design is not click-lock. See tip #1 above. I wasted an entire day and one box of product, trying to get the planks to stay together. At the time, I didn’t realize that it’s nearly impossible unless you’re a professional flooring installer with tricks up your sleeve.
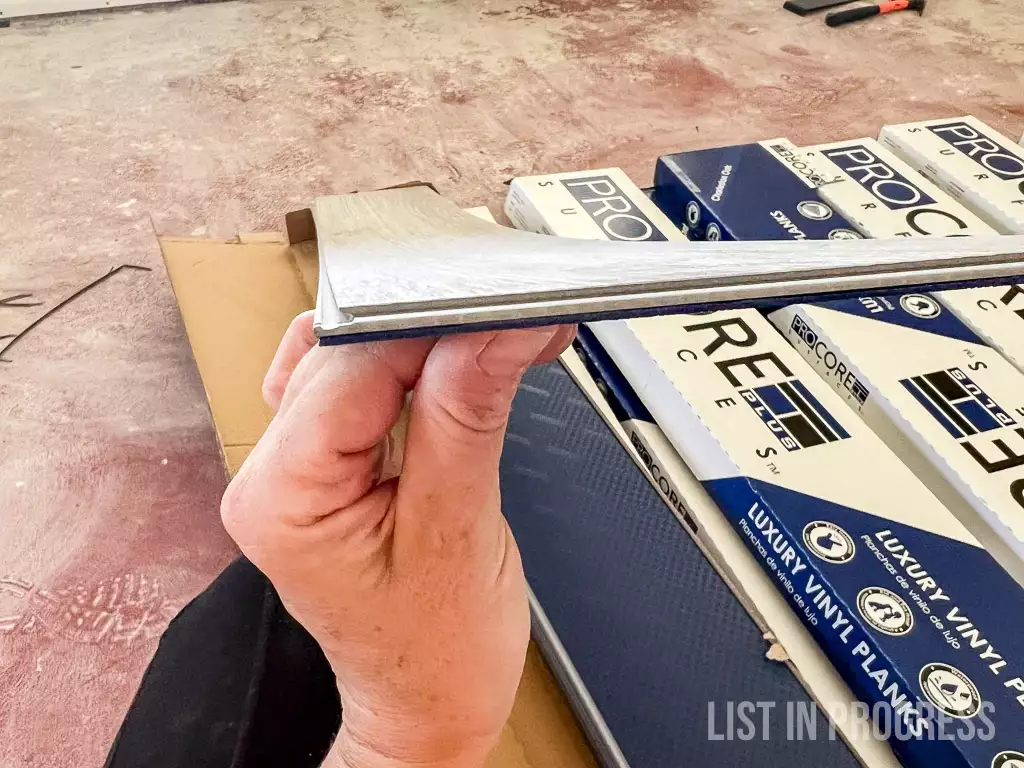
Here is a comparison of the two products with the Traffic Master plank on top of the Style Selections plank. See how the locking edges are wider on the Style Selections vinyl flooring, especially on the ends? That helps the planks stay together once they’re connected.
Tip #3: Plan to Buy Extra Boxes
Once you decide what to buy, purchase at least 10% extra (probably 15-20%) if you’re tackling this project for the very first time. You can always return unused product to the big box stores, so it’s best to have enough for your entire project in case it sells out.
I ruined many planks trying to get the perfect cut. Type A problems. I blasted right through my 10% extra and used it all, down to the last board.
You Might Also Like:
How to Install Groutable Vinyl Floor Tile
The Best Flooring for Every Room in Your House
Choosing a Kitchen Floor Tile Layout
Tip #4: Gather These Tools
4-ft level – you’ll need to ensure the subfloor is level/smooth. If the entire floor slopes, that’s fine; it just needs to be relatively flat and smooth.
Tape measure and speed square – a speed square is great for marking straight cuts across the planks.
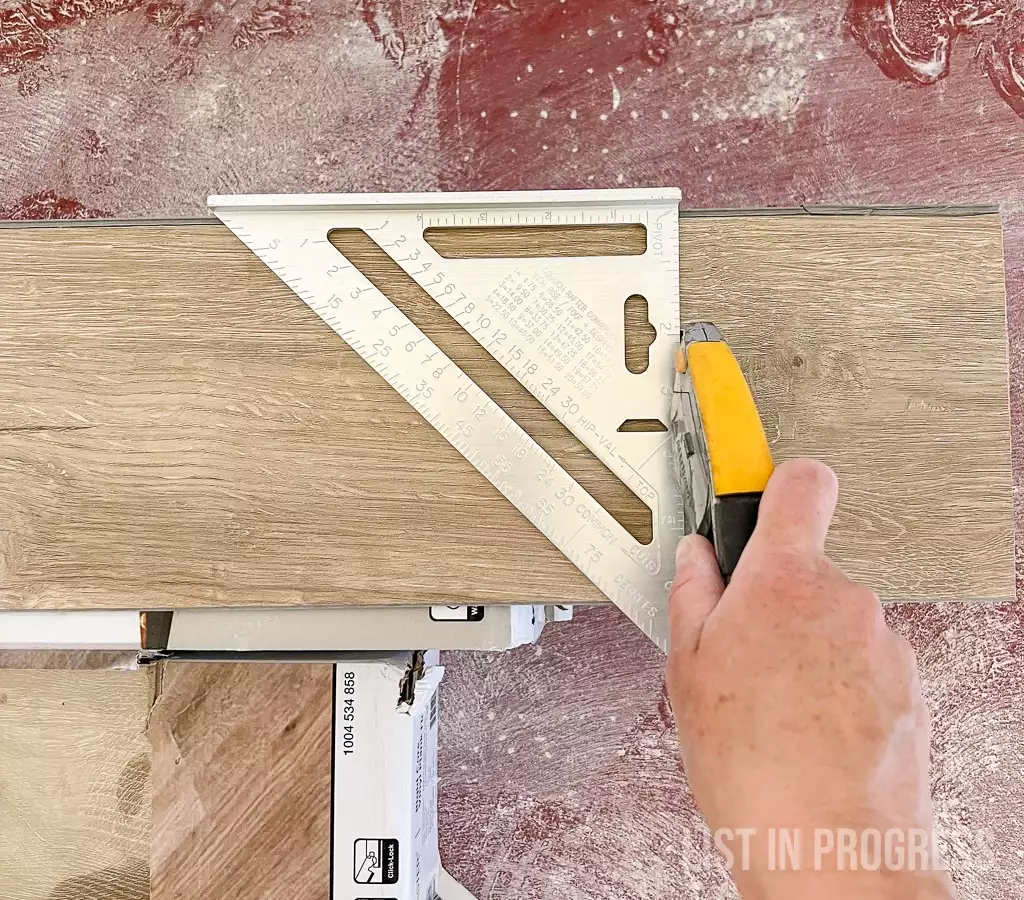
Utility knife with extra blades – The utility knife method works great for scoring and snapping planks. Make sure you have one that’s comfortable to hold (like this) because you’ll be using it for 90% of the cuts. Have plenty of fresh blades available for better precision. It’s tricky to make lengthwise cuts with a knife; a jig saw would be easier for those.

Oscillating multi-tool – Use this tool to easily cut under door casing. There’s really no other comparable tool for this job.

Vinyl floor installation kit – the only tool I really used and needed from the kit was the metal pull bar. See my next tip for more info.

Jig saw or circular saw and cutting station – For lengthwise cuts, and some cutouts, it’s easier to use a jig saw than a utility knife.
Rubber mallet – for tapping planks together.
Knee pads or a foam garden pad to save your knees. Even a scrap of foam this size would work:

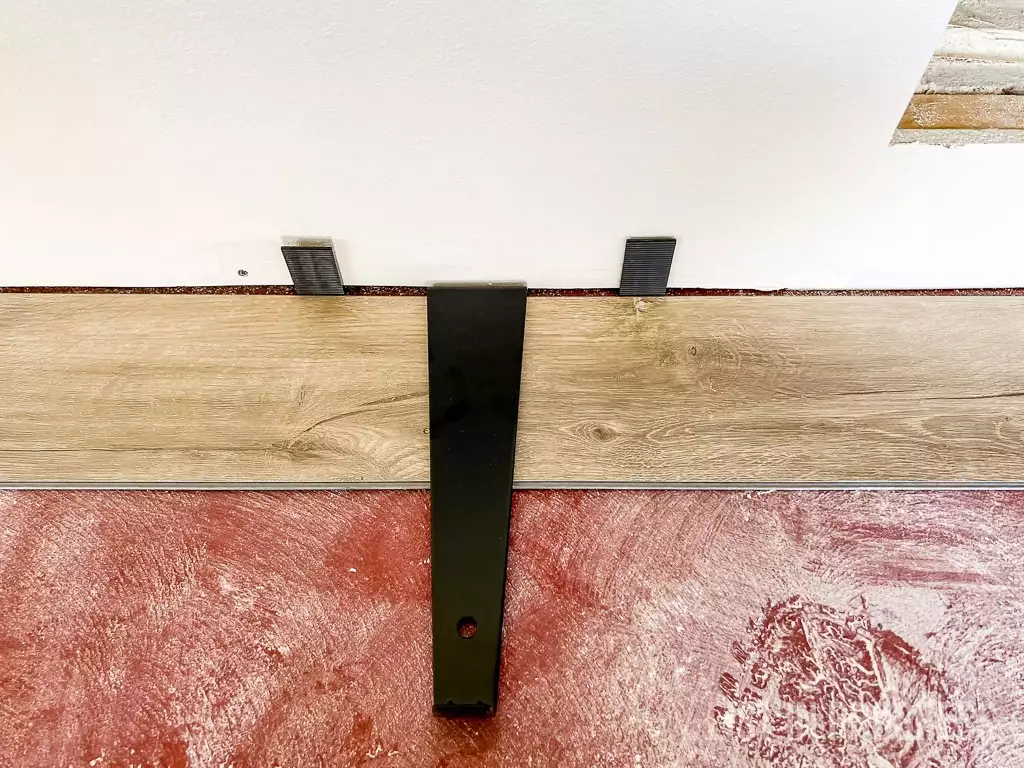
Tip #5: Why You Need an Installation Kit
Your hardware store should sell a $25 vinyl plank floor installation kit. You really only need the metal pull bar tool and a rubber mallet. You’ll use these in a few ways to slide connected planks and tap seams together. You can buy the pull bar separately if you already have a mallet.

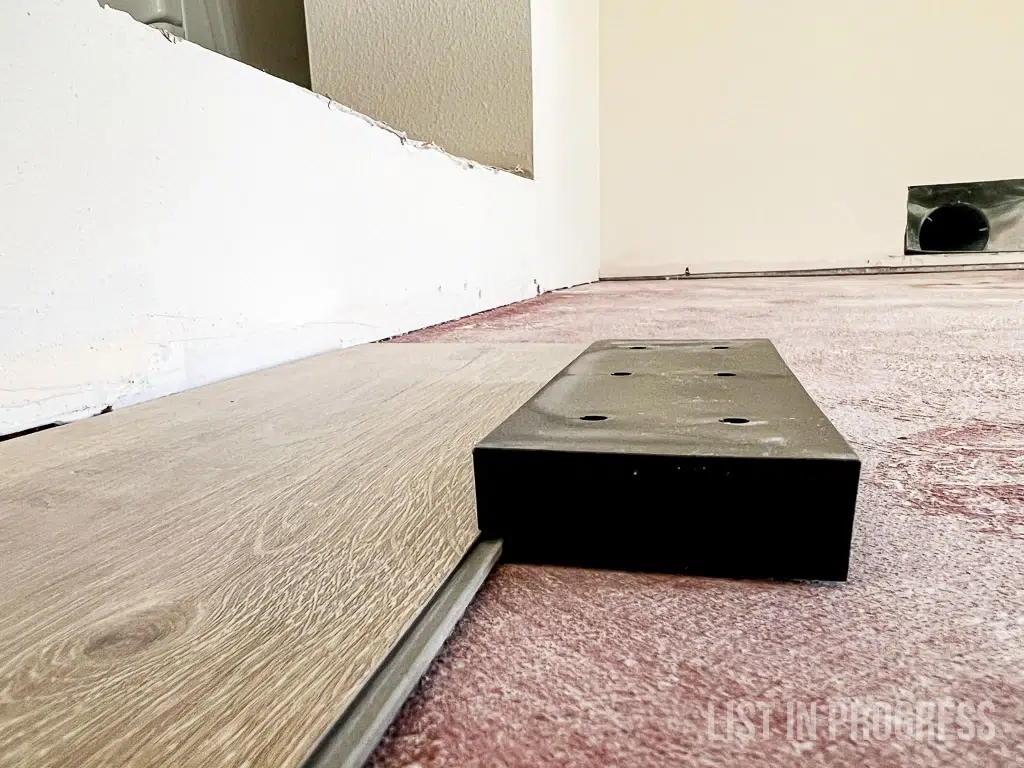
DO NOT USE the tapping block because it can destroy the plank edges. I’ve watched videos where this is used successfully, but I did not have luck with it. Using a scrap flooring piece is an easier way to avoid potential damage. Use this method to close up gaps and shift boards around to fix alignment issues.
The tapping block looks like this:
Spacers are up to you. Mine mostly became a nuisance and shifted around. You can tape them to the wall or just use cardboard to maintain the 1/4″ gap. These spacers look like a good alternative that might stay in place.

The ones I taped to the wall (photo below) kept getting pushed into the gap below the drywall.

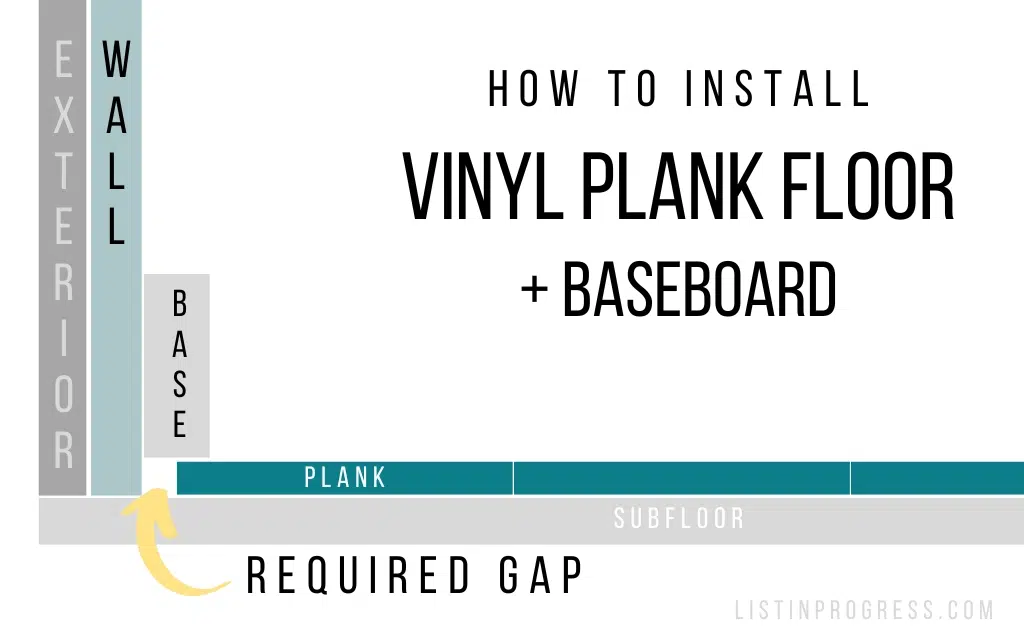
Tip #6: Remove the Baseboards
Remove all baseboards. Don’t be lazy about this step. You can save them and reinstall at the end.
Here’s the deal. The floor system will essentially float in the room. You’ll run it up to the walls and leave a 1/4″ gap around all of the edges to allow for expansion during temperature shifts in the room. Reinstall baseboard after the floor is complete, to make the room look finished.
If you can’t remove the baseboard or other room features (like a bathtub), you’ll need to caulk the exposed edges of the flooring where it meets those walls or features.
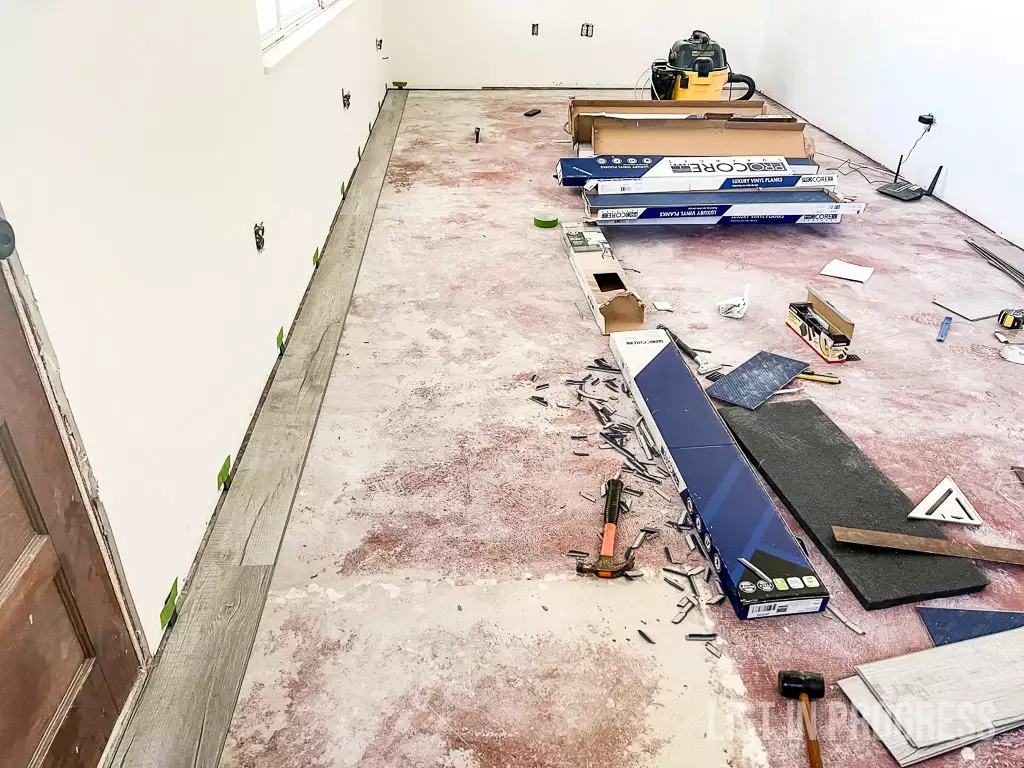
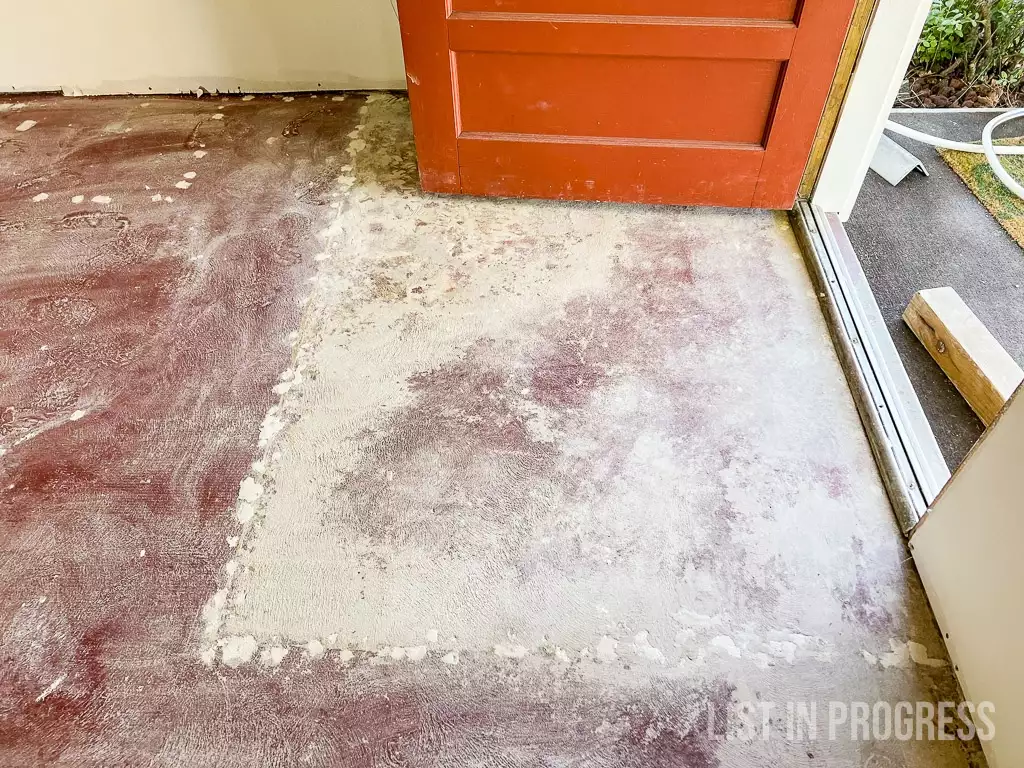
Tip #7: Prep the Subfloor
The subfloor must be relatively flat, level, and clean, which takes some attention to detail. Grab your knee pads and crawl around, running your hand over the surface to catch any small bumps (scrape them off), nail heads or screws (pound/screw flat), and divots (fill with floor patch). If you install LVP over anything bumpy or uneven, it will eventually show through the vinyl and possibly damage the plank.
Lay a level on the floor to check that any dips aren’t more than 1/8″ deep (or as specified in product directions). I use a 4-ft level for this step, not to check that the floor is truly level, but to assess that it’s consistently flat.
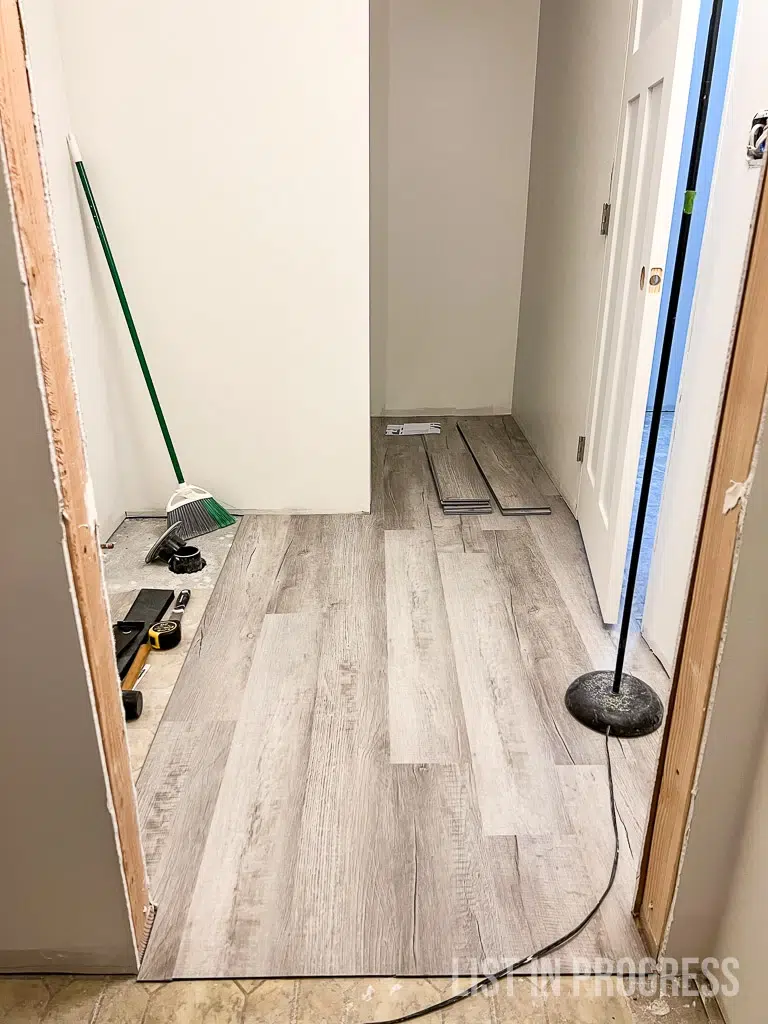
Clean the floor and vacuum up any debris and dust. That’s the next step here, but you can see how the subfloor started out:
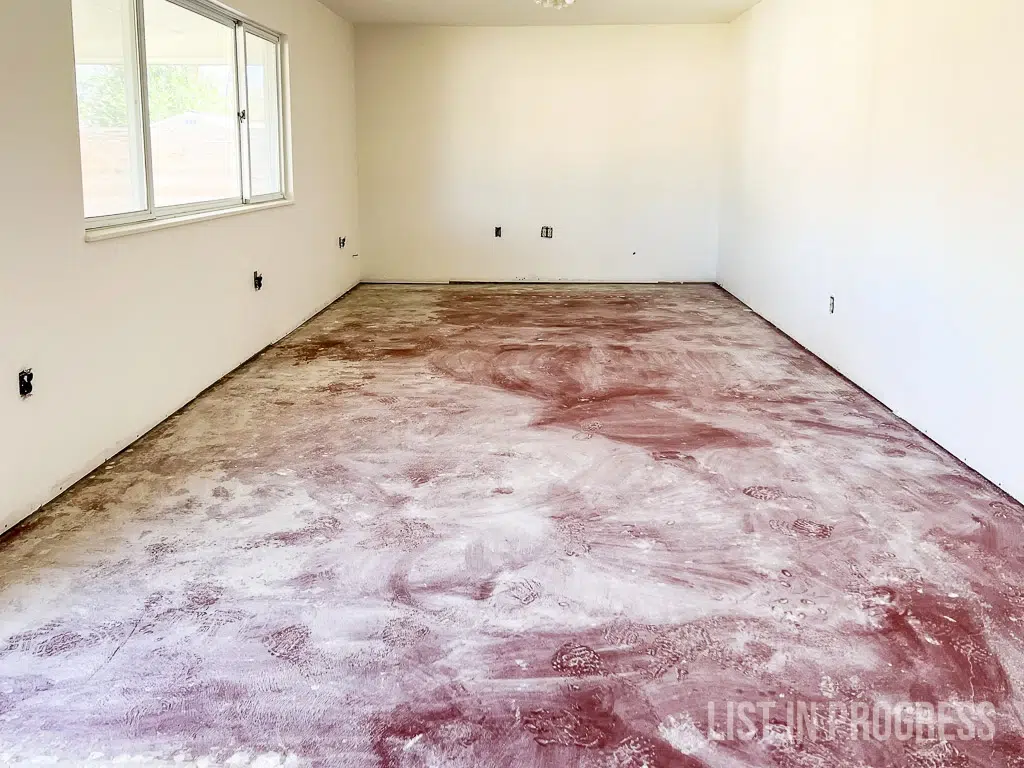
You can install vinyl plank flooring over a multitude of subfloor surfaces. If your subfloor is truly a mess, install lauan or thin sheets of OSB to create a smooth surface. 4′ x 8′ subfloor should run perpendicular to the direction you plan to lay your vinyl plank.
I installed our vinyl plank flooring over concrete in both the basement and what was formerly the back patio of the house.
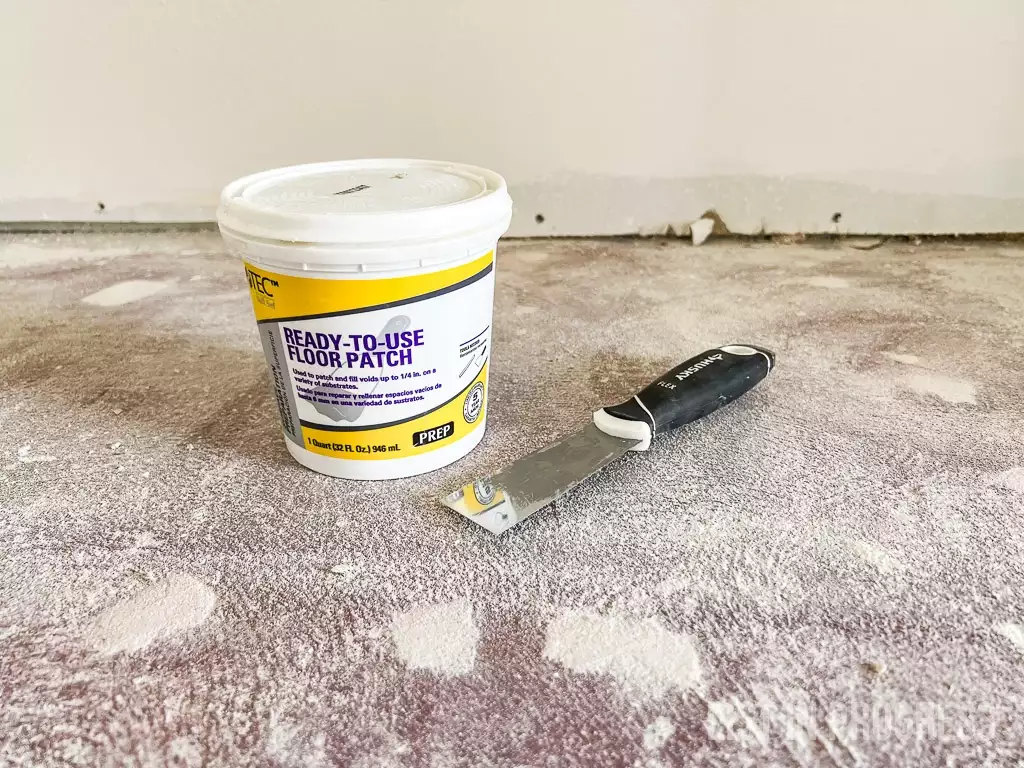
Use a concrete patch product to fill holes and broken areas of concrete. Here’s how:
- wipe down the floor with wet rags or a mop
- vacuum up dust and particles from any holes you’ll fill
- apply the floor patch with a putty knife and allow to dry (takes hours)
- gently sand the patch surface until it’s level with the floor (be careful not to bust it right out of the hole or you’ll have to start over)
Tip #8: Prep Any Door Frames
Use a multi-tool to cut under the door frames or casing where they meet the floor. Just measure your cut with a scrap of flooring to see where it meets the frame.
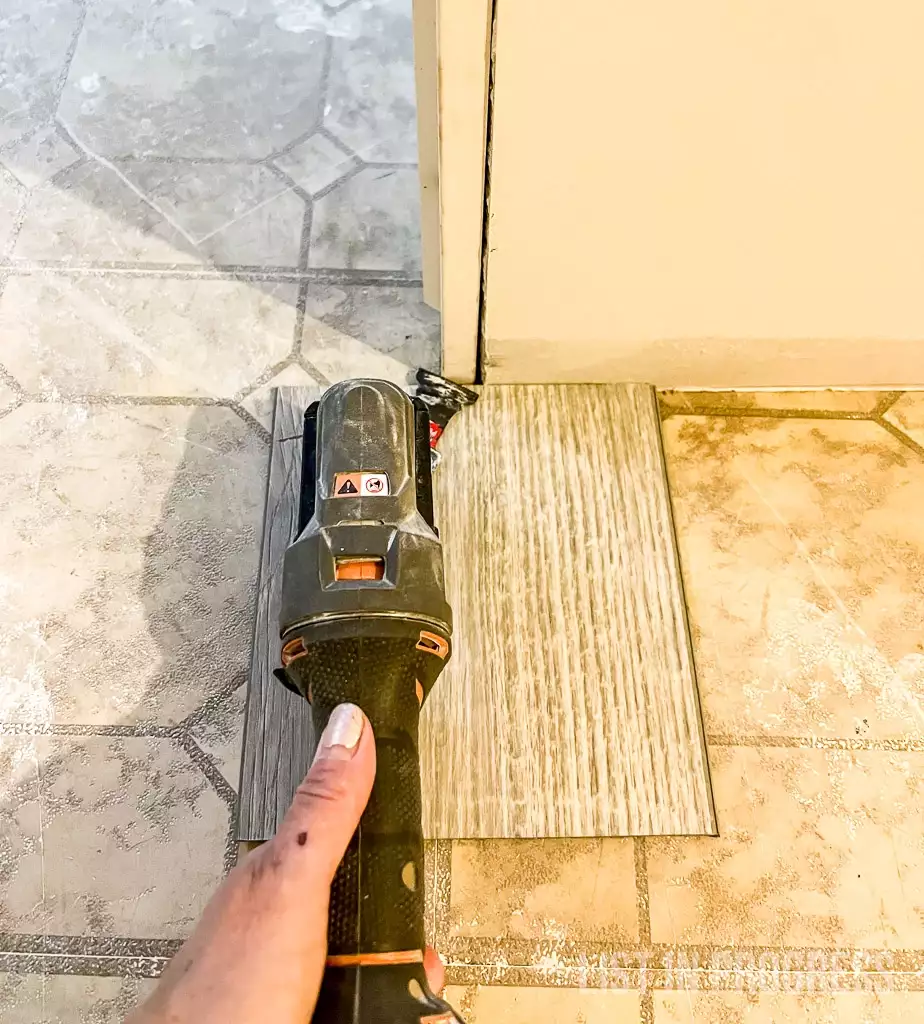
During installation, you’ll slide the vinyl plank under the casing for a more finished look. This method looks much better and is easier than cutting and caulking the floor around a door frame.
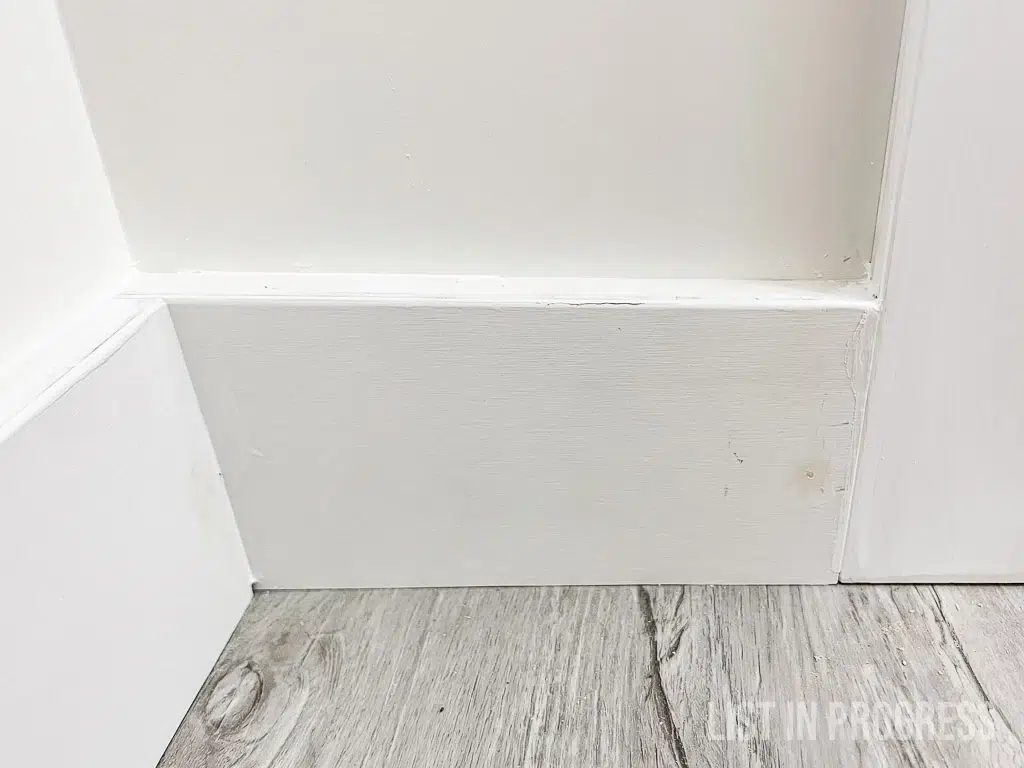
Here’s a closeup of the floor under primed base trim and door casing. The door frame was cut, vinyl floor installed, and then baseboard was installed. The last step here is to paint all of the trim so it blends together.
Tip #9: Mix Up the Boxes of Planks
Before you dive in, mix up most of your planks. Each box will have slightly different design elements and perhaps subtle color variations. Plus, you should avoid placing two of the same planks together or it will look super fake. Mixing them up in advance makes it easy to lay out the floor without stopping your workflow.
I did this by opening a variety of boxes and then pulling one plank from each box to create mixed stacks of flooring. Then I installed the planks from those mixed batches.
If you’re not sure how much you’ll use and don’t want to open ALL of the boxes, here are two possible solutions:
1. Open 4-5 boxes at a time and mix up smaller batches of flooring as you go. That’s what I did for the family room floor and it looks fine. There’s enough variation that it all blends together.
2. If you want to open all of the boxes to start, keep a few in good shape for possible returns. You should be able to return a full, open box of product to Home Depot or Lowe’s. Check the return policy on that product first, of course.
Tip #10: Measure Twice, Cut Once
OK, here’s where the math kicks in. Take the time to calculate how to best lay the floor so you won’t end up with short pieces or skinny strips on one side of the room. Not only does this look amateurish, it might also be too fragile for daily wear and tear.
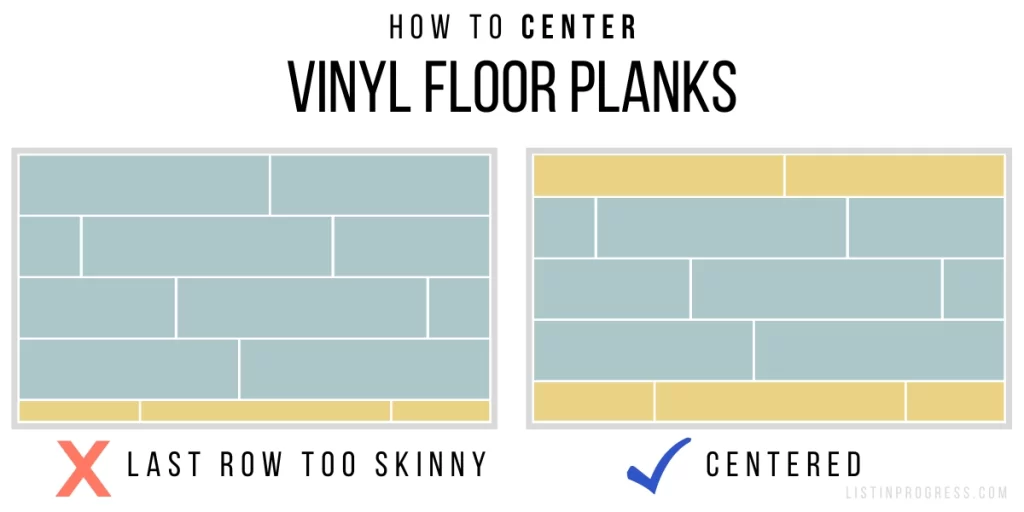
Width Measurements
You’ll need to measure the width of the room and divide it by the width of your vinyl planks. If the remainder is less than x-inches (stated in your product directions), trim the first row of flooring to center the entire floor system.
Here’s a diagram to illustrate.
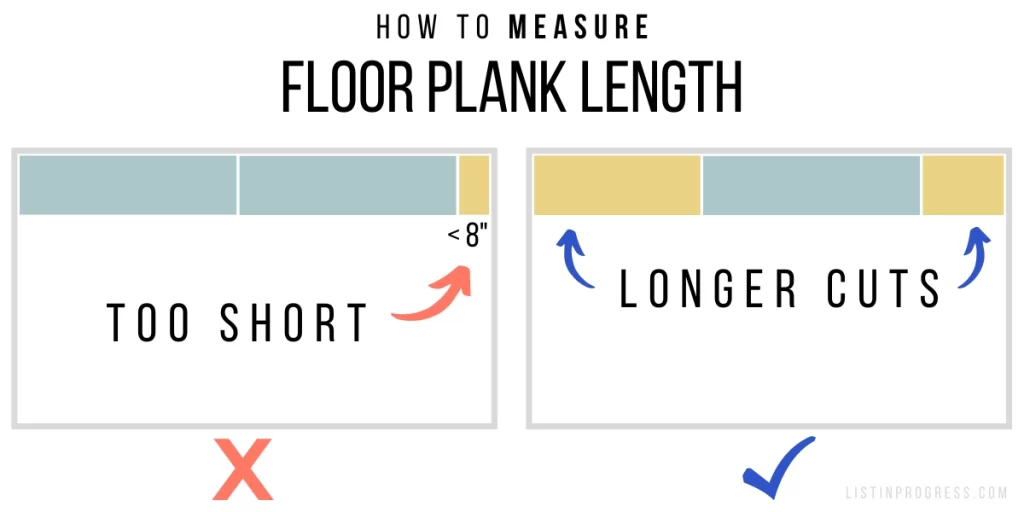
Length Measurements
Your flooring product directions will also clarify the minimum length measurement. For this vinyl plank floor, the planks must be at least 8″ long, and I really aimed to keep the short-end chunks more than 10″.
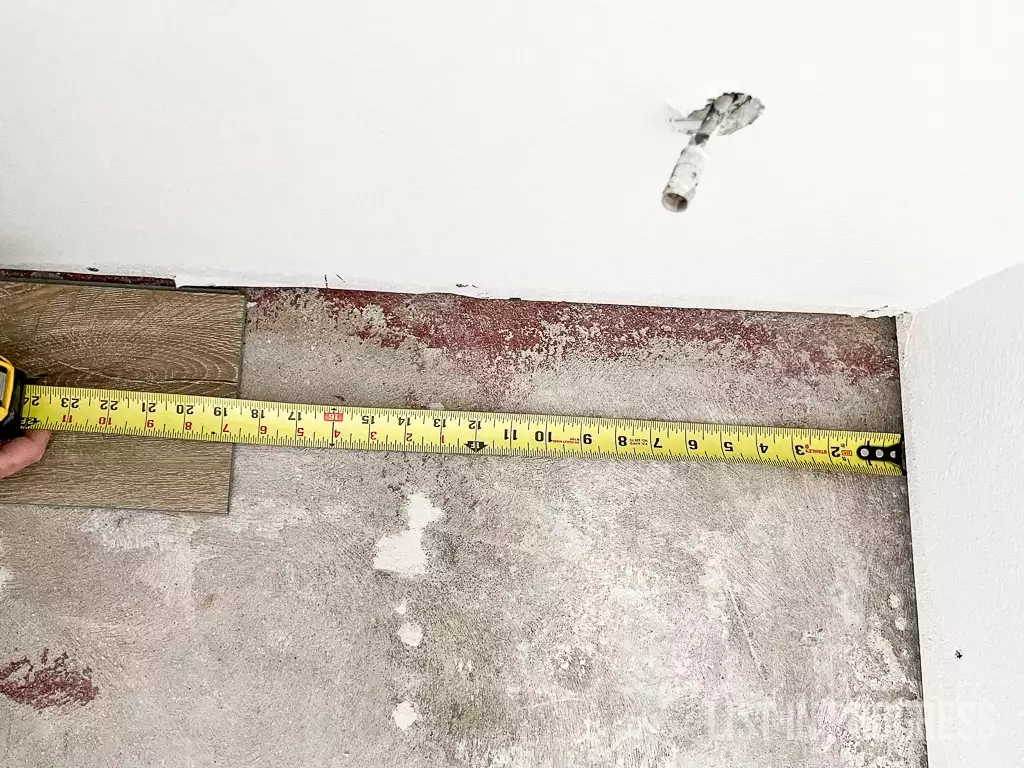
To calculate, measure the length of the room and divide it by the length of your planks. If the remainder is less than x-inches (mine was 8″), then you need to start the row with a trimmed plank in order to end it with a plank that’s longer than the minimum.
Here’s a diagram.
Tip #11: Vary the Lengths in Each Row
For a more realistic-looking floor, vary where the seams overlap. Your directions will state a minimum for seam spacing in each row; the product I used required at least 8″ from the previous row’s seams. Avoid making this too precise; aim for variety, as long as your spacing is sufficient.
For example, if the first course starts with a 10″ plank, start the second course with an 18″ plank (as long as that doesn’t leave you with a stumpy end piece). Perhaps start the third row with a full plank. Save the cut pieces to start or end future rows.
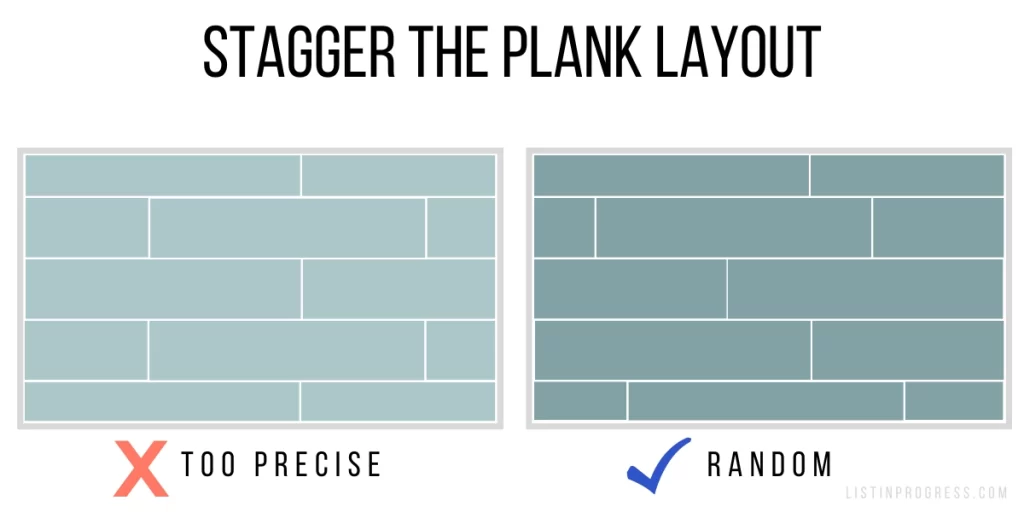
This way, your seams will vary over the entire floor. Because we’re used to seeing variety in a natural hardwood floor, this tends to be more aesthetically pleasing than a symmetrical design.
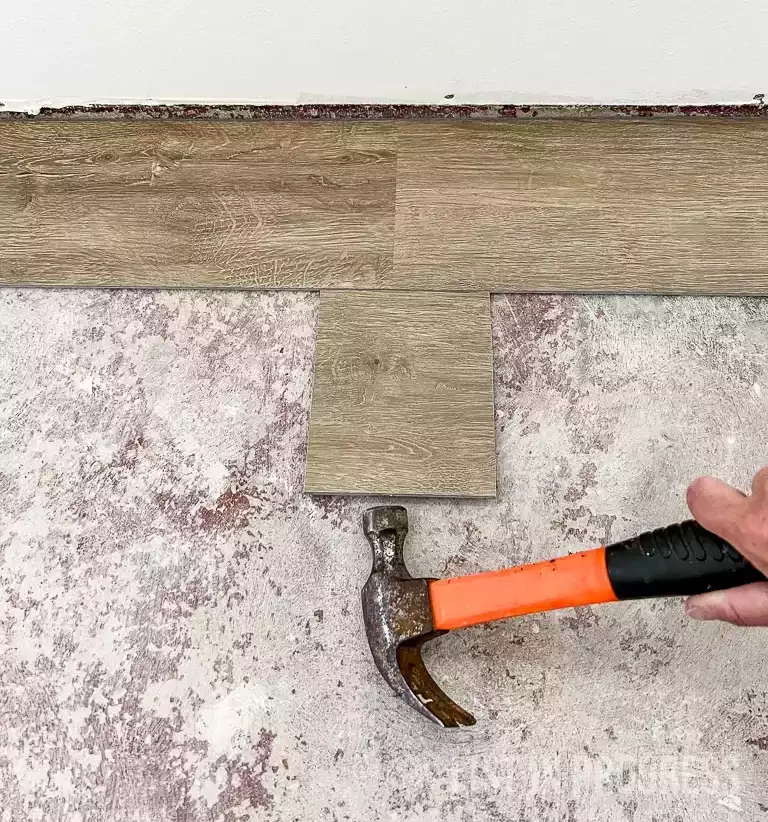
Tip #12: Connect Planks Snuggly
The click-and-lock flooring systems come in many installation designs. Read your product directions and practice connecting a few boards before cutting any for your real floor.
I found a rubber mallet to be very helpful to lock the end seams together. Almost none of my planks locked into place without the mallet, although sometimes I accidentally broke the locking edges. If the edge cracks, the plank is trash. The seams won’t stay together or lay flat.
If you’re tapping the planks together toward a wall, be sure to maintain the 1/4″ gap. Tap the metal pull bar with the mallet to nudge connected flooring if you need to move it. Spacers can also help maintain the gap (try these).
Planks must be properly connected with no gaps or spaces, or you might run into problems. If you’re installing water-resistant LVP, gaps make the floor system less water-tight. Leaving gaps can also lead to chips or breaks at the edges of the plank.
Be sure to snug up the planks together as you work with the pull bar and mallet.
The photo below shows gaps and one broken section of the locking seam; do not ignore either problem. These are the first vinyl planks I ended up returning because they would not stay locked together.
Tip #13: Save Your Scraps
One of my key tips for installing vinyl plank flooring: you’ll end up using scrap pieces more than you expect.
Measure the height of your cuts under door trim with a piece of scrap flooring.
Use scrap pieces to tighten up gaps between planks. Fit the scrap into the floor plank and gently tap the scrap piece with the rubber mallet. DO NOT USE the block tool in the installation kit because it will destroy the live edge of the existing plank.
You might even find yourself pawing through scraps, looking for short pieces that could fit at the end of a row. Save your scraps!
You Might Also Like:
How to Install Groutable Vinyl Floor Tile
The Best Flooring for Every Room in Your House
Choosing a Kitchen Floor Tile Layout
Tip #14: Don’t Cut Planks on the New Floor
Seems obvious, but don’t work on top of your freshly laid vinyl floor. Either set up a cutting station in a safe place or protect the new floor if you’re cutting planks over it.
I was in a rush and sliced right through a plank and onto my perfect, new floor. I had to pull up everything to replace this damaged plank. There’s really no other way around it. Please don’t make the same mistake.
Tip #15: Consider Whether LVP is Best for Your Budget
Vinyl Plank Price Range
The cheapest products on the market are basically junk. Don’t waste your time or money on vinyl plank that is under $2/sq ft. Buy a better click-and-lock product so you can ensure it will stay locked together. It’s worth investing in a well-designed flooring product that probably costs $3/sq ft or more.
I was pleased with this $3/sq ft vinyl plank flooring from Lowe’s. The cost seems to go up from there, and I hope the quality does, too.
FYI, if you do crap work, the floor will not last very long before chipping, buckling, or unsnapping along the seams. That’s money down the drain. Unlike a $30 can of paint, you’ve just spent hundreds on a project that needs to be replaced.
Other Flooring Options
Now that I’ve detailed the joys of installing vinyl plank, you might be second-guessing this project.
That’s a good thing. Vinyl is great for some applications, but not the best for all spaces. If you’re installing it in a bathroom, can you spring for tile instead? Grouted tile would be more durable over the long term than vinyl plank.
If you’re debating carpet or LVP for a bedroom or family room, it might be a tough choice. Lifespan could be the same with these two products. If you have a discount carpet option, the cost could be comparable, and obviously, hiring a carpet installer is easier.
Honestly, I had planned to install LVP in the entire basement family room, but I found the project too time-consuming and chose to have some carpet installed instead. I installed vinyl plank in the bar area and bathroom. That compromise was worth the time and slightly extra cost.
Would I Install Vinyl Plank Flooring Again?
Believe it or not, yes. I’ve started researching options to lay this flooring in our current family room. Despite the installation challenges, it’s the best option for a room that sees heavy foot traffic, muddy pawprints, and Lego projects on the floor. It’s easier to clean than carpet and slightly softer/warmer than tile. Plus, I’ve already worked out most of the tricks involved to install it!
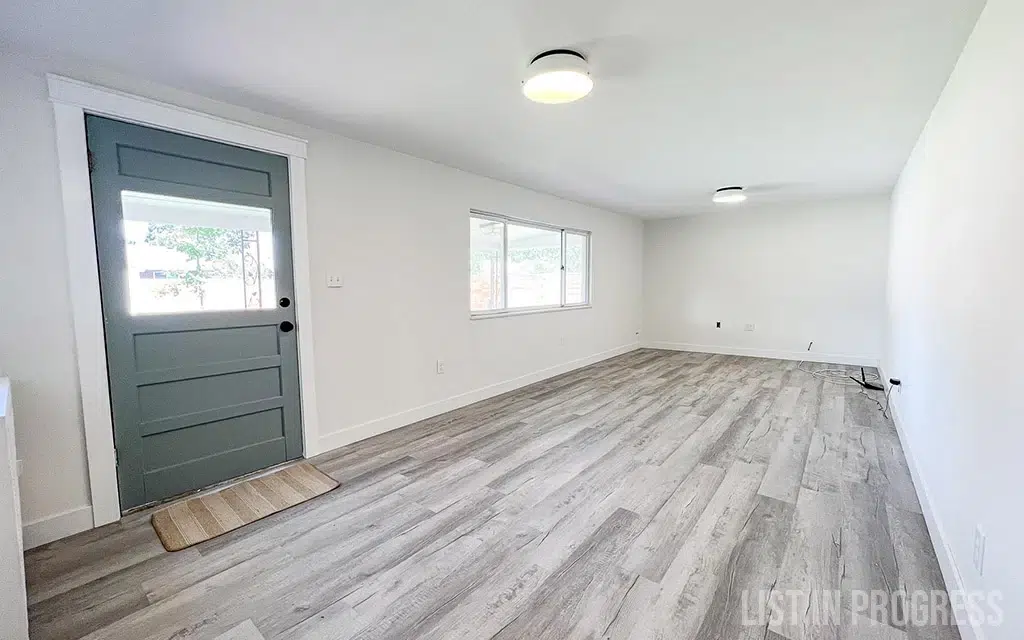
This is what the family room looked like when we sold the house. The backdoor paint color is Cloudy Sky by Benjamin Moore.
Tour Our Remodeled Brick Ranch
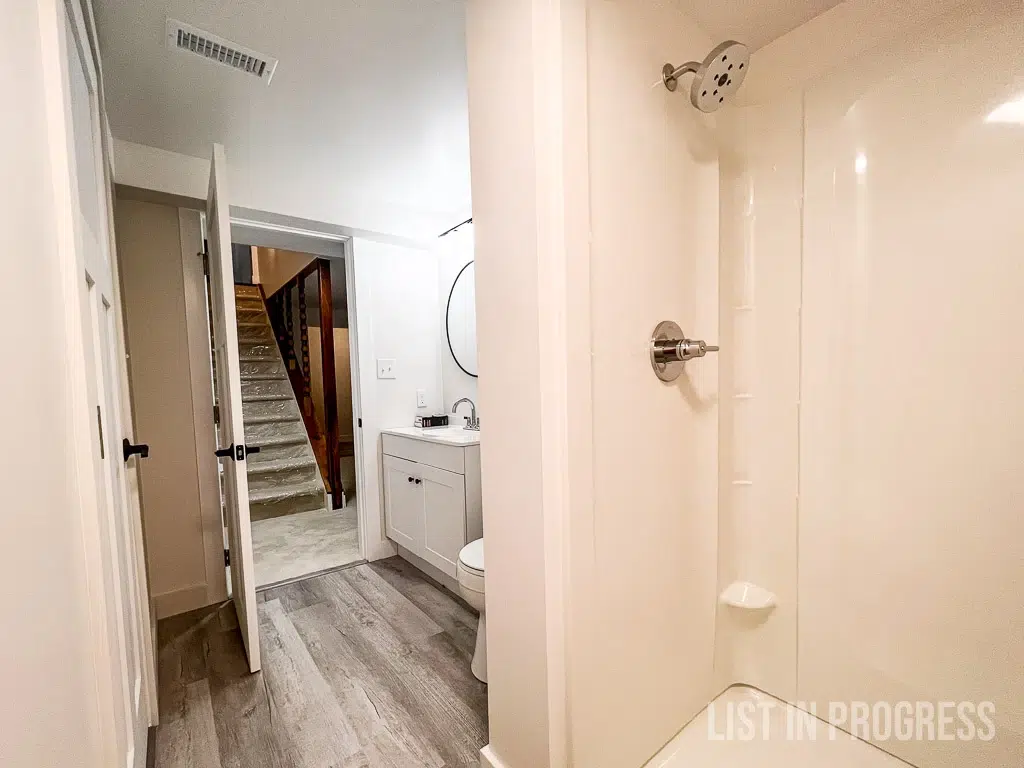
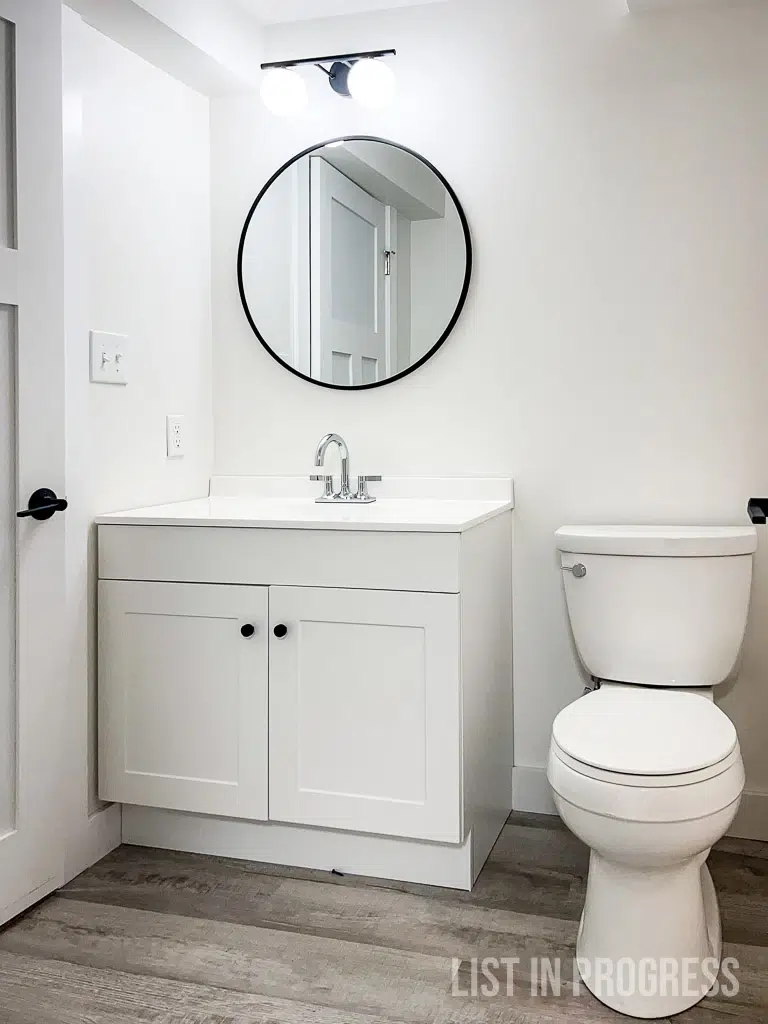
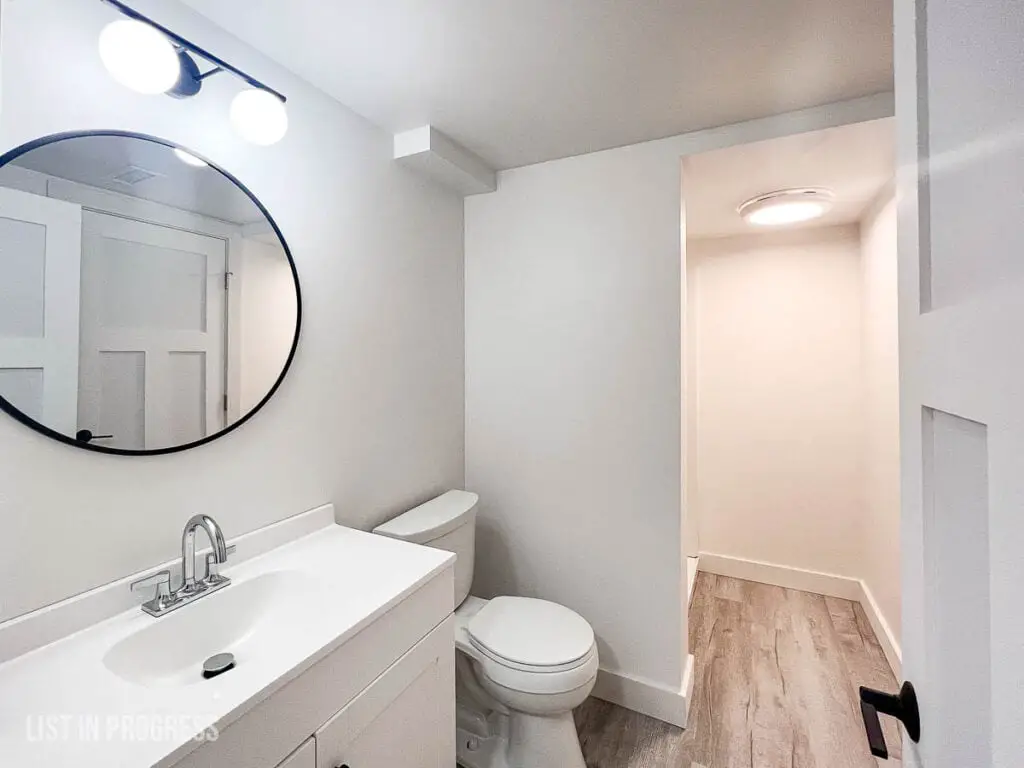
Here’s the finished basement bathroom. It’s hard to capture the floor, but you can see glimpses of how it turned out.
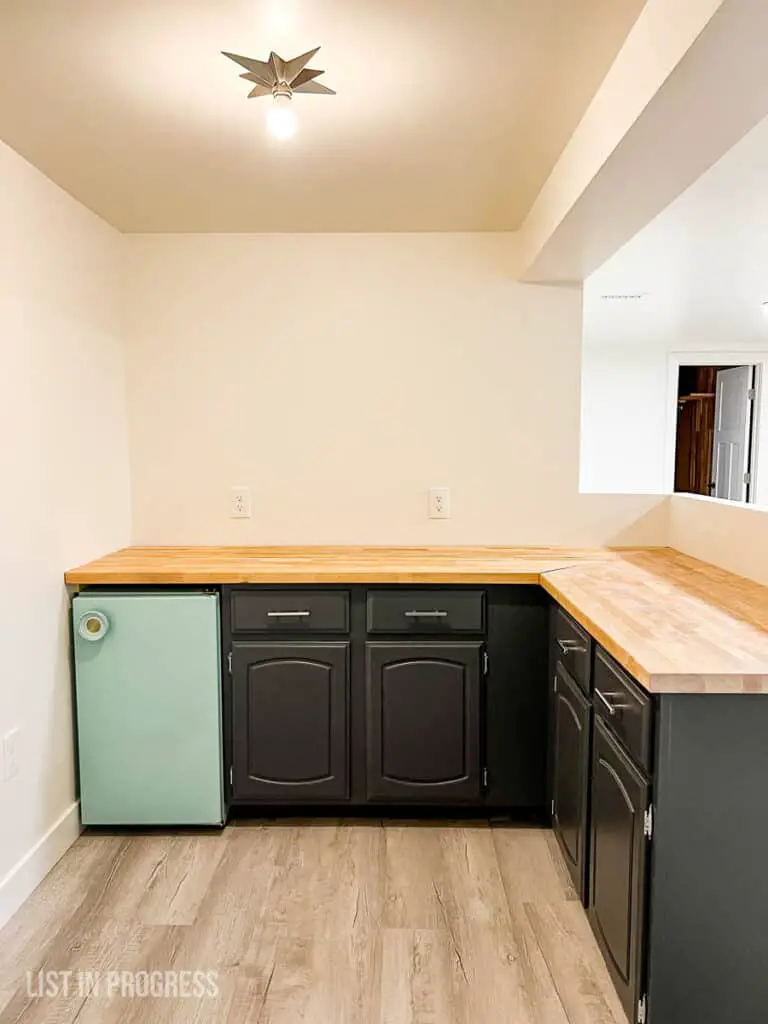
Last, here’s the bar area in the basement. Painting that cute little fridge was an easy DIY project.
That’s a wrap on my top 15 tips for installing vinyl plank flooring. What are your questions? Have you tackled this project and if so, what product did you choose? I’m willing to pay a little more for a better floor product if it’s easier to install. I’d love to hear some product recommendations.
Best of luck with your projects!


Wow,! A lot more work than most of us are willing to do. How much do you think an installer would charge me? Of course, he might not be as detail oriented as I am.
I have no idea! I think pricing is really localized, but they would certainly work faster than I do… so that’s the upside.