

Yes, you can paint a refrigerator! No, it won’t look like garbage – as long as you follow these tips. Give your kitchen a major facelift with this easy DIY project. I’ve included step-by-step instructions and photos on how to paint a refrigerator, including the fun retro mint green paint color I used. Here’s the scoop.
Go Ahead and Paint Your Refrigerator!
Here’s your permission to get crazy and paint a refrigerator. Why not? Unless you have a custom kitchen with panels hiding your hard-working appliances, the fridge takes up a ton of visual space. Why not make it pretty or fun or unique? Since not everyone can afford a gorgeous mint Smeg or custom-color Big Chill, paint could be the solution.
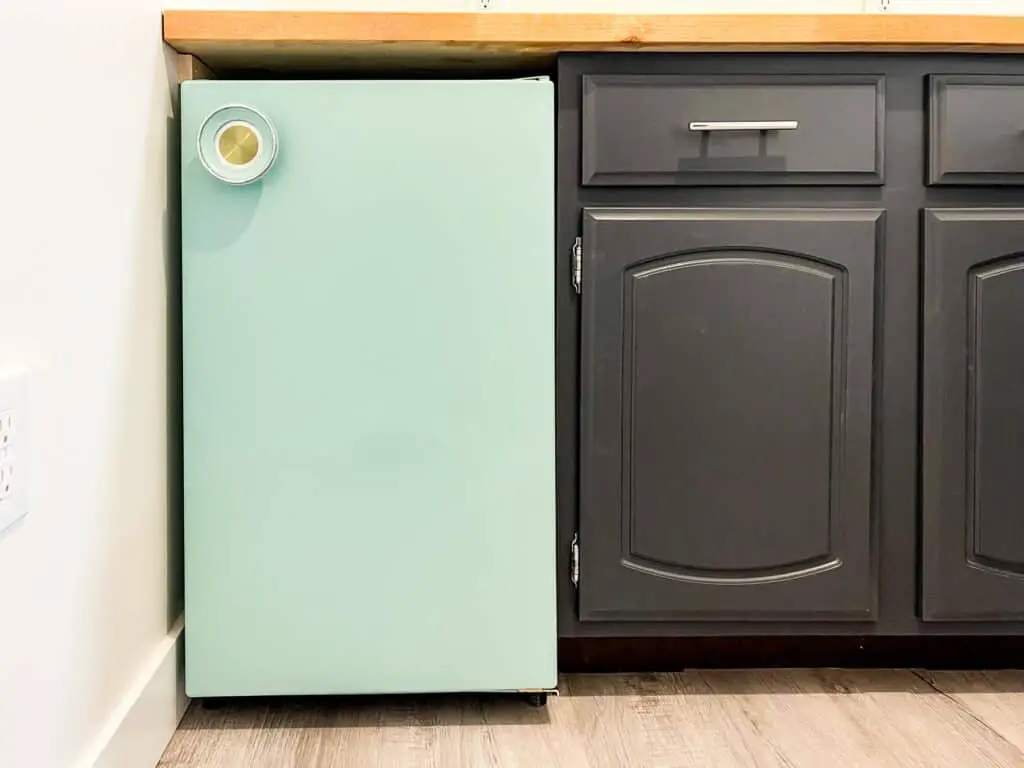
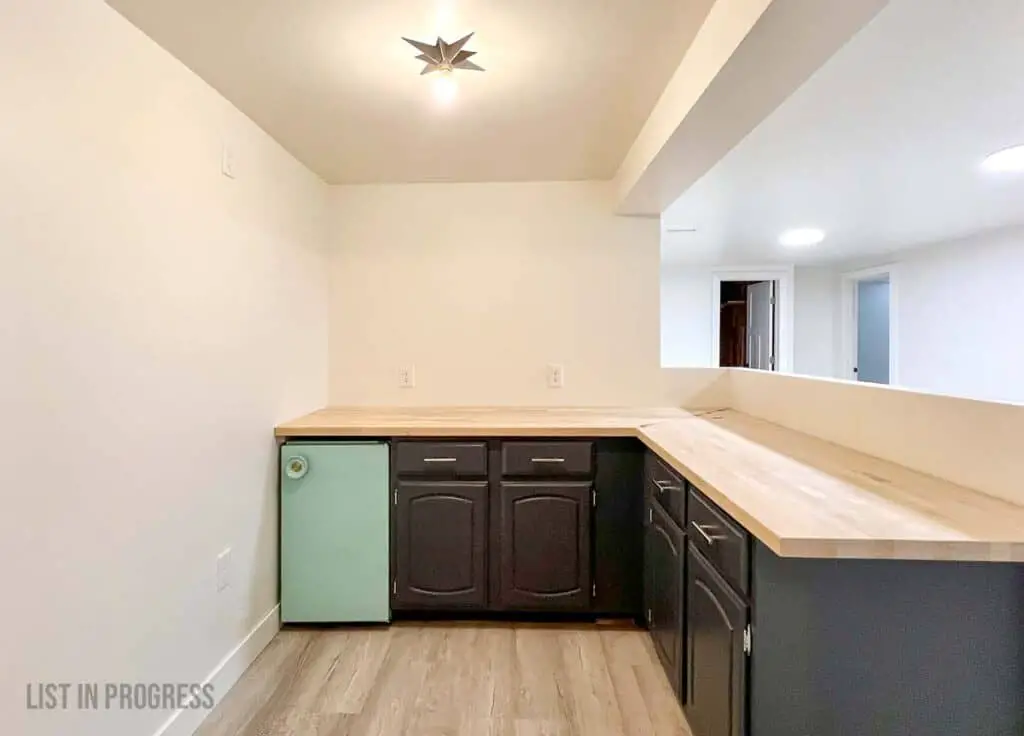
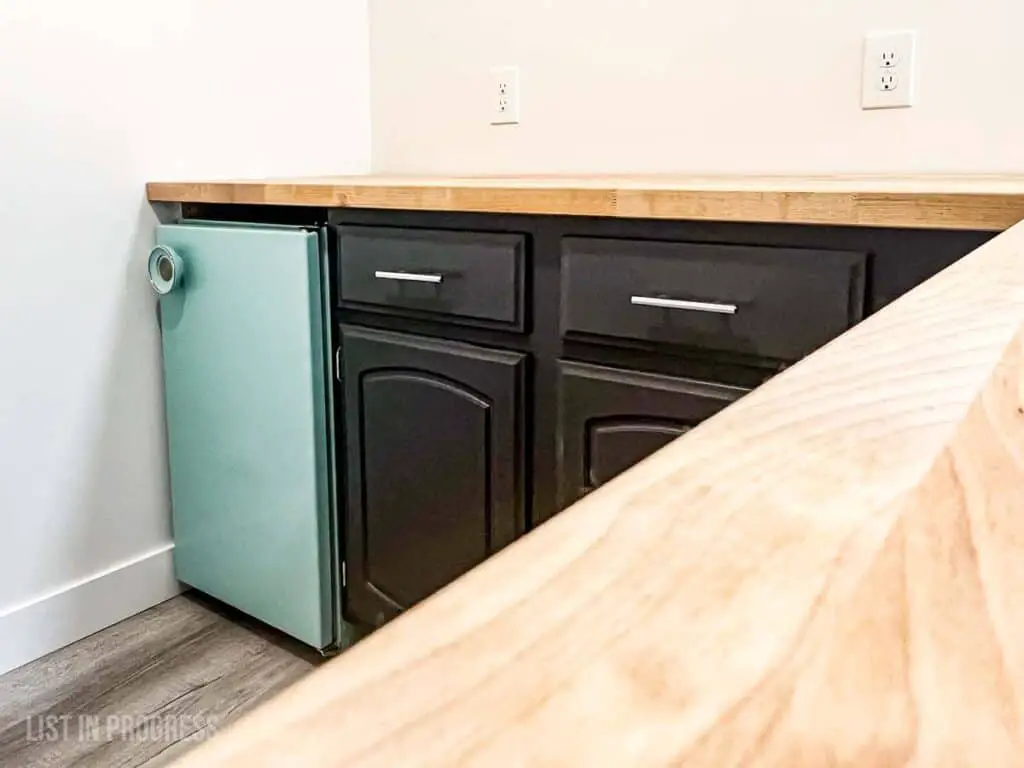
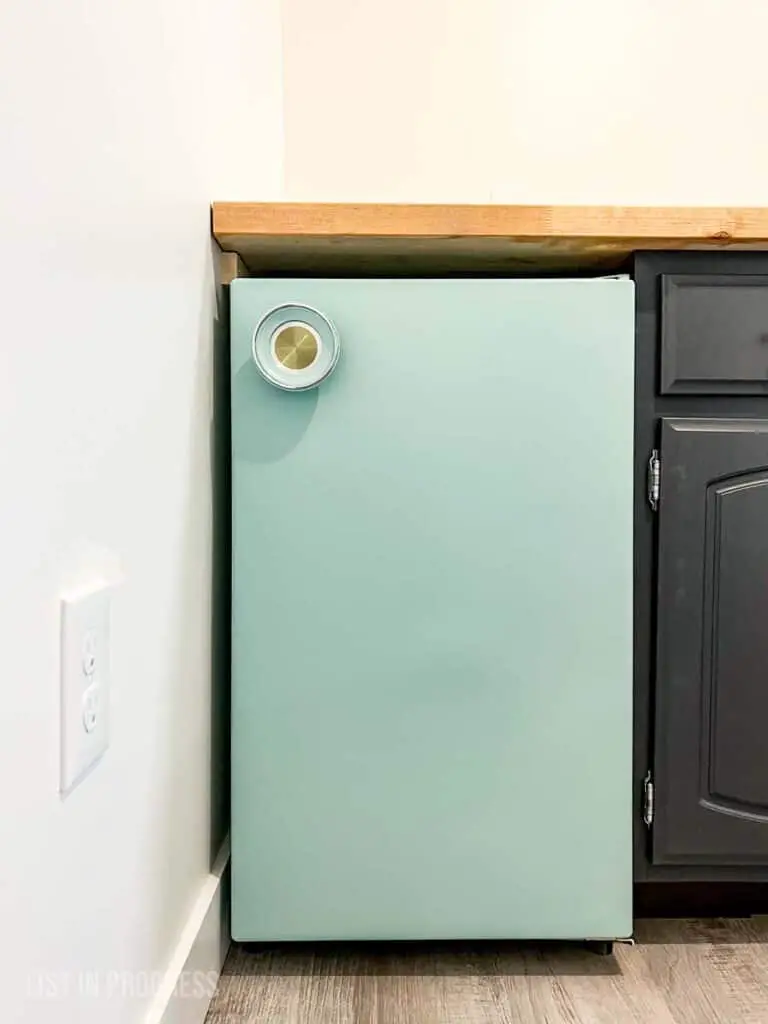
I painted a mini-fridge to update the basement bar at our last house. This was an easy remodel with a fun retro vibe; plus, this little fridge created a memorable moment for buyers touring our house.
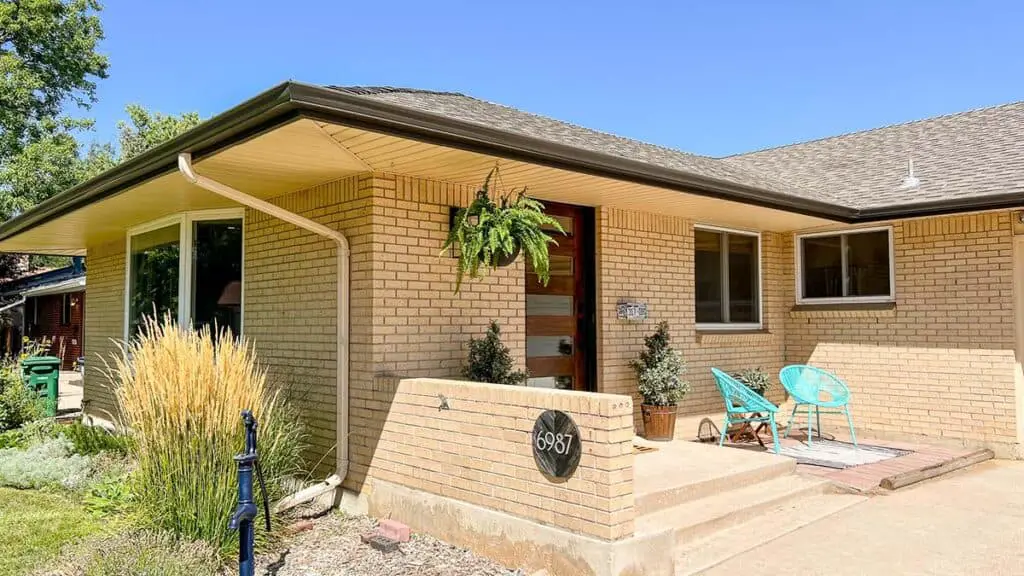
Our Fully Remodeled House in Denver
I’m not the only DIYer who has tried this project, and the internet told me it would be easy. Spoiler: it actually was! You might assume that specialty paint is used to paint a refrigerator, and it can be, but you can also use any regular latex or acrylic paint if you’ve prepped properly. I took the route of using a bonding primer and a good acrylic paint, and my project was a success.
I’ll get into the details but let’s knock out a few questions first.
15 Tips for Installing Vinyl Plank Floors
You Might Also Like:
The Easiest Way to Paint Cabinets
The Best White Ceiling Paint for DIYers
Two Great Cabinet Paints for Your Kitchen

Notes About Painting Appliances
Can I Paint Stainless Steel?
Stainless steel refrigerators are my only caveat to this post. I haven’t tried painting stainless steel, and I’ve read mixed reviews on whether or not paint will adhere. If you have nothing to lose, try following these steps on a small section of the steel and see if it holds up before you tackle the entire beast.
Easiest Surfaces to Paint
If your fridge is white, black, or almond, chances are those exterior door panels are constructed of plastic. The sides might be painted metal. Both surfaces can be painted with the right prep.
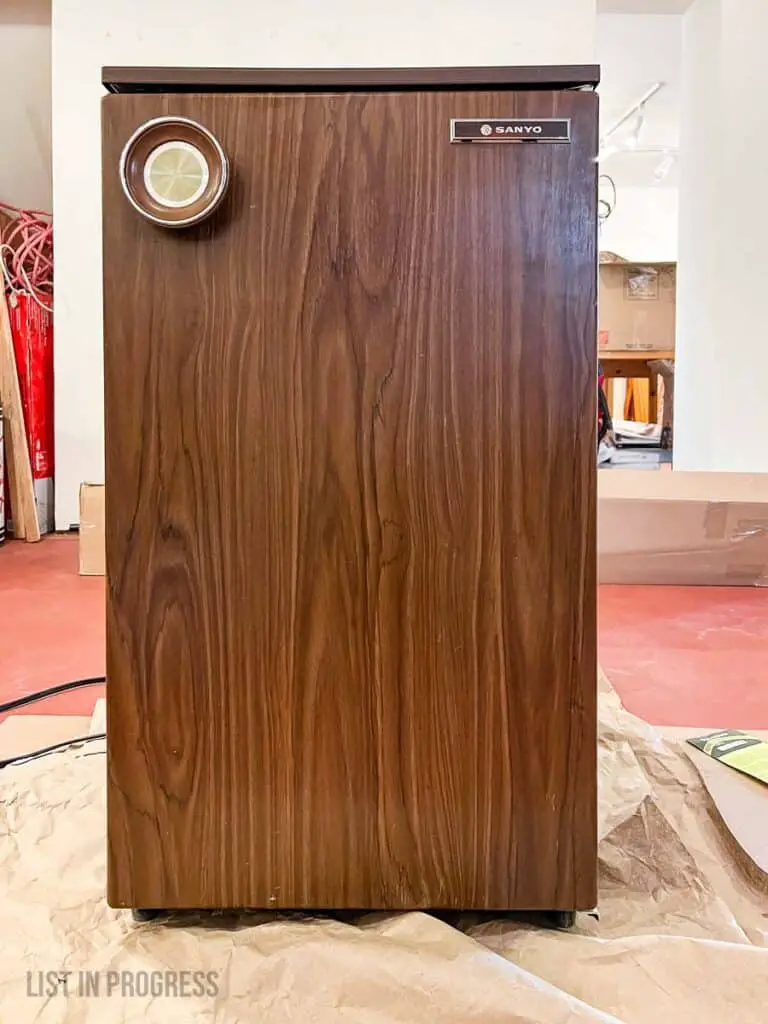
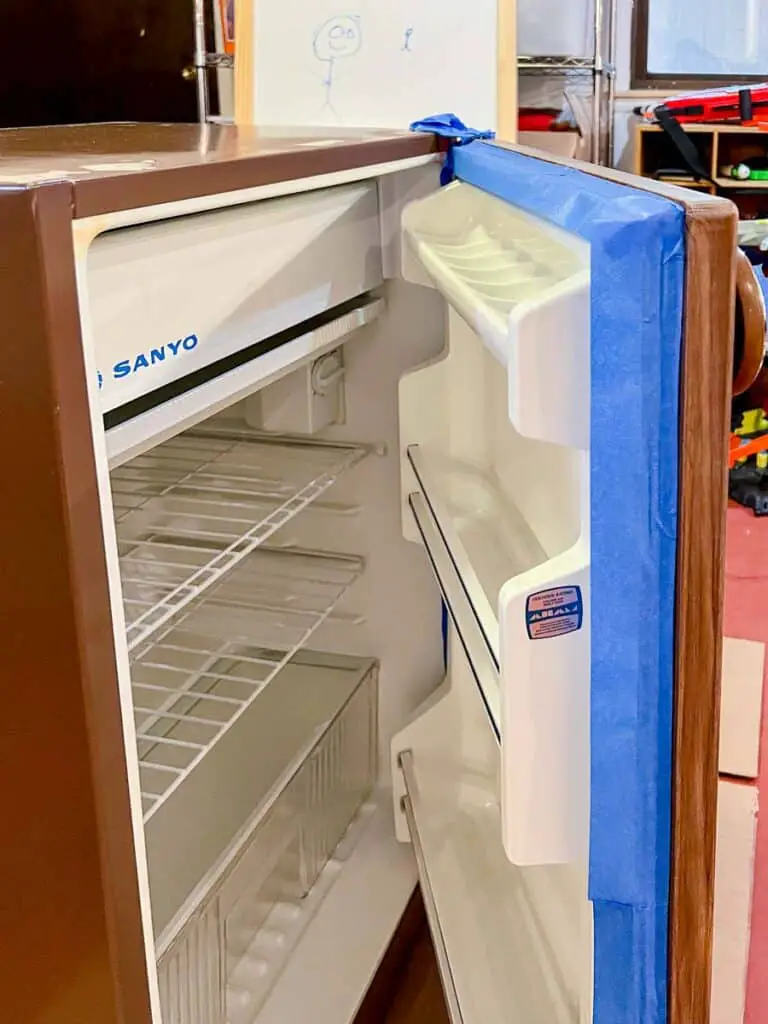
In this post, I’m sharing how I painted a super-retro 1970’s mini-fridge with metal sides and a faux-wood plastic door. I had no trouble painting this little guy, and the same principles transfer to a full-size fridge.
Types of Paint for Appliances
I haven’t tried this, but apparently, there is actually a stainless steel paint that can be used to paint a refrigerator. Go figure! Check it out here.
You could also try an epoxy paint formulated specifically for appliances. I find epoxy paints to be incredibly smelly, but they might be the answer if you’re having trouble finding a paint that will adhere to your appliance. Rustoleum offers a limited range of colors in spray paint epoxy.
Third, you can also use oil-based, acrylic, or latex paint. I prefer acrylic or latex for easier cleanup and fewer fumes. My understanding is that acrylic is more durable and elastic than latex, which I wanted for a high-touch appliance.
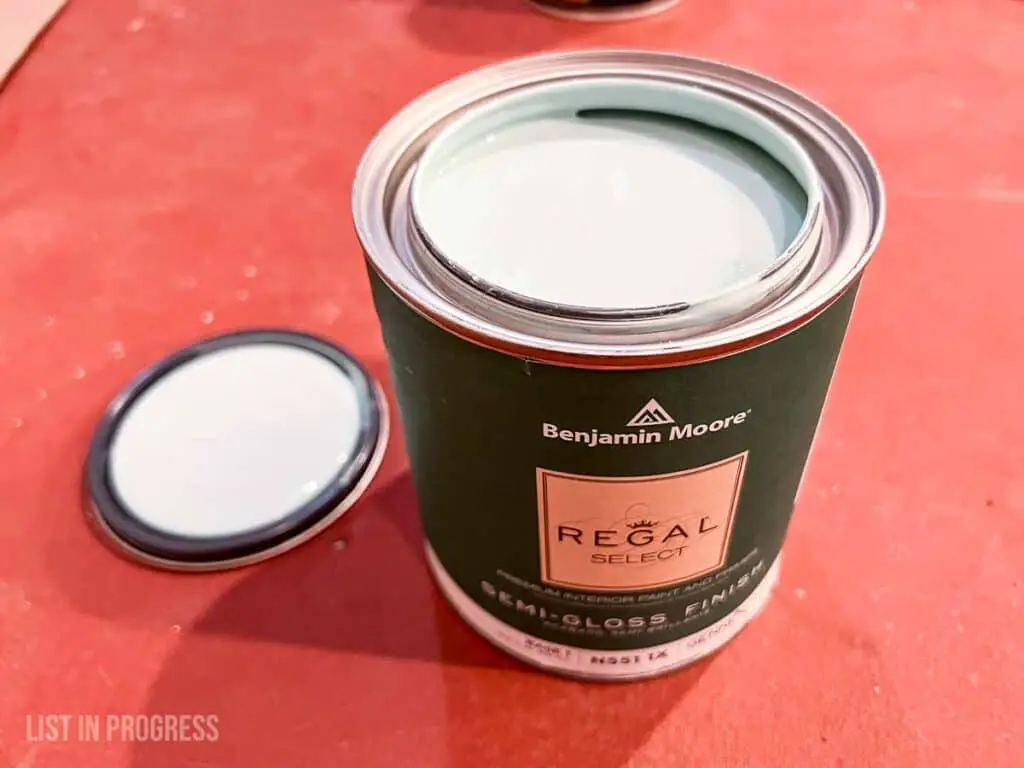
Here’s the Paint I Bought
I bought a quart of Benjamin Moore Regal Select in Hazy Blue (2040-50), in a semi-gloss finish for this project. The glossier the sheen, the more durable it will become as the paint cures.
Ironically, the paint matters much less than your prep and primer. However, if you’re going through the hassle of meticulously cleaning and prepping your appliance for paint, you might as well choose a quality product.

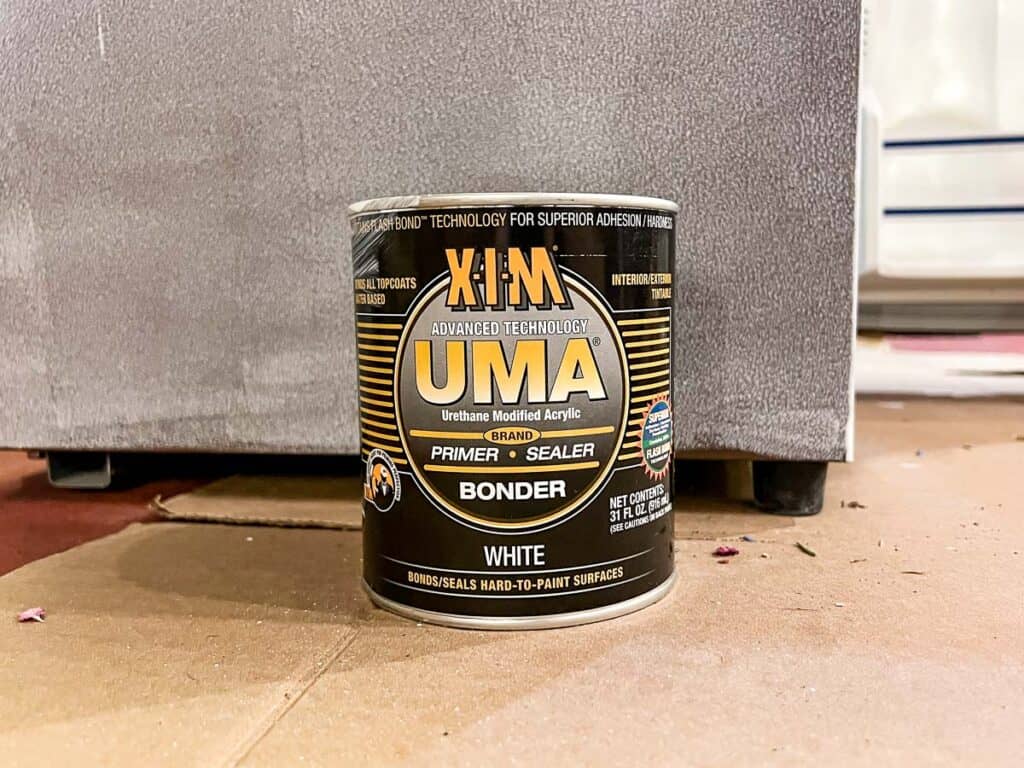
If you’re painting a plastic and metal appliance surface, you’ll need to find the best bonding primer you can afford. I did a lot of research on this, but in the end, I went to a specialty paint store and bought what an employee recommended.
Primers: How to Choose a Primer for Appliances
I chose this X-I-M bonding primer. I’ve also read great things about Insl-X Stix and Zinsser Bondz.
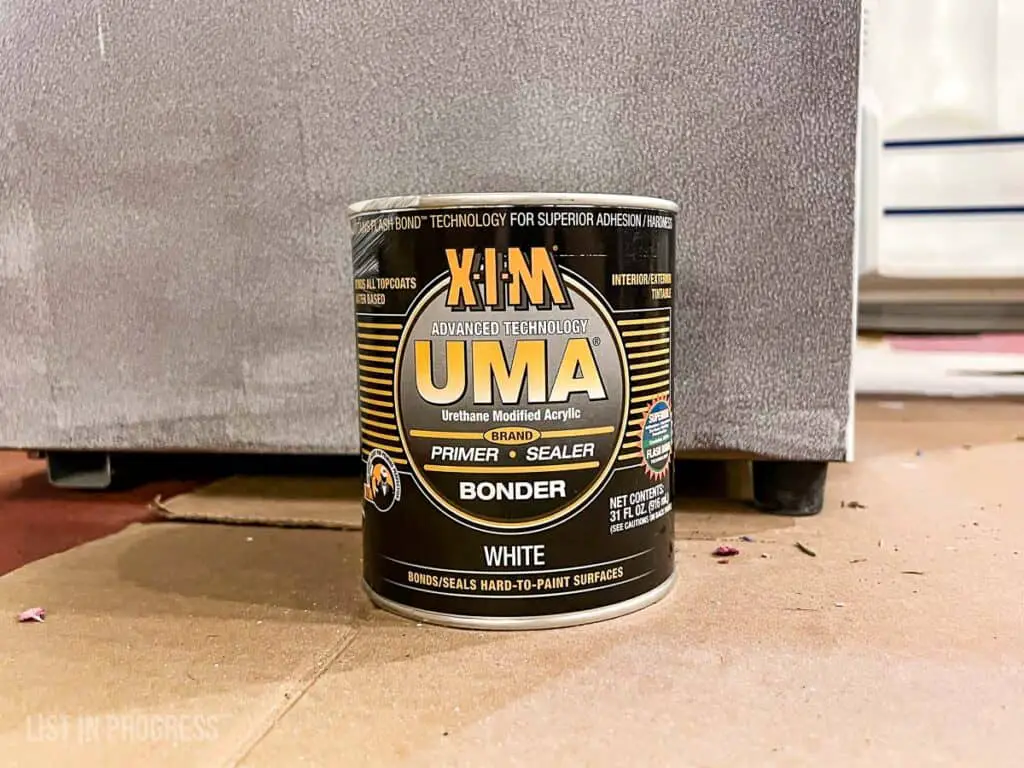
Bonding primers form a bond between tricky, slick surfaces like plastic or metal and the topcoat paint. You should read the primer instructions before purchasing to ensure it’s formulated for your particular appliance surface(s).
Materials Needed for This Project
Here’s what you’ll need to gather to pull this off. Basically, you’ll need to clean, sand, clean again, prime, and paint. The most critical step is the primer.
- 220-grit sandpaper
- Bonding primer: X-I-M UMA Bonder or INSL-X Stix or Zinsser Bondz
- Paint – almost any will do! I used BM Regal Select semi-gloss in Hazy Blue
- 4″ foam covers, 4″ paint roller and paint tray
- Painter’s masking tape
- Optional: plastic-bonding paint for handles, like Krylon spray paint
- Optional: Bondo and putty knife to fill dents
- 1″ foam brushes for painting the frame
- screwdrivers
- rags
- newspaper, cardboard or floor protection
You Might Also Like:
The Easiest Way to Paint Cabinets
The Best White Ceiling Paint for DIYers
Two Great Cabinet Paints for Your Kitchen
Steps to Paint a Refrigerator
Once you’ve sourced your materials, you’re ready to dive in!
Although I completed this project on a mini-fridge, which is a nice trial run for the big appliance, the steps are the same. If you have an old mini collecting dust, it might be worth painting before attempting a larger project.
I hope it goes without saying, but this project will take a few days and you’ll need an alternative source to store cold foods. You don’t have to move the fridge to a garage or other location, but you’ll need to unplug it at some point to paint the doors.
Getting Started: Cleaning and Filling Dents
Definitely give your fridge a good cleaning to ensure all grime and grease have been removed. Airborne grease inevitably builds up in a kitchen after years of cooking. If things feel sticky, you’ll need a good cleaning product to cut through it.
Check out this post on cutting through grease build-up for cleaning ideas. You might succeed with just Dawn and hot water, but if you need more ideas, I shared a few methods here when I tackled our kitchen:
How to Degrease Old Wood Cabinets

Use Bondo to Fill Dents
Next, fill any dents or dings to smooth out the surface of your fridge. It’s worth the effort to recreate smooth panels so your project looks as flawless as possible – especially after all of this work.
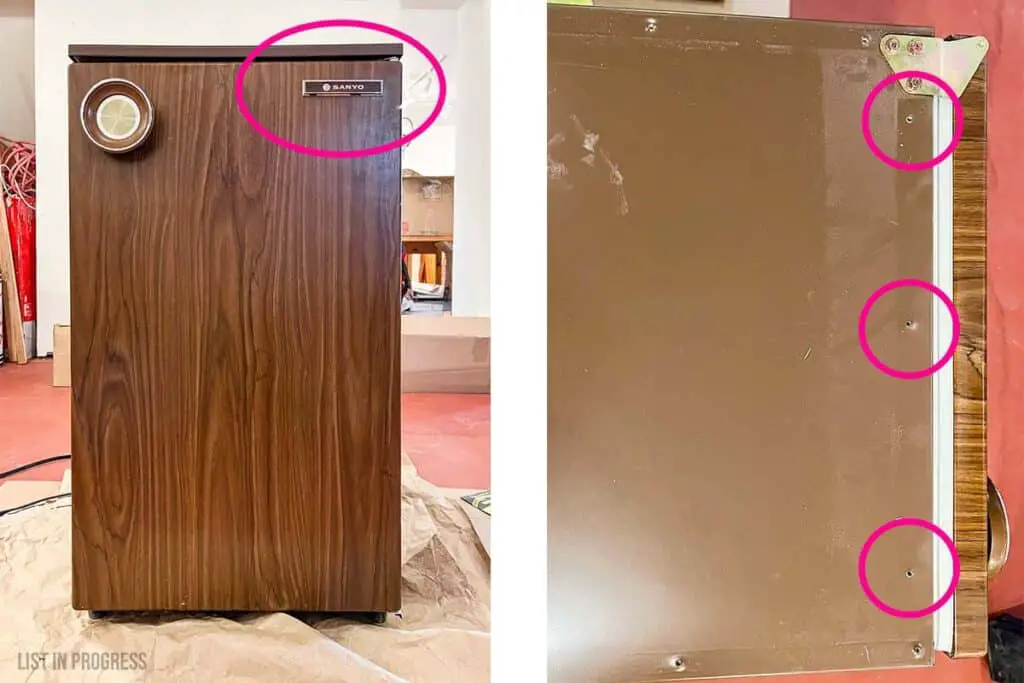
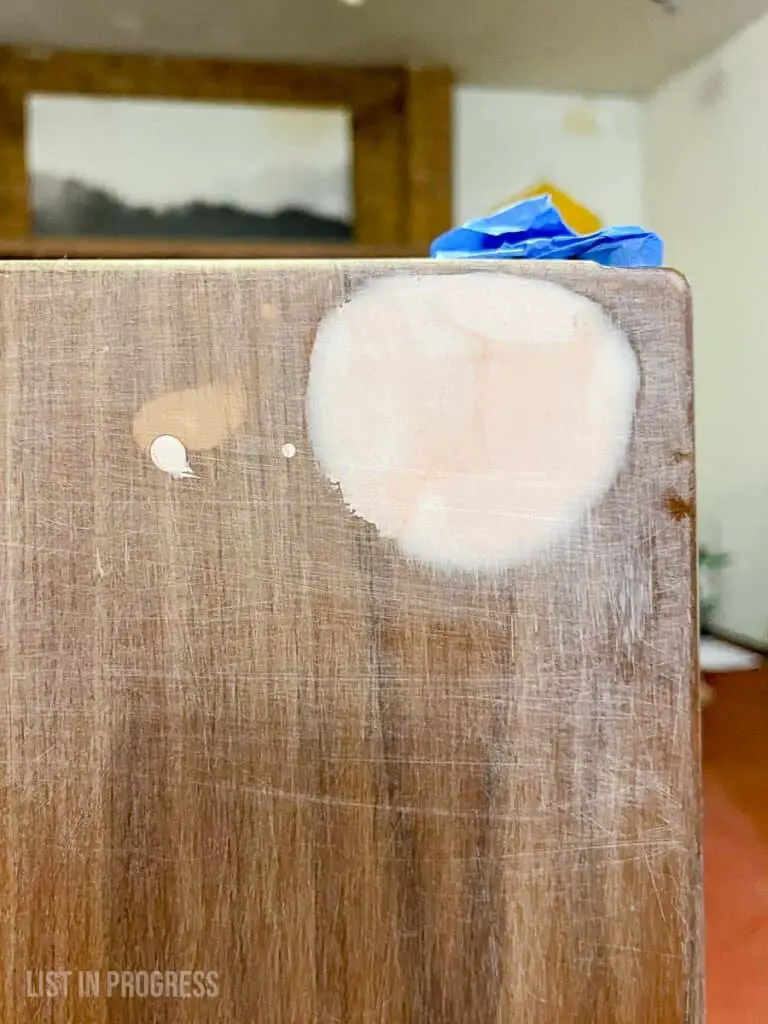
Our old mini-fridge had screw holes from old side panels and a sizeable dent in the door where I removed the logo plaque. Oopsie.
To fix these issues and smooth out the surfaces, I applied a few layers of Bondo with a putty knife.
Have you used Bondo before? We always have it on hand to fill nail holes in trim projects. It’s intense, but it’s also the strongest product around.

Warning: Bondo is a heavy-duty filler used on cars and it STINKS. Make sure you’re in a well-ventilated area and don’t stick around to breathe fumes as it dries. I worked outside for this part.
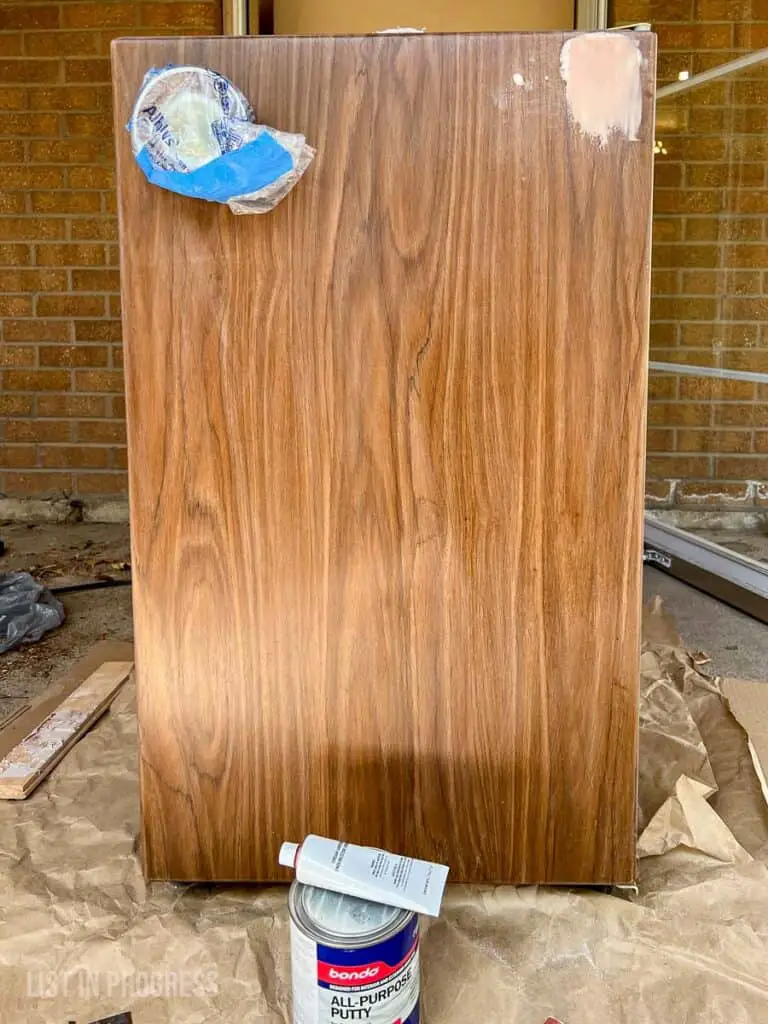
To apply, use a putty knife to mix a small amount of the compound with a few drops of activator on a scrap piece of wood. (“Compound” and “activator” are my own technical terms – I have no idea what kind of toxic magic happens with Bondo.) You can see my “palette” in the background of the photo above. Apply a thin layer with the putty knife and let it dry. Repeat these steps until the surface is level.
You’ll need to mix a fresh batch of Bondo for each layer because it starts to harden within a few minutes. Wipe the knife clean immediately after each layer is applied or it will be ruined. If you’re new to this, it’s better to build up thin layers than to apply thickly. You’ll need to sand it smooth once it’s dry.
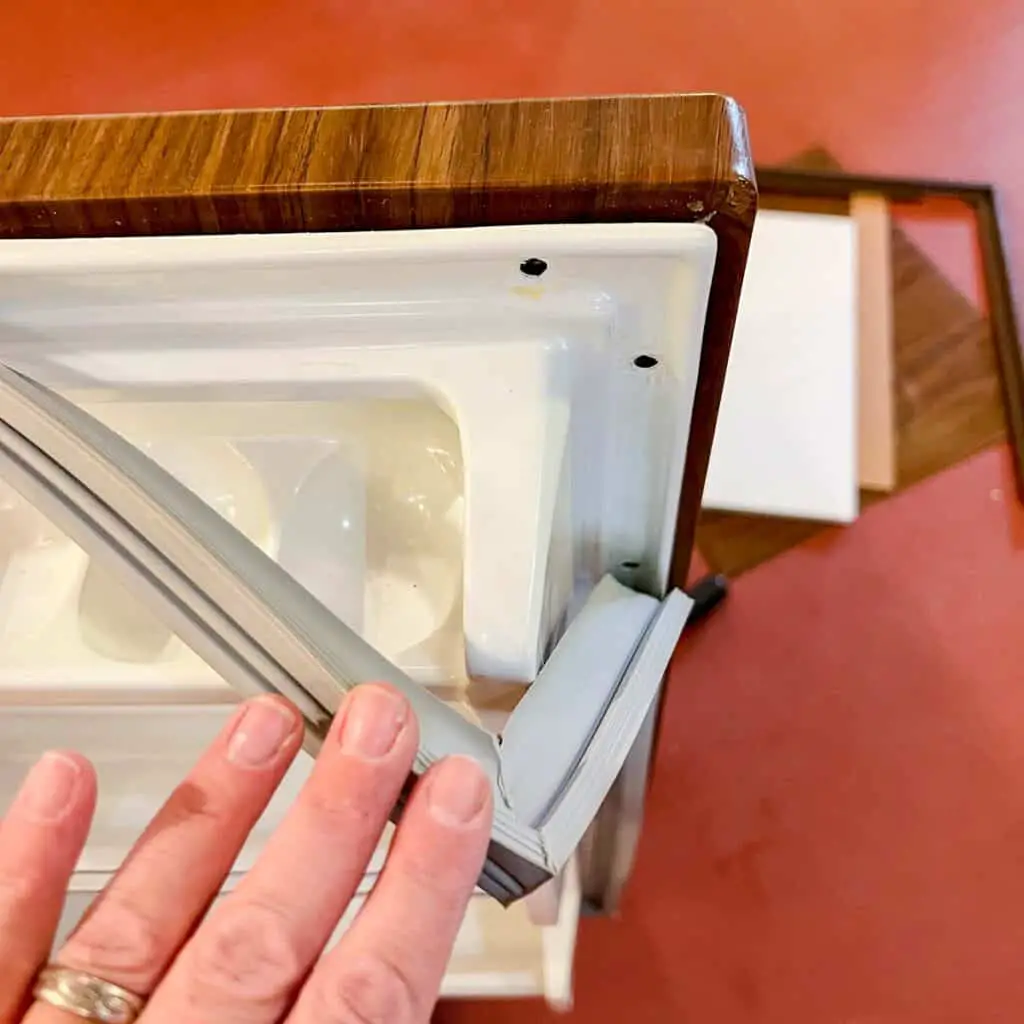
Remove Handles and Grille if Possible
If possible, remove handles and kickplate grille before sanding.
If you’re able to remove the handles and bottom vent cover, that will make life much easier when it’s time to paint. Some handles can be detached with a screwdriver, but you might need to google your fridge model for instructions.
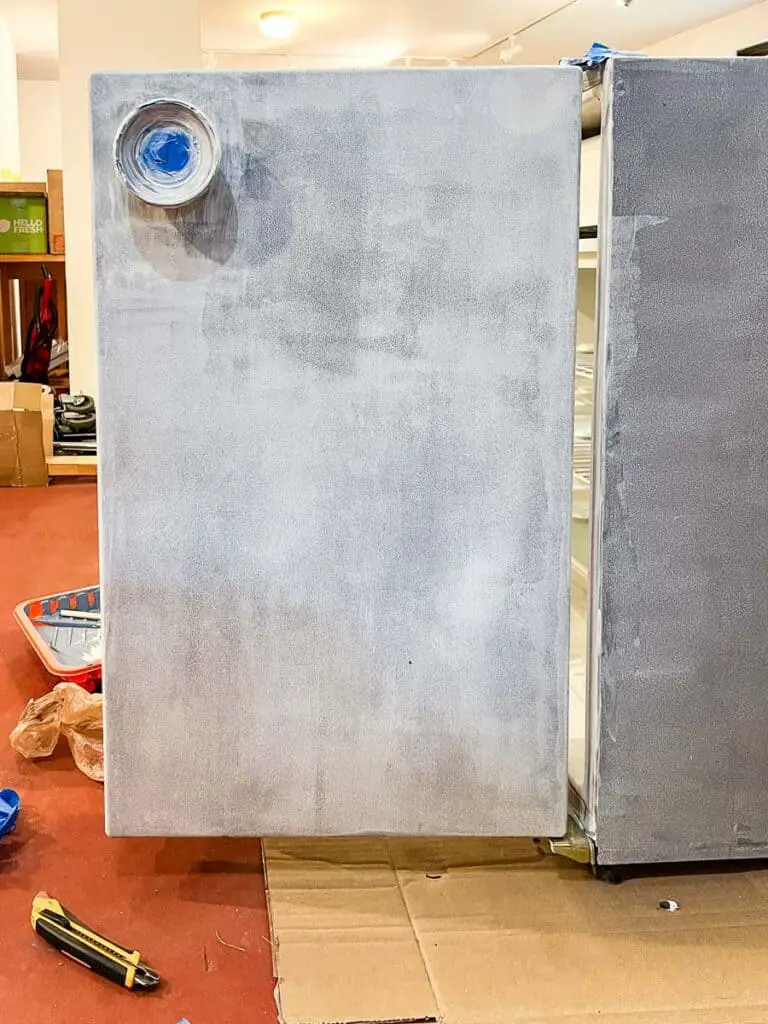
This mini-fridge is all about the handle. That’s 100% the motivation behind this project and I wanted to preserve the chrome finish. Unfortunately, I couldn’t remove this handle, so I carefully sanded first and then taped it off. If you are working with a similar issue, use a utility knife to cut precise tape lines around curved edges.
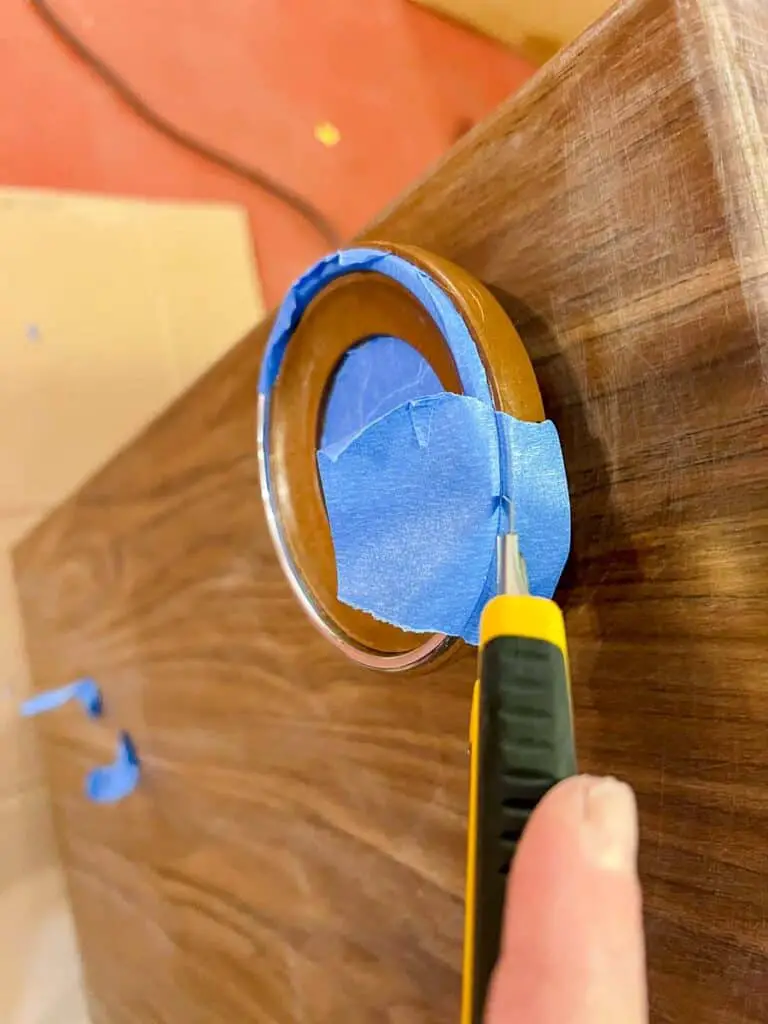
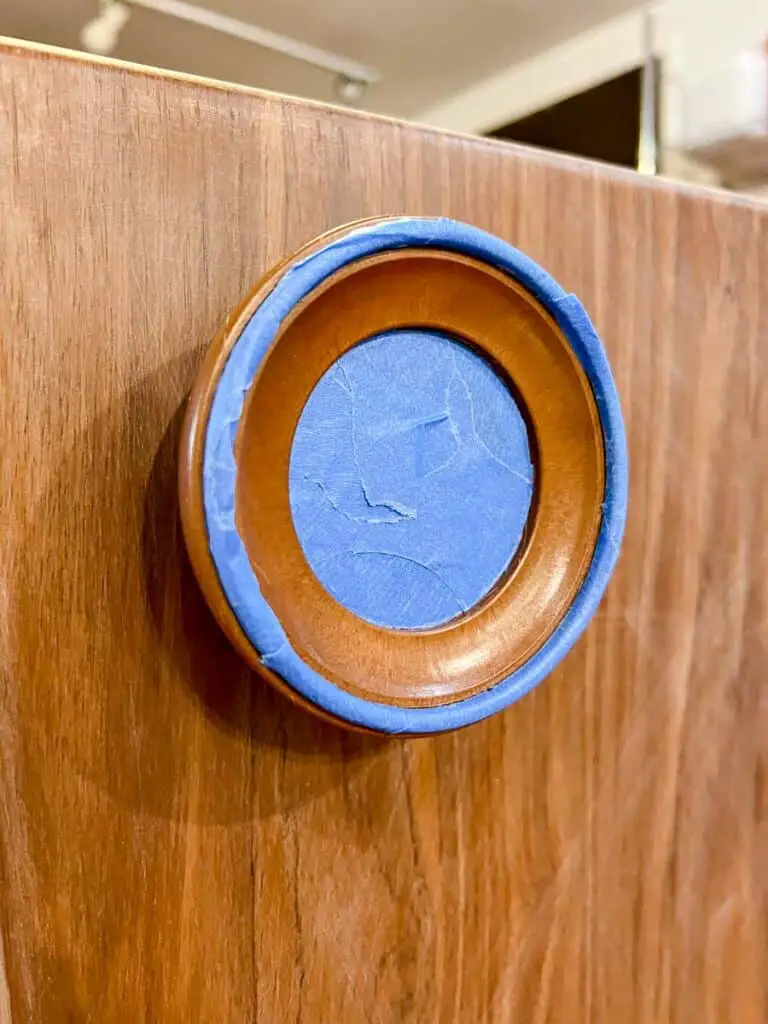
As for the seal, use your best judgment. I started to remove this 40+ year-old seal, but I was concerned I would damage the seal by stretching it out, so I just taped it. That was easy and no paint seeped through.
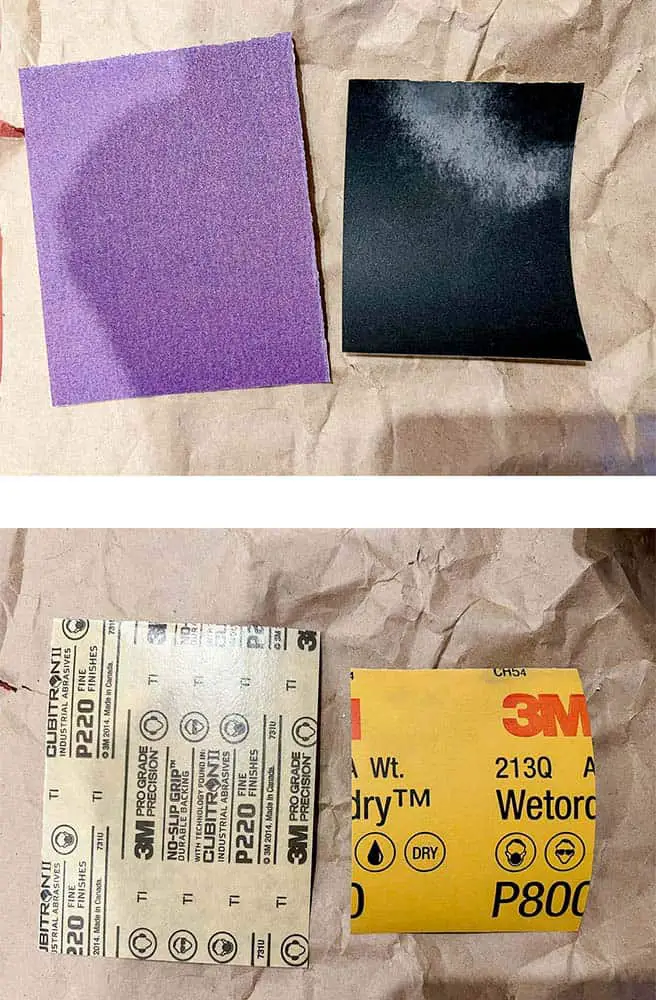
Sand Lightly, Then Clean and Tape
Do not skip this step. You’ll need to sand all paintable surfaces with a light sandpaper or sanding block. Sanding roughs up the smooth surface so the primer can really grip on and create a bond between the old and newly painted surfaces.
Sand both the metal sides of your fridge and the plastic door panels. I used this 220-grit sandpaper. For a larger fridge, it would be easier to use this 220-grit sanding block over the large panels. You could also use finer sandpaper, but I wouldn’t go coarser than 220, or you might start to see scratches on the surface (through the paint).
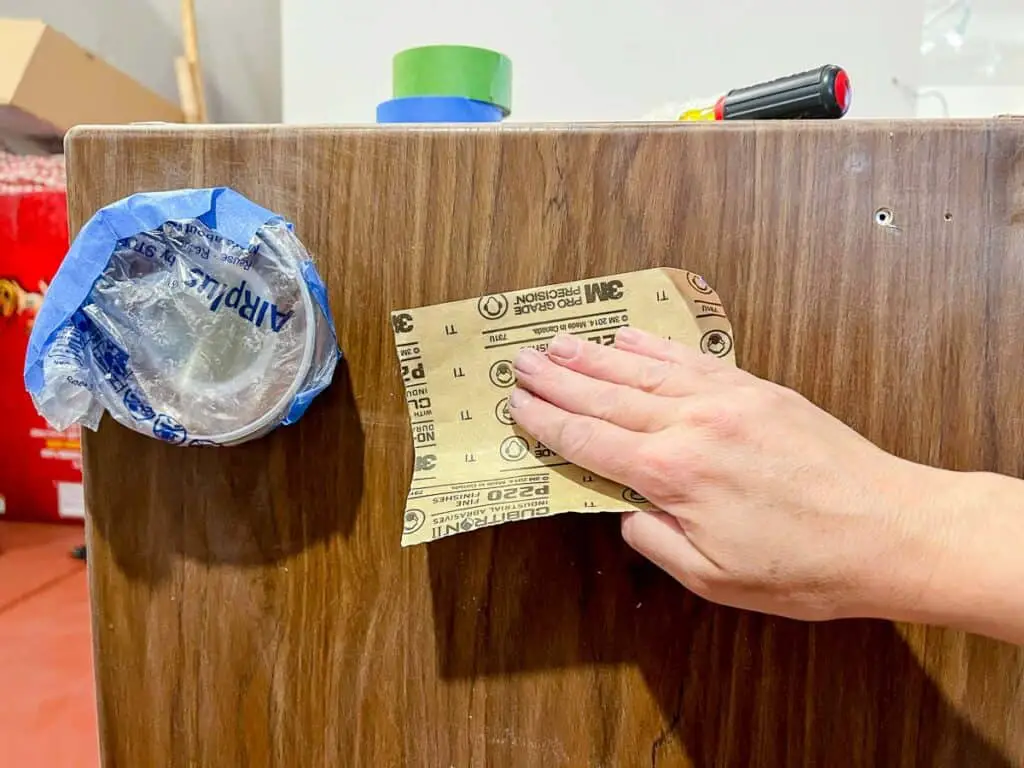
Carefully wipe down all surfaces to remove any trace of dust from the project. You can use tack cloth or microfiber, anything lint-free.
Double-check that all taped-off areas around the frame and seals are securely taped down.
Ready for Prime Time
Read this section about choosing primer if you skipped it. I used X-I-M UMA bonding primer for this project, but you must source a good bonding primer to paint a refrigerator.
Use a 4″ or 6″ roller for this project – not a brush. I chose this foam roller cover for the smoothest finish possible. Personally, I find a 4″ roller easier to control on a project like this, but if you’re an experienced DIYer, you might want the 6″ frame.
Apply one good coat of primer with the small roller.
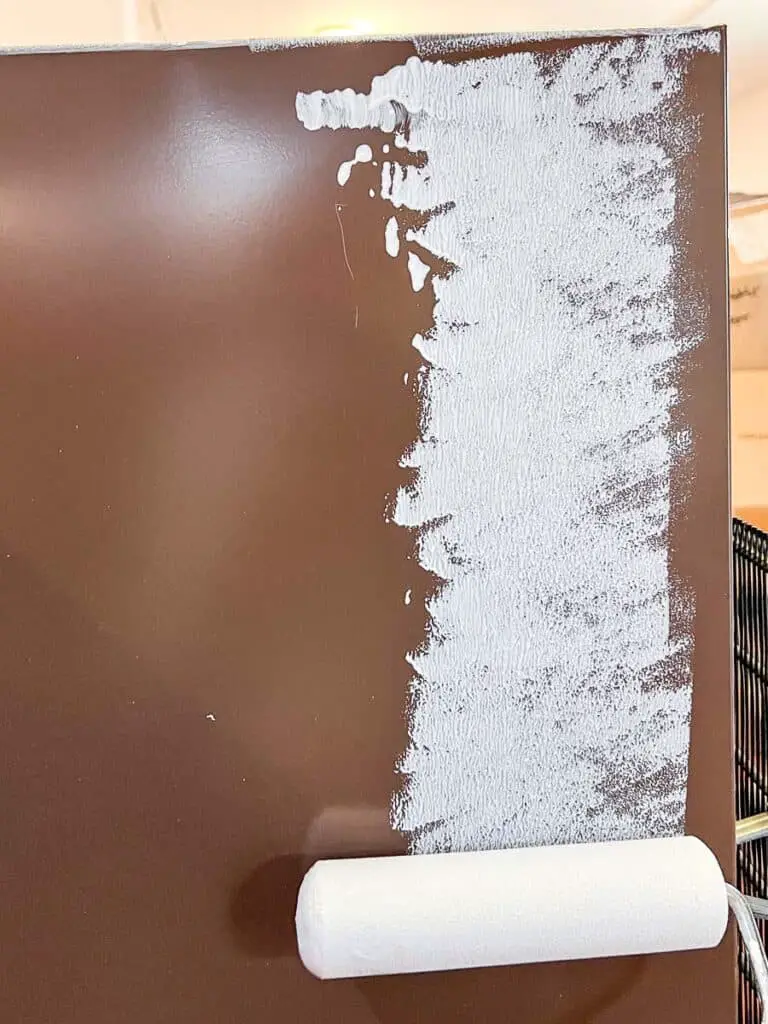

Once the primer has dried, it’s your decision whether or not to sand and clean again. I did because I wanted the smoothest finish possible. If you have it, use 320- or 400-grit for this final primer sanding. I used what I had on hand, and it looks like 800? Overkill, but it works.
It’s also a great idea to retape all surfaces before you crack open the paint.
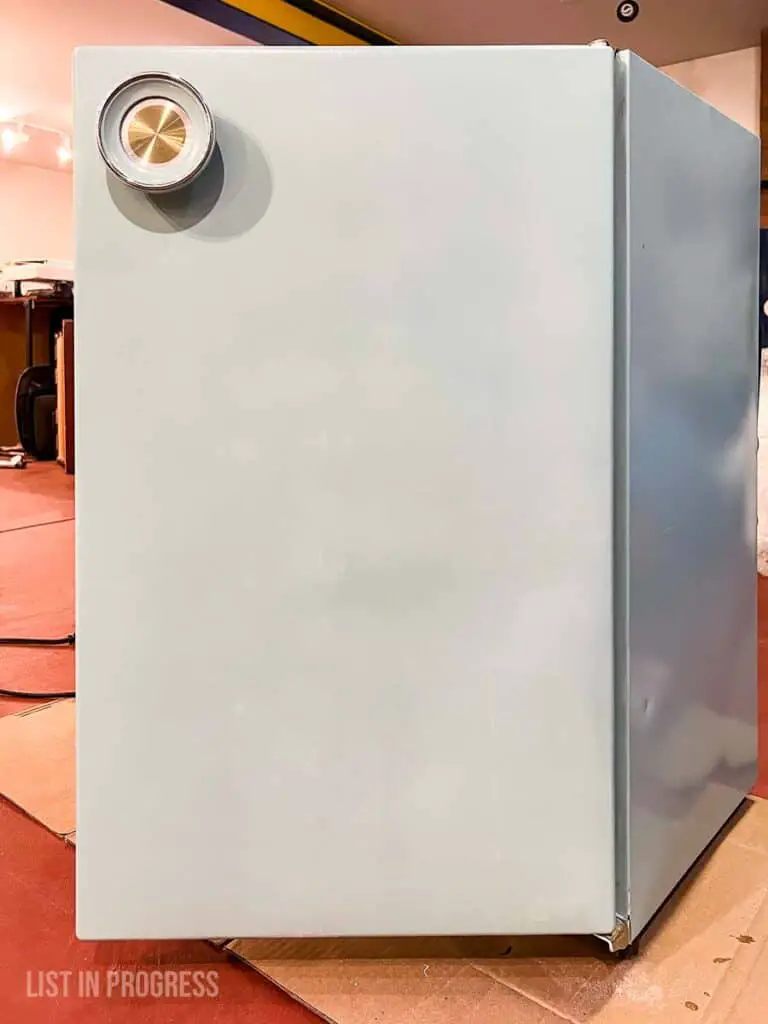
Paint – At Last!
You made it! Time to apply your dreamiest paint color to this perfectly prepped fridge.
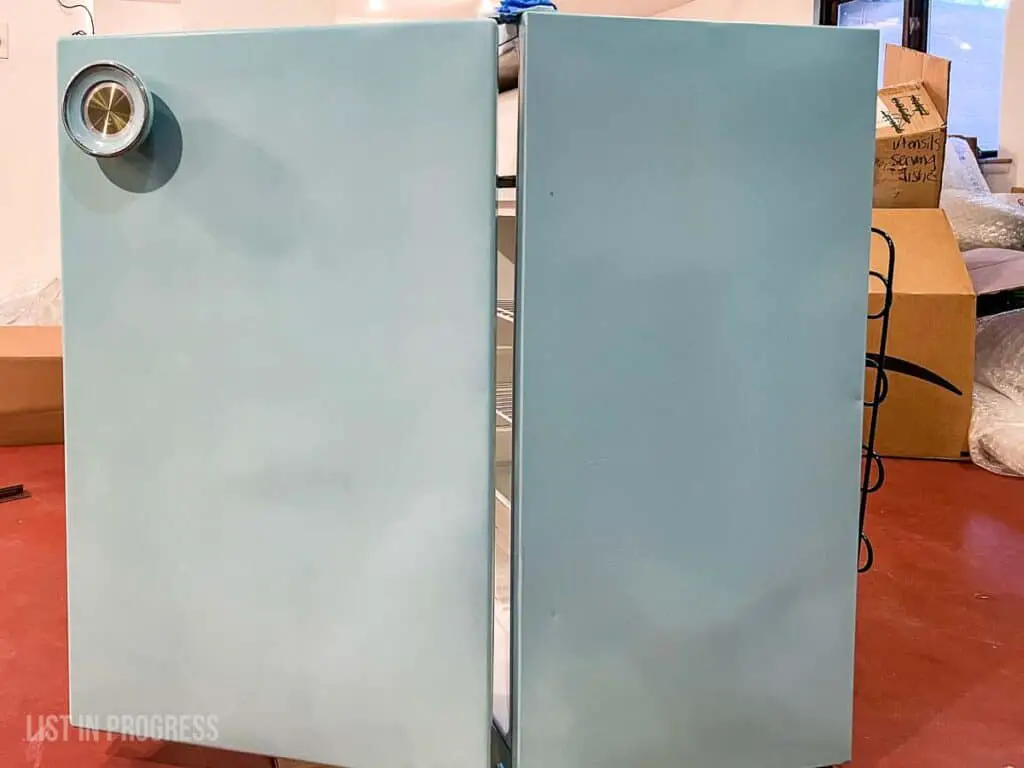
I chose Benjamin Moore Regal Select in semi-gloss, which is a high-quality acrylic paint, and the color is Hazy Blue (2040-50).
Using the same small foam roller, paint two coats, allowing the suggested dry time between coats. Refer to your paint can for drying time directions.
Carefully paint around the plastic interiors. I didn’t tape everything off because I use these small foam brushes, which are easy to control. Plus, it’s easy to wipe off paint mistakes with a wet rag.
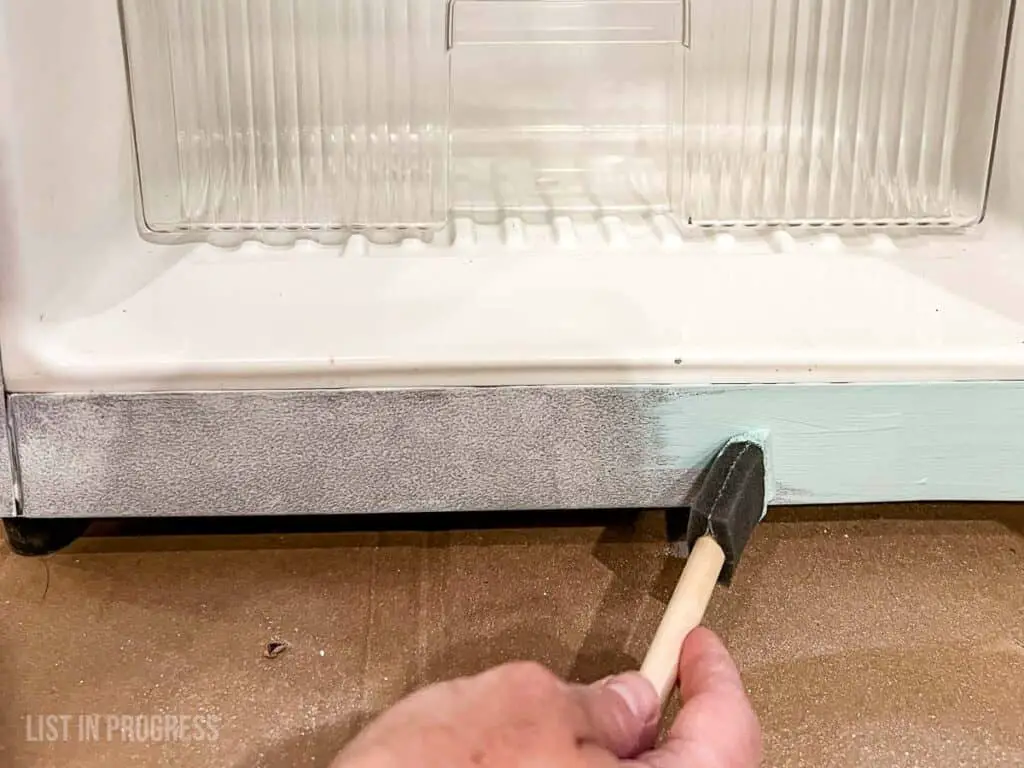
Painting the Handles and Grille Cover
To paint the handles, you might want spray paint for a more durable finish and contrasting color. My mini-fridge handle is unique, and I only painted the brown plastic handle bits.
If you have removable handles in a matching original color, I recommend researching good paints for high-touch plastic. This article has suggestions and I would pick this Krylon Fusion All-in-One spray paint. You might need a sealing topcoat, too. Read the directions, but it might be smart to follow the same sanding/priming prep steps first. Good luck.

You’ll also need to paint the kickplate grille. You could choose the same paint color as the fridge or match the handles for contrast.
Reassemble and Admire
Once all of the components are dry, you can reassemble the fridge. If possible, it’s nice to give the fridge an extra 24 hours to let the paint cure, but I realize this might not be possible. Just warn everyone in your house to be super careful with your new baby for a few days.
Keep a small amount of paint on hand for future touch-ups. You should have plenty left over if you buy one quart for this project.
15 Tips for Installing Vinyl Plank Floors
Want to see the rest of this remodeled home tour? Come on over and check it out!
Our Fully Remodeled House in Denver
Share Your Photos!
If you try this project, please send me a photo! I would love to share them here in this blog post.
What color would you choose? Flamingo pink? Navy? Hunter green?
You Might Also Like:
The Easiest Way to Paint Cabinets
The Best White Ceiling Paint for DIYers
Two Great Cabinet Paints for Your Kitchen


