

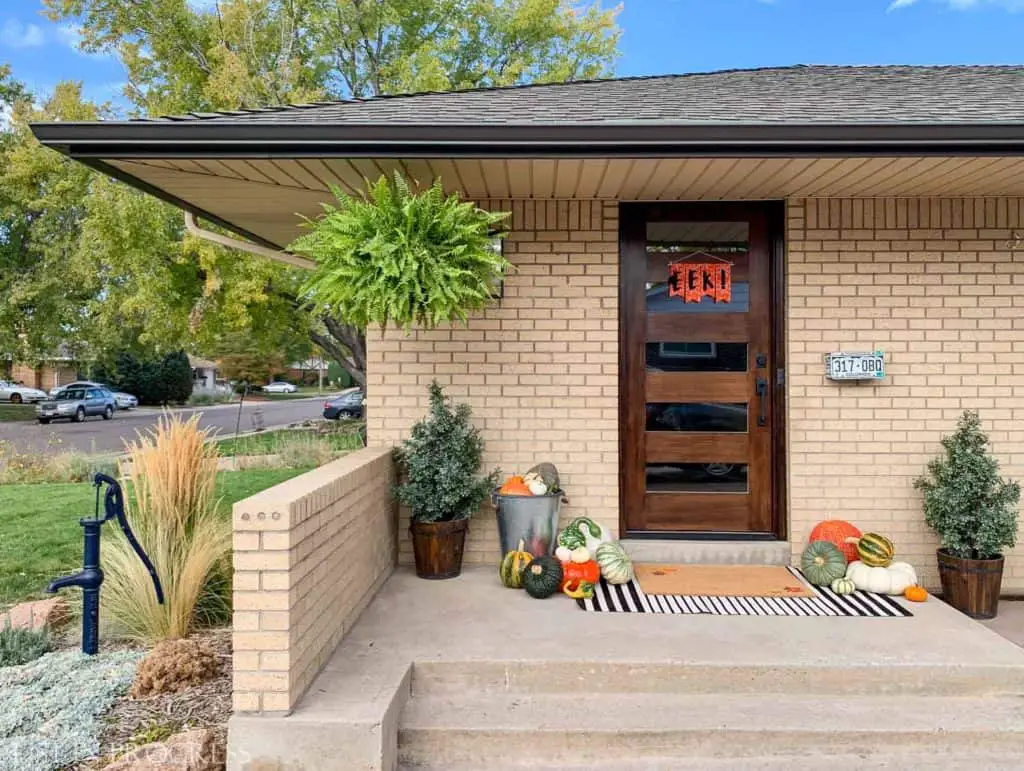
Today, I’m excited to share tips to install and stain a new front door, which will give your curb appeal a major boost. This project has been months in the making, because we got sidetracked over the summer with other outdoor projects, like a veggie garden, our back porch makeover, and a new fence. I have to say, this was not an easy project, but I love our new front door with a slightly obsessive passion. Here’s the big reveal, so I can share how we pulled off this DIY project.
This post contains affiliate links. Read my full disclosure here. Thanks for supporting my blog.
Project Overview to Install and Stain a New Front Door
- Buy a new, prehung front door (see note below)
- Demo original door and frame
- Install new prehung front door
- Stain the door and jamb
– remove door and lay flat to stain
– stain jamb
– stain trim BEFORE installing
– rehang door
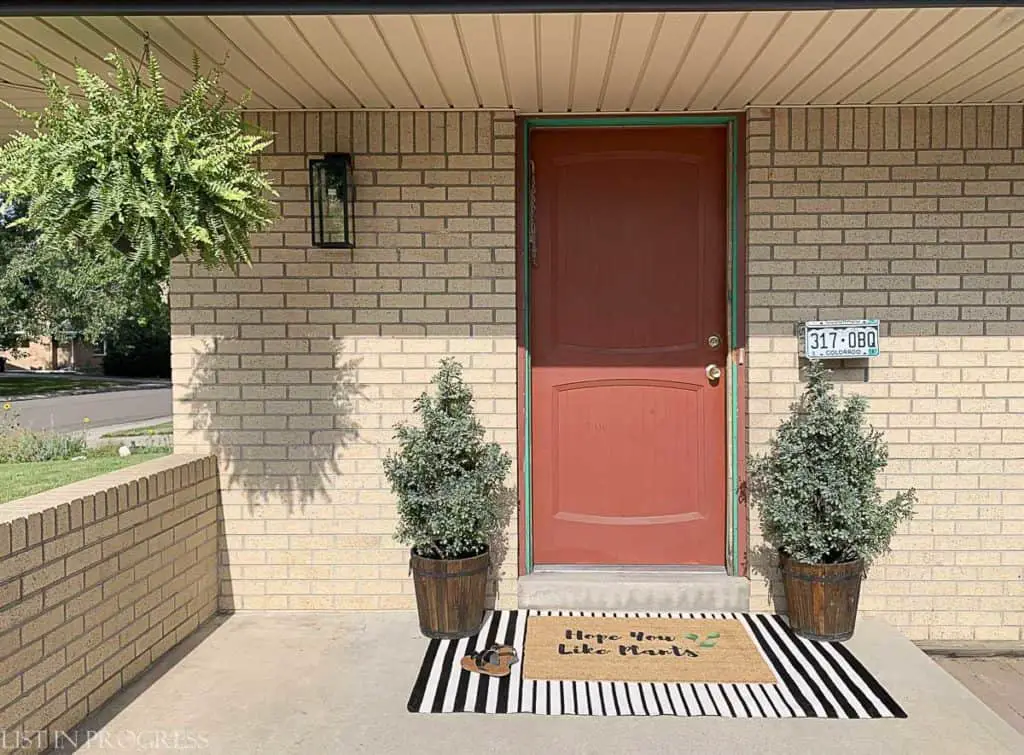
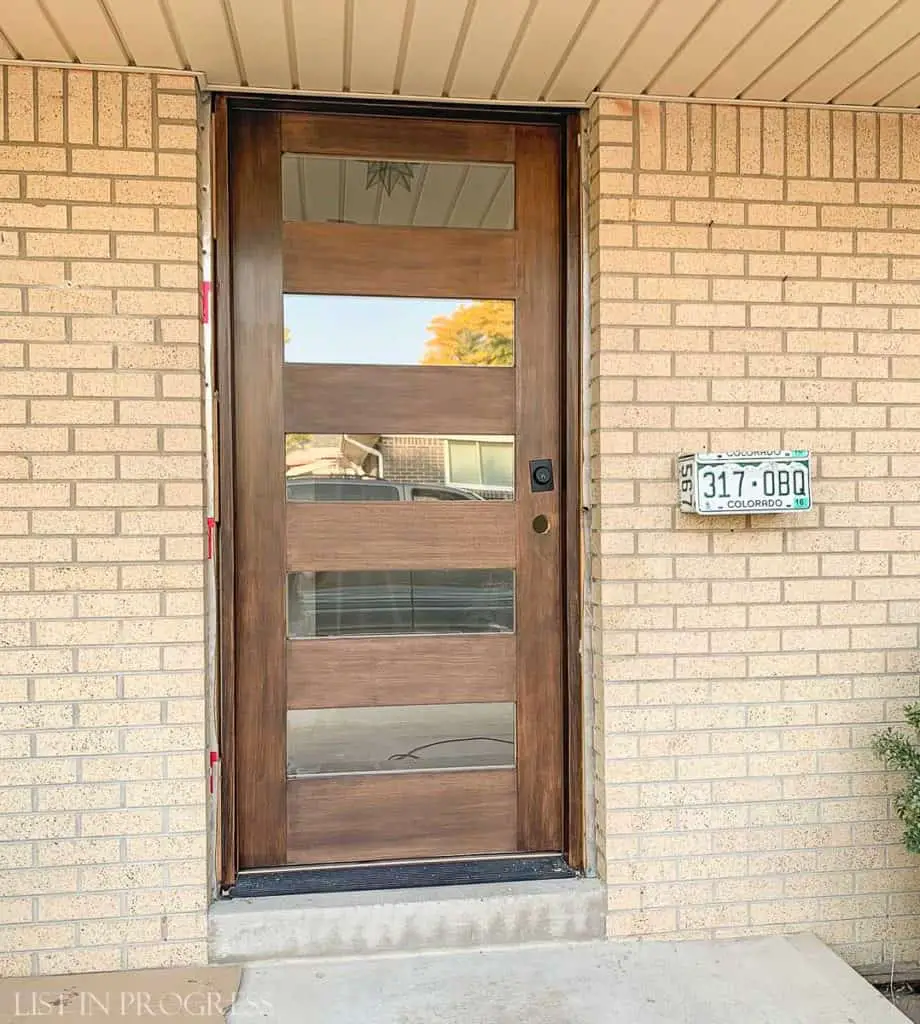
Before you can install and stain a new front door, you’ll need to buy one, right? Check out my previous post: How to Buy a New Front Door for more info. I covered different door materials, how to determine the swing, and where to shop for doors. After extensive research, we ordered this unfinished, prehung Simpson Douglas fir door from a local trim supply shop. It sat in our garage for about six months before we got our act together to install it! This is what the original door looked like:
> How to Buy a New Front Door
> How to Make a Doormat with a Custom Stencil
A Few Tips to Install a New Front Door
Once you demo your front door, you’ll need to be ready to move on this project. So plan ahead! Choose a weekend with decent weather, because your house will be wide open for most of one day, and possibly two, if things get dicey.
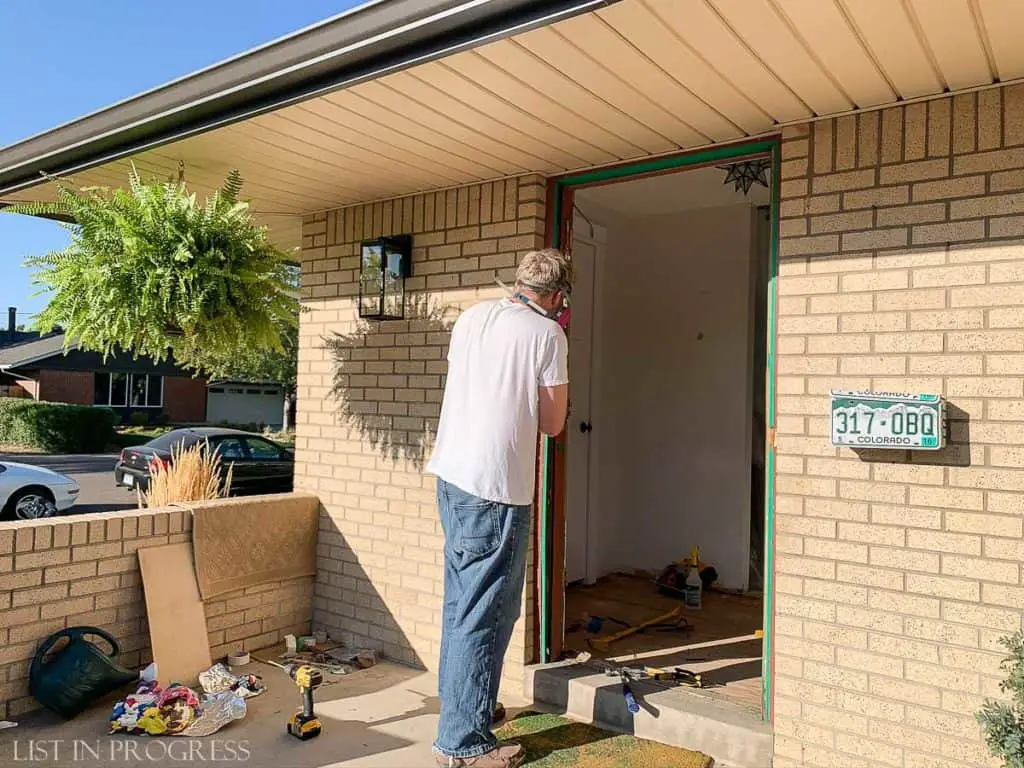
If you google this topic, you’ll find a dozen tutorials to install a new front door. Lowes has done a very thorough and clear job of explaining the installation steps. Read this tutorial for all the details. This was a two-person job for us, because our wood door is very heavy, and it helps to have one person hold the door in place while the other attaches the frame. Here I’ll fast forward to show you the installed door and frame:
How to Stain an Unfinished Fir Door
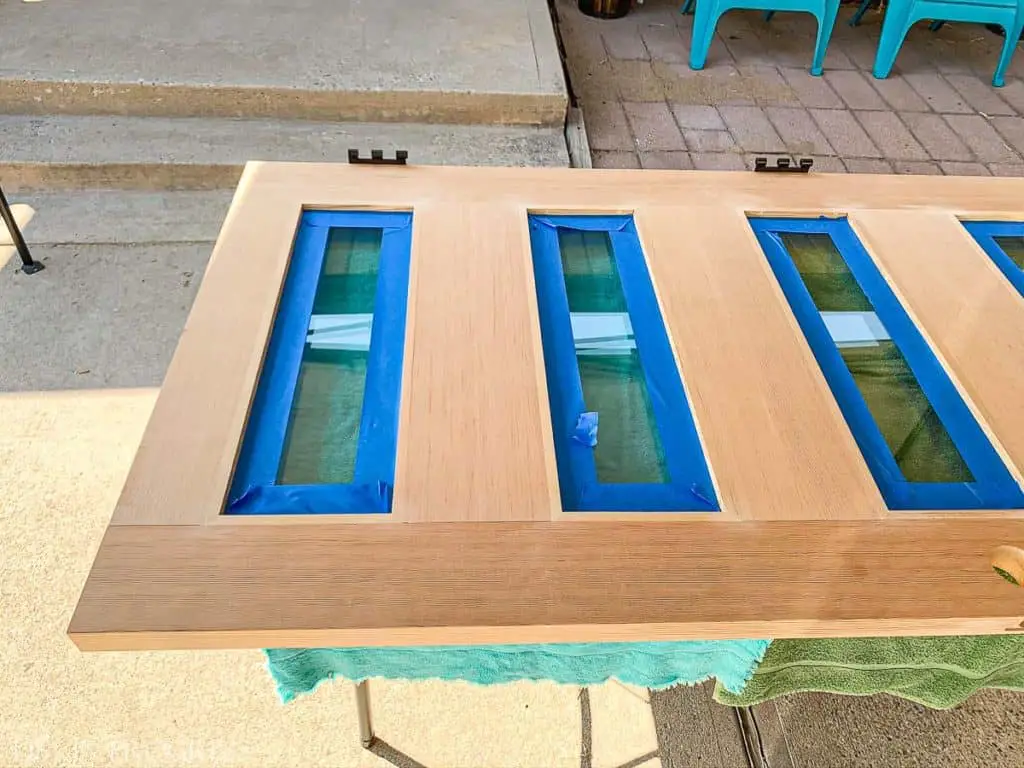
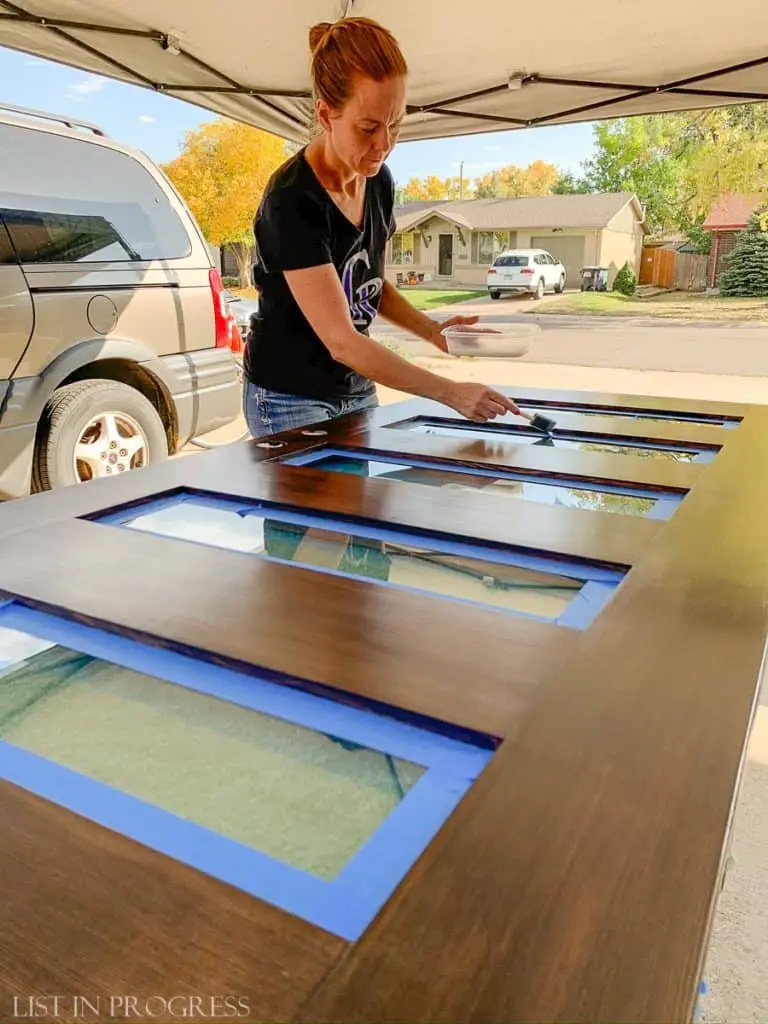
Finishing the door is the last step in the process, but the most time-consuming. Wait to stain a new front door until after you’ve installed the jamb, so you don’t damage the door finish. We removed the door from the hinges, laid it flat on a folding table, and I started to stain while Wyatt finished installing the jamb. When he was done, he helped stain the door, because it quickly became a two-person job.
DIY tip – stain the trim pieces last, before installing them. This can be done after the door is installed, and it’s easier to control the stain process when the trim is flat on a table. Just touch up the nail holes after it’s installed.
Just FYI, I found the staining process to be quite tricky. This is one of the harder DIY projects we’ve tackled, since we have super high standards for our work. If we weren’t trying to save money, I would have happily hired a professional. With that said, here is how we pulled it off.
*** IMPORTANT: Practice your entire stain procedure first. Buy a piece of wood in the same species as your new door from a trim supply shop or hardware store. Run through ALL of the steps to practice. It will be harder to apply the stain evenly on the door, so you need to have the other steps under your belt.
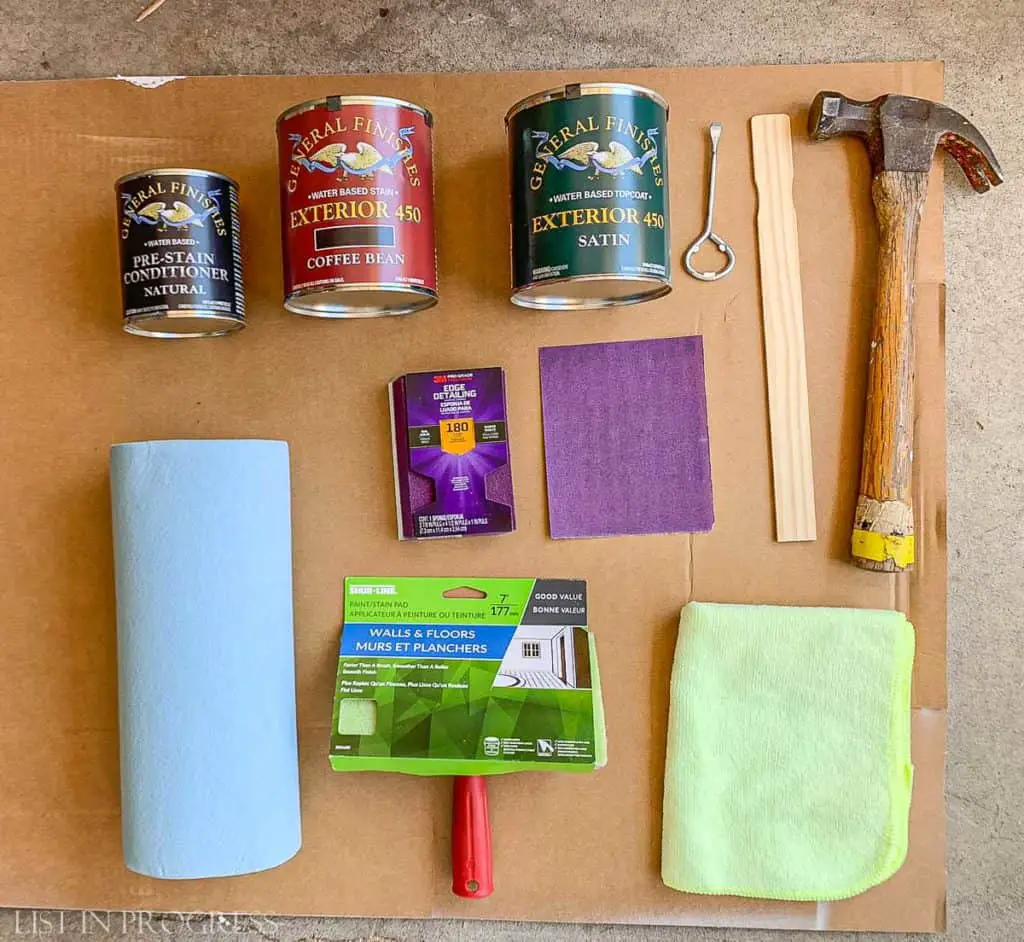
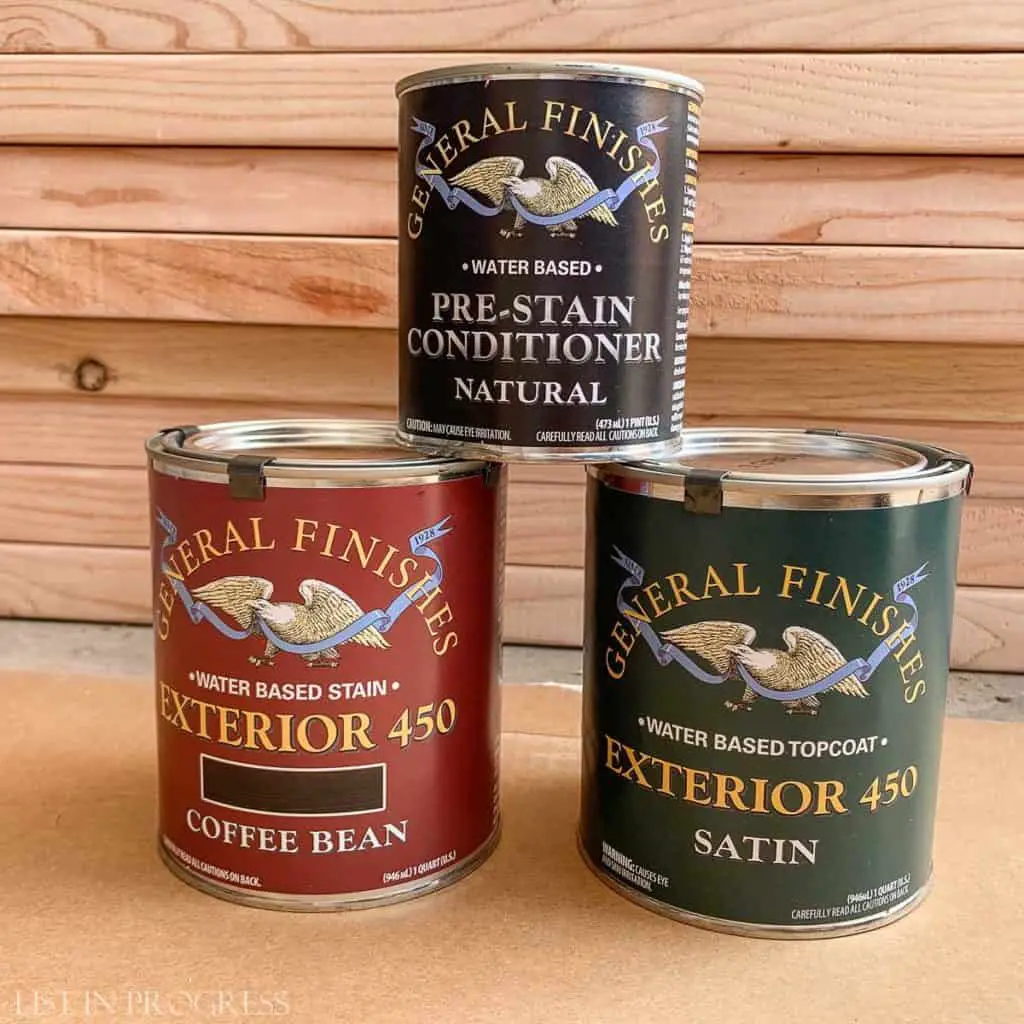
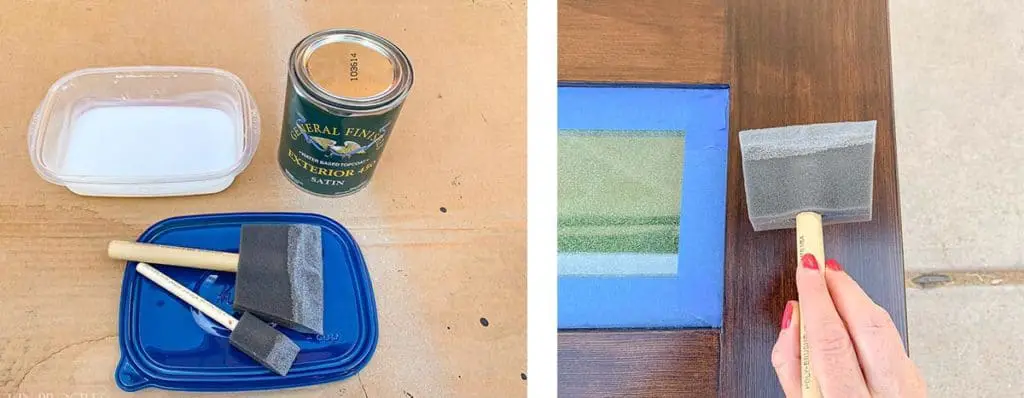
Stain Project Materials:
- awl
- plastic putty knife
- sandpaper – I used 180 grit and 220 grit papers
- microfiber cloth or tack cloth
- wood putty
- painter’s tape
- screwdriver
- paint brush (for wood conditioner)
- foam paint pad
- 1″ foam brushes and 4″ foam brushes
- shop paper towels
- General Finishes Pre-Stain Conditioner
- GF Exterior 450 Water Based Stain in Coffee Bean
- GF Exterior 450 Water Based Topcoat in Satin
- Varathane stain marker in Dark Walnut
Prep Steps Before You Get to the “Fun” Part
First, remove all hardware from the door so that you have a slab of wood. I recommend labeling hinges top, middle, and bottom, so you ensure to match them correctly when you reinstall.
Then, if you have excess window glaze around the glass, you’ll need to carefully remove it with an awl. This video is helpful. This awl worked perfectly for me, but be very careful not to scratch the glass! I used a plastic putty knife to remove the glaze, after I had cut through it with the awl.
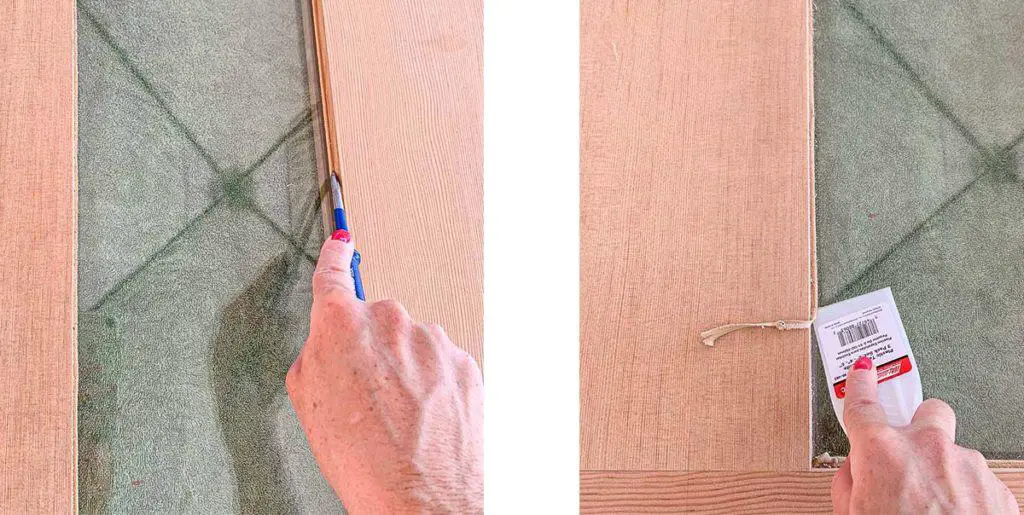
Next, tape off any glass, fill door knob holes with paper towels, and cover the mortise plate (where the latch sticks out) with tape. I also taped around the edges of the door because I wanted a crisp line of dark stain; I left the interior side of the door unstained. Traditionally, the side edge that will be visible when the door is open should be the same color as the exterior. So, I stained the hinge-side edge of our door, but I left the latch-side edge unstained, since it swings into the house.
Fill any gaps or cracks with wood putty. You’ll need to sand it once it’s dry. I like this wood putty since it dries quickly and cleans up easily with water.
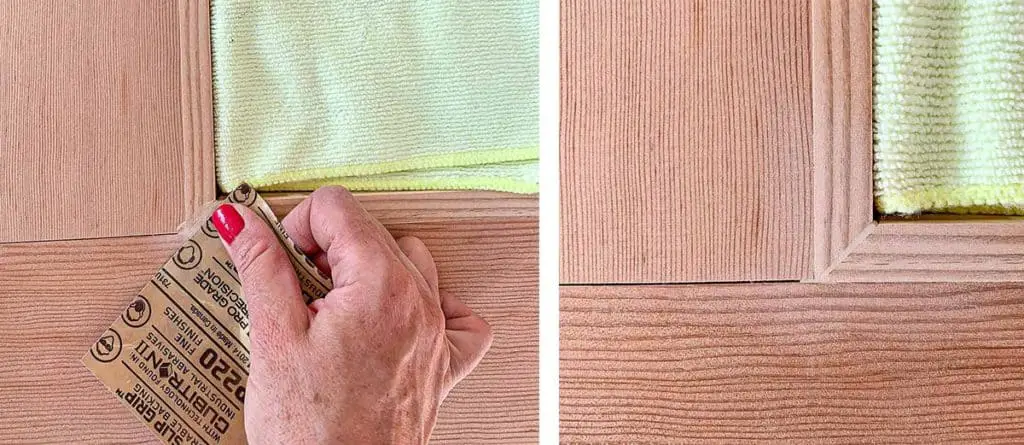
Next, lightly sand the door, moving with the grain, using 180-grit sandpaper. Wipe off every speck of dust with microfiber or tack cloth. I prefer microfiber, because it can be washed and reused, unlike tack cloth.

Ready, Set, Stain!
After much success with General Finishes Milk Paint products on my kitchen and bathroom cabinets, I turned to GF for stain. I bought their Exterior 450 Water Based Stain and Topcoat products because they’re low-odor and clean up is simple. Compared to my disastrous attempt to stain our new cedar fence with oil-based stain, this was SO MUCH easier. Plus, no worries about spontaneous combustion in the trash can!
> The Easiest Way to Paint Cabinets
These are the steps to stain a new front door with GF Exterior 450 stain and topcoat:
- Make sure the door is clean and lint free.
- Apply wood conditioner with a foam or bristle brush, it doesn’t really matter which. This brush is my favorite.
- Wait 20 minutes but not too much longer to begin staining.
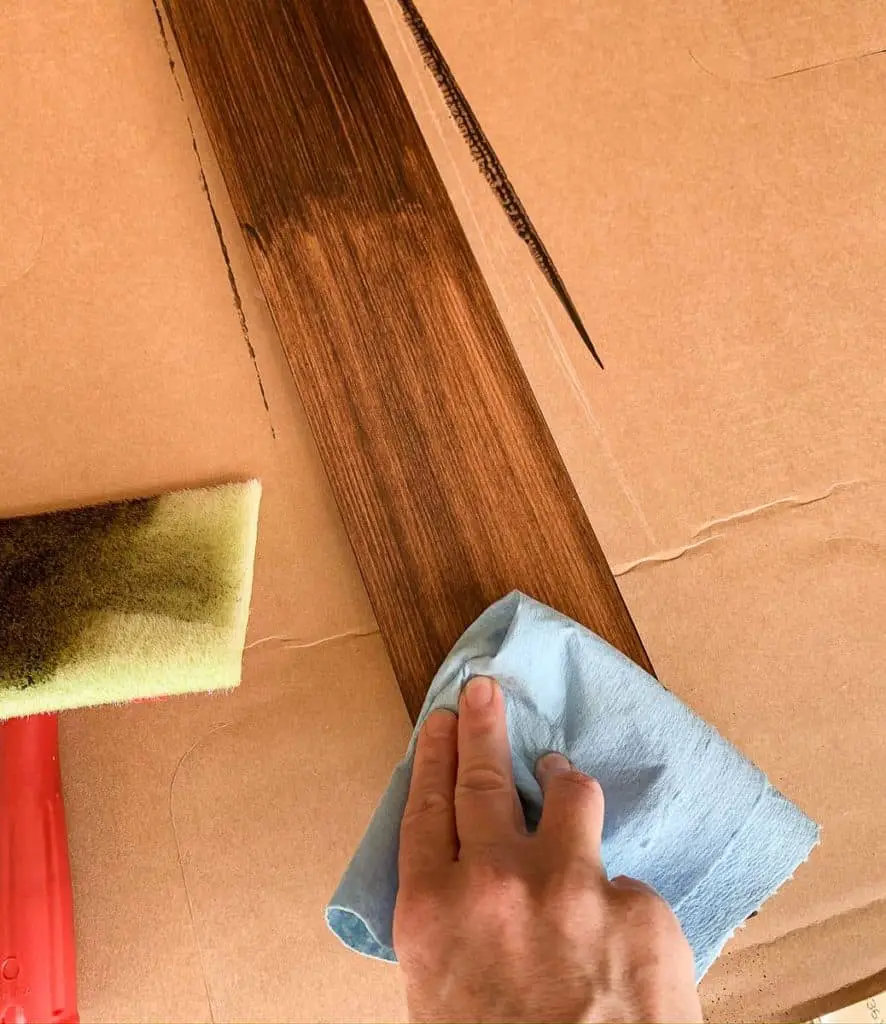
- Apply stain in smooth strokes, following the direction of the grain. I used this foam pad for the widest application and these foam brushes for narrow areas around the glass panels.
- *Evenly* wipe off stain using paper towels or shop towels. These are great.
- Let stain dry and then lightly sand using 220-grit paper. Even out any dark blotches while sanding. Wipe clean.
- Repeat process: apply second coat of stain and wipe off.
- Decide if you need to sand/repeat stain application again. We didn’t sand after our third stain round.
- Apply 3 coats of clear, protective topcoat, sanding in between coats. I used these 4″ foam brushes.
Our Experience with Stain
Wow, typing out those nine steps above makes this process sound much easier than we found it to be. Because our climate is so dry, the stain dried almost immediately and if we didn’t wipe off the stain evenly, it looked very splotchy. We went round after round of sanding down the crummy areas and then attempting to restain. Ugh. I don’t want to ever stain another door! Here’s how it went for us:
Stain round one – yikes!
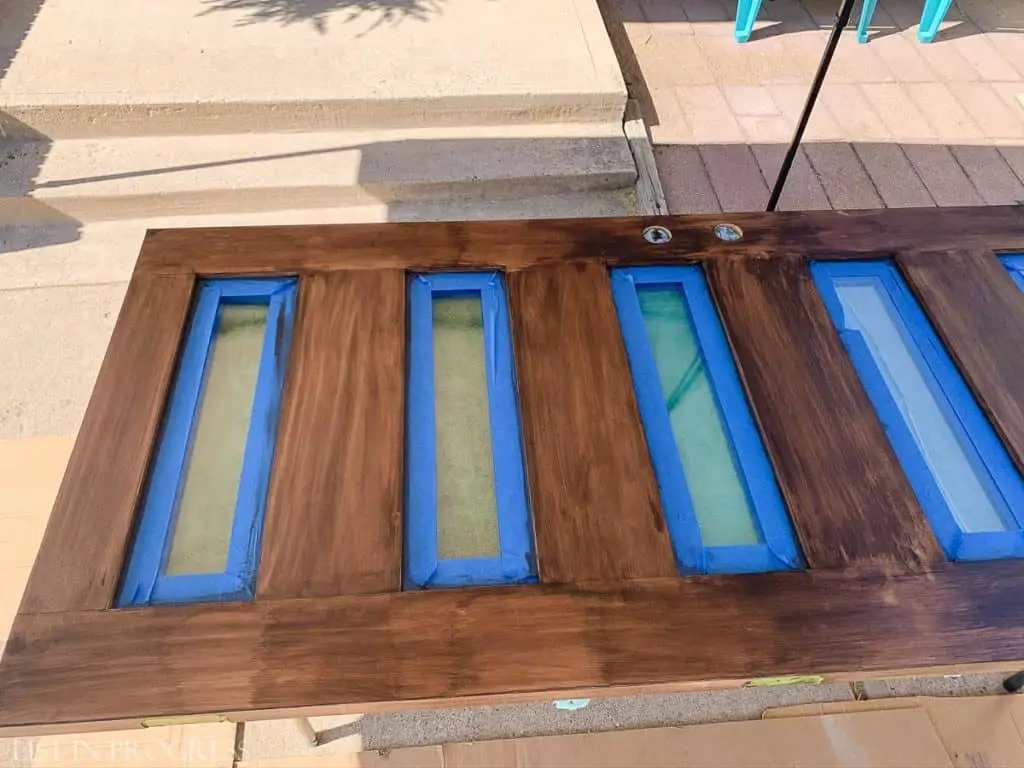
Sanding down blotches with 220-grit. (We did not use the orbital sander in the photo because it was too aggressive.)
Stain round 2 – looking a little better:
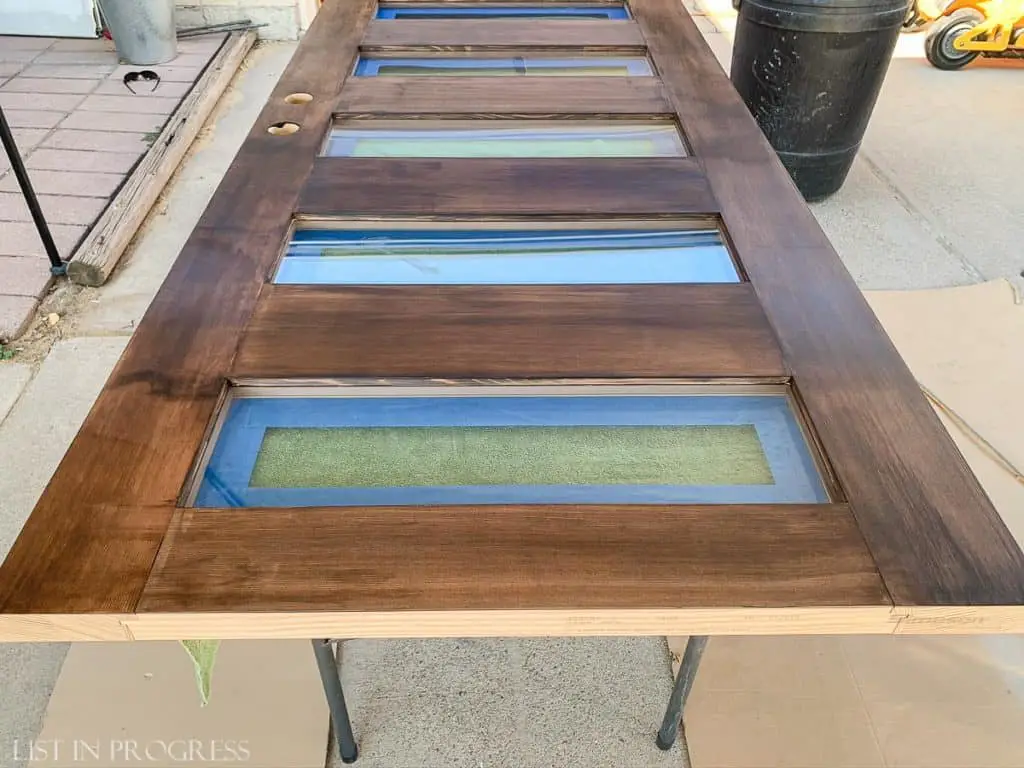
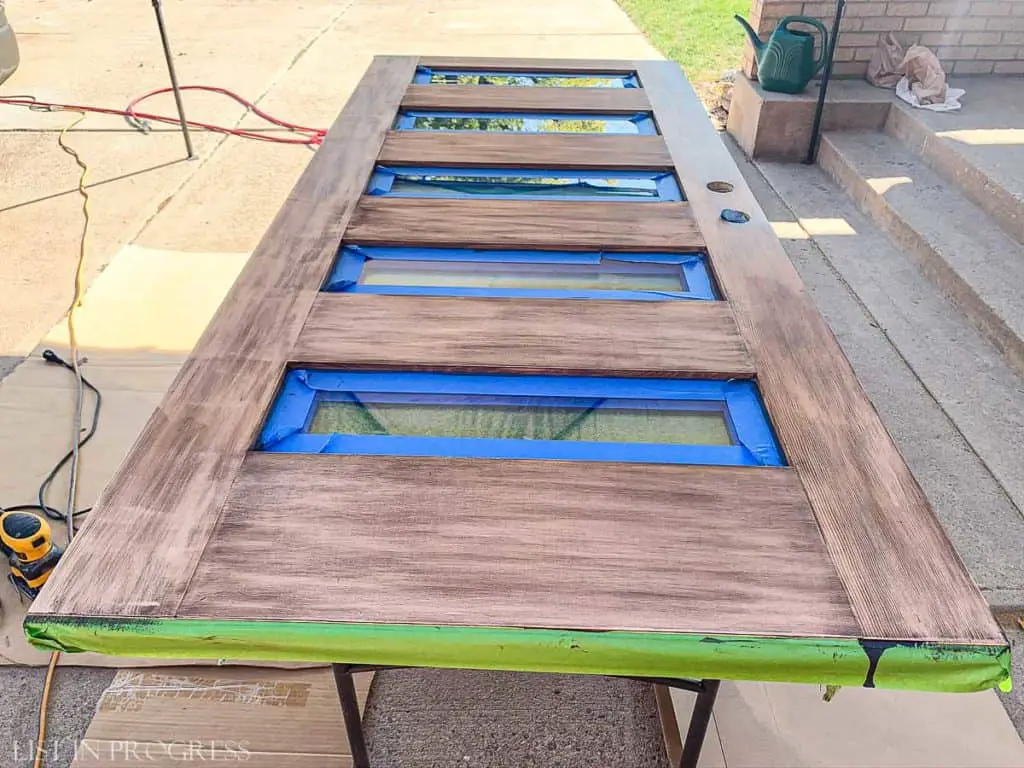
Stain round 3 – our best effort yet:
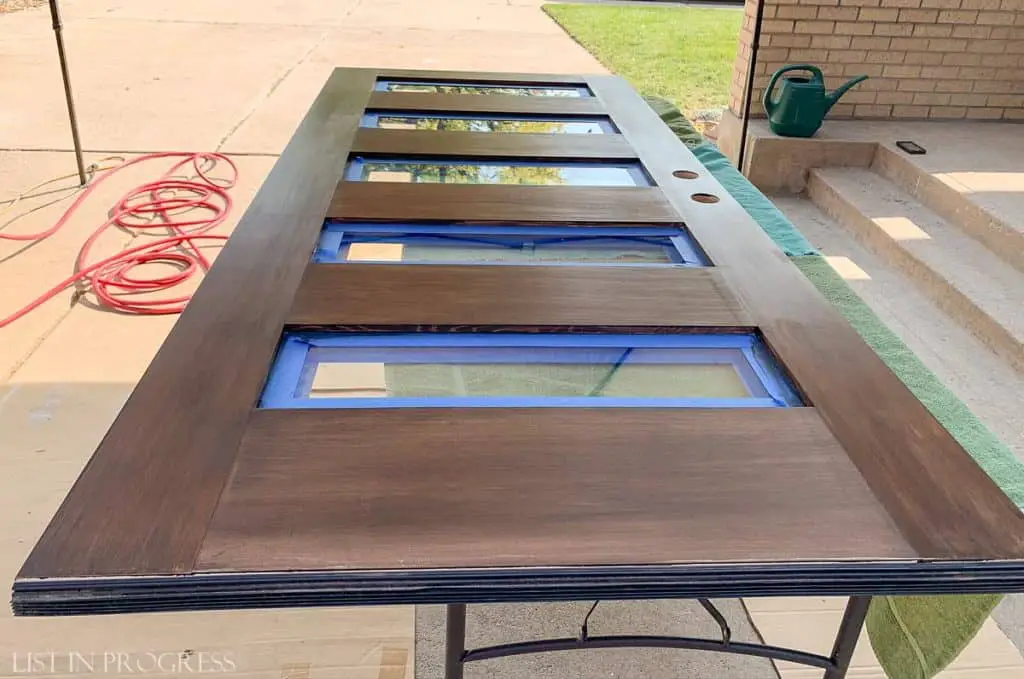
Then, 3 coats of topcoat, sanding in between coats. I poured the topcoat into a disposable plastic container because it’s easier to dip the brush and save any leftover product. The clear coat is easy; just brush it on, without a lot of back brushing and the lap lines will “tighten down” as it dries. That’s painter speak for “brush strokes will smooth out.”
Stain Process Tips We Learned Along the Way
- As I learned the hard way, Douglas fir is difficult to stain evenly. Because of this, General Finishes recommends a 50/50 mix of stain and clear coat instead of their wood conditioner. I missed that note in their FAQs. Oops.
- Buy extra paper towels or shop towels. We went through three rolls of towels on this door, and we only stained the outside!
- Set up a “wiping device” to clean off the stain with even pressure. Wyatt wrapped a scrap piece of wood with several paper towels and then pushed the wood along the surface to wipe off stain. This actually worked pretty well!
- Retape each day so the finishing products don’t seep under the tape and look splotchy.
- Anticipate that it will take a few days to install and stain a new front door. It could be done faster if you’re not dealing with kids.
- Once you finish the majority of the stain, use a stain pen to fix any small areas or mistakes before applying topcoat. This is much easier than adding another entire coat of stain! This Varathane stain marker in Dark Walnut matches the Coffee Bean color almost perfectly. I have had zero issues mixing the oil-based pen with water-based stain, but professionals might slap me for this.
- Once the door is dry, clean stain/topcoat from glass panels by carefully wiping with a damp rag or towel.
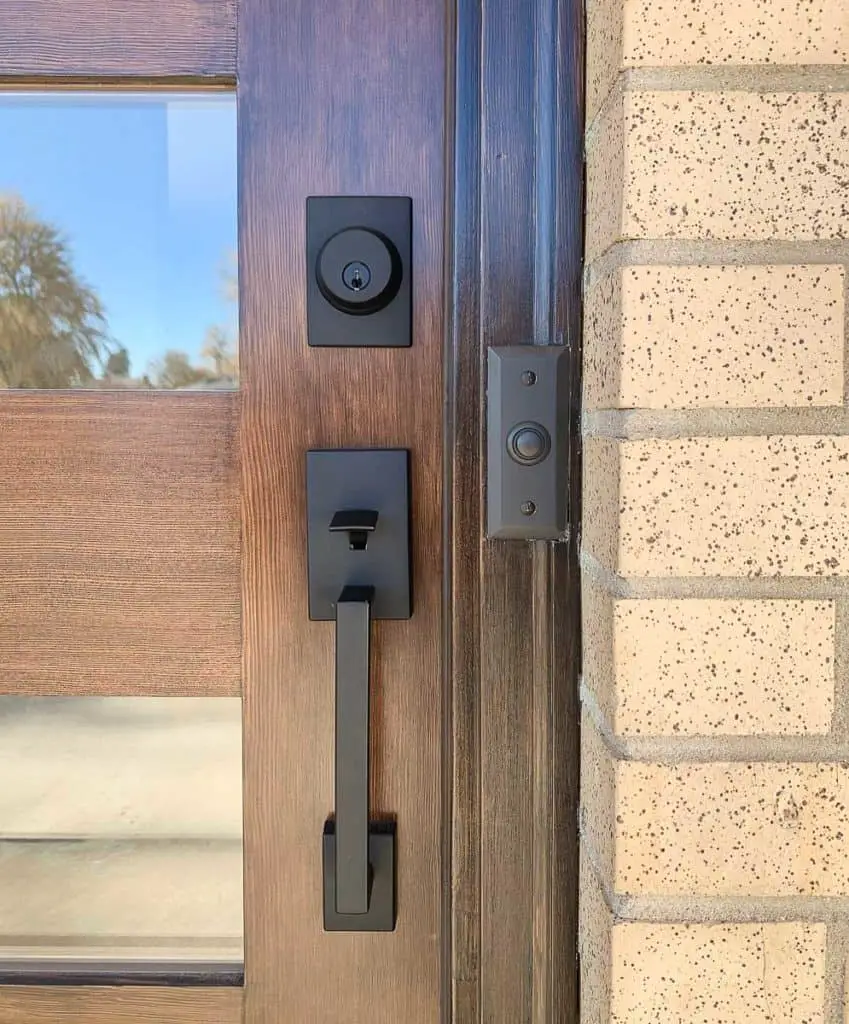
- While the door was in process, we only installed the deadbolt at night as a temporary way to lock the door. Wyatt waited to install the door handleset until the door was completely finished.
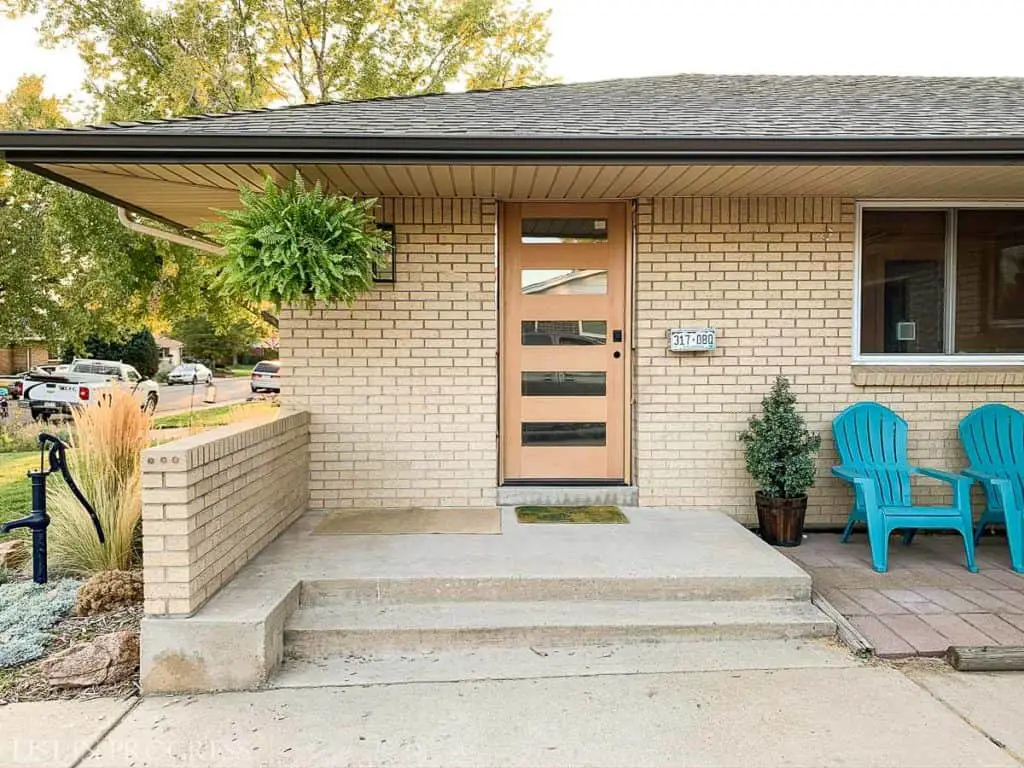
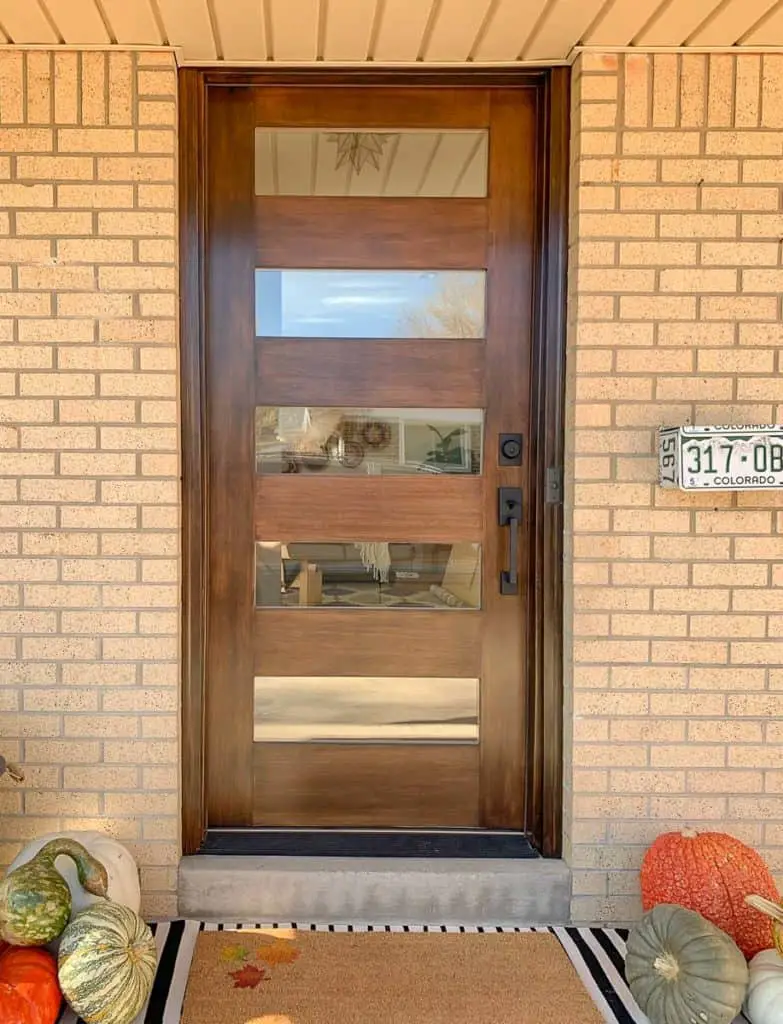
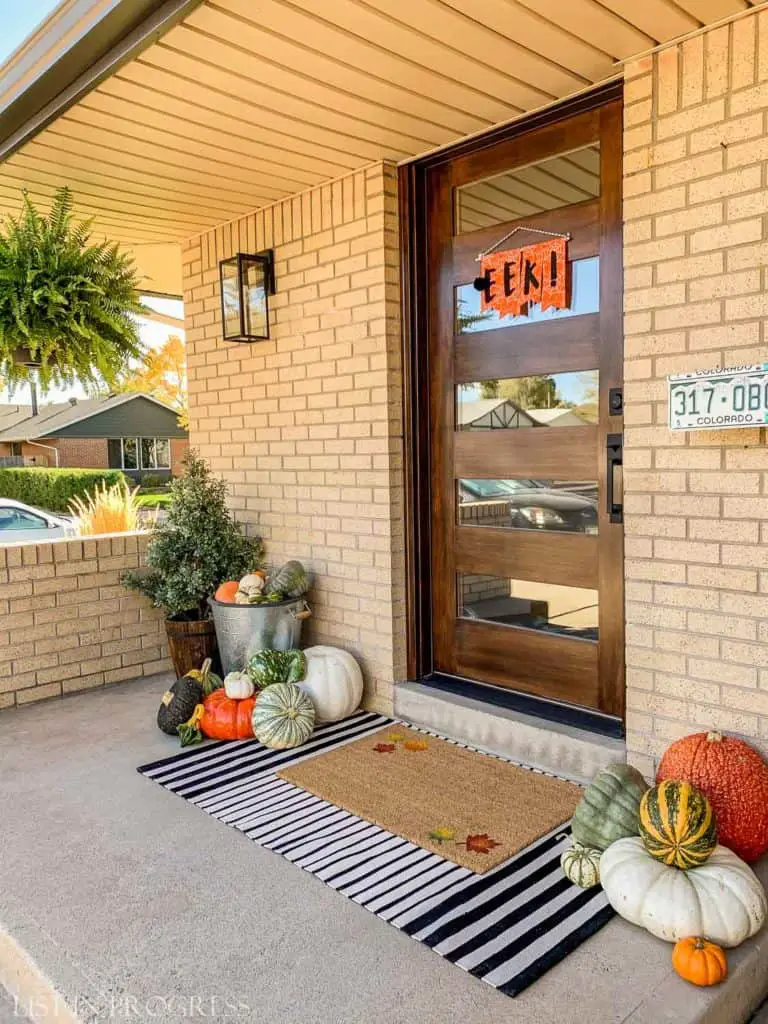
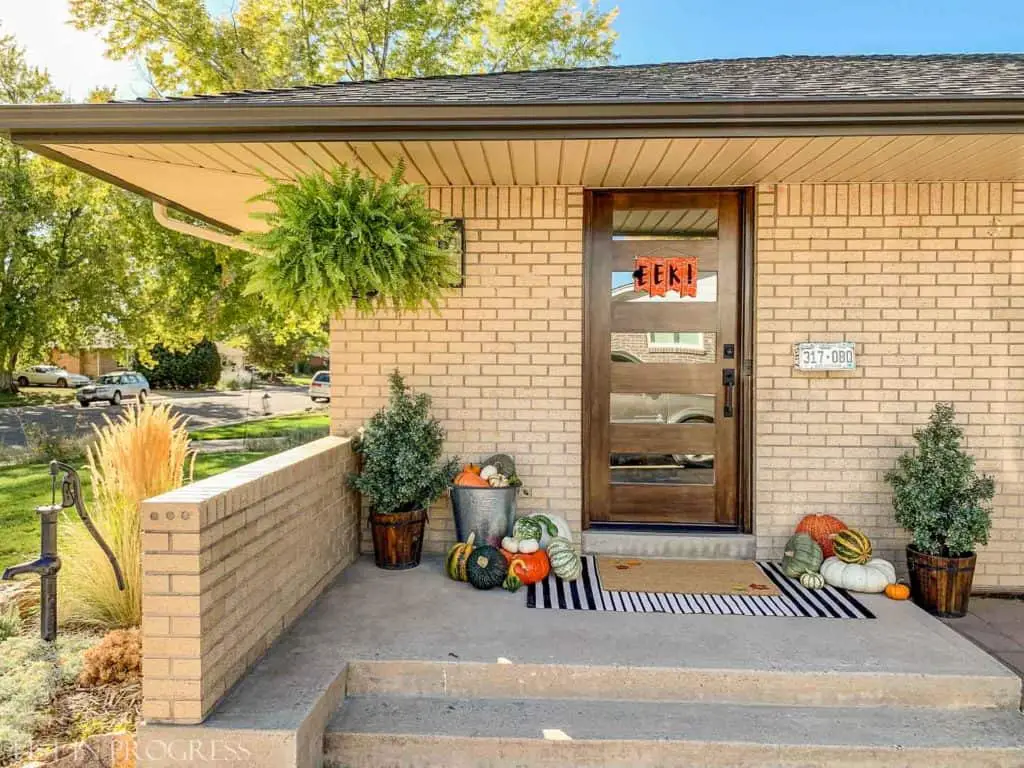
Drumroll Please… Here’s Our New Front Door!
The stain looks even better in person than in these photos, and I’m really pleased with how it turned out. I’m also glad this project is behind us. Ha! The door has changed the entire look of our midcentury house, and in my completely biased opinion, it’s just beautiful.
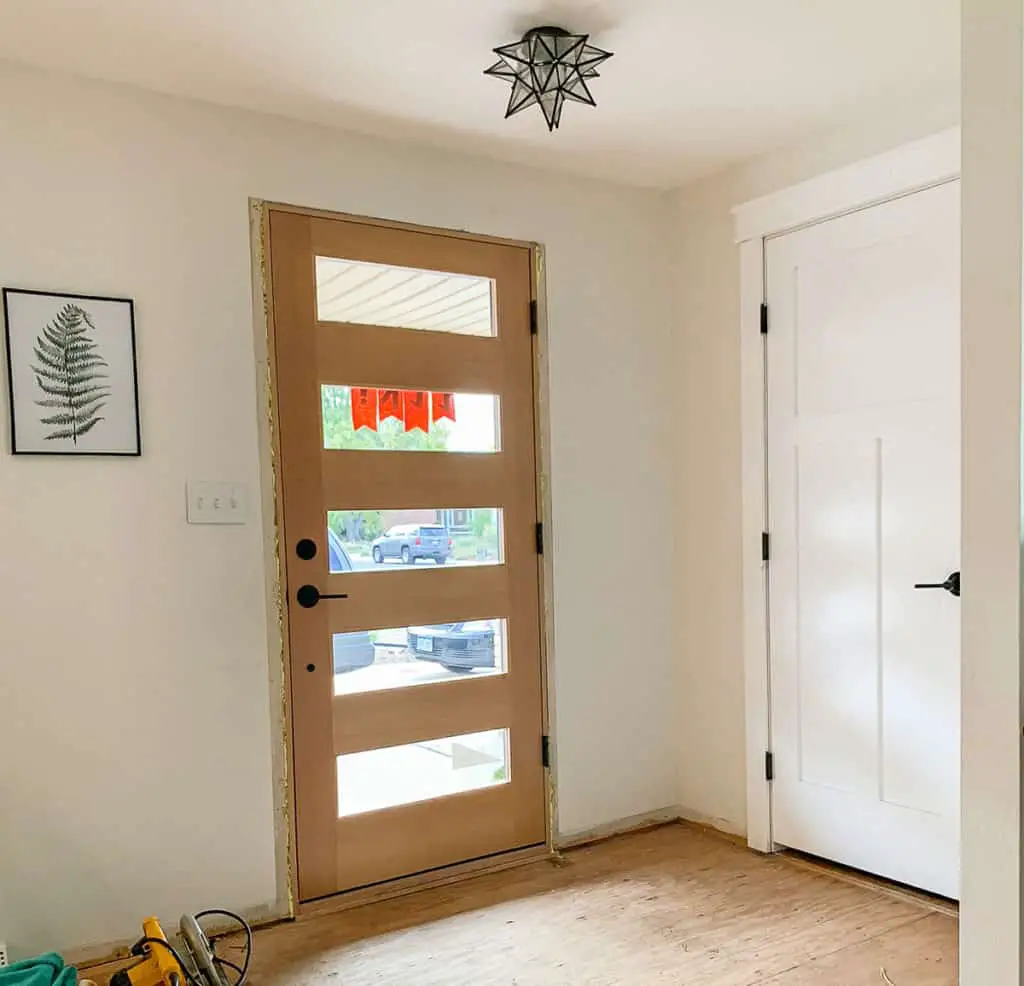
By the way, I also applied three coats of the topcoat to the inside of the door. I want a natural wood look since a) fir is gorgeous and b) it flows better with the white interior of our house. We still need to install trim (and the entry floor), but this is what the door looks like from inside.
> UPDATE: Here’s Our New Entry Floor with Groutable Vinyl Tile <
Product Sources
Simpson Door 7405 in Douglas fir, clear glass
General Finishes Pre-Stain Conditioner
GF Exterior 450 Water Based Stain in Coffee Bean
GF Exterior 450 Water Based Topcoat in Satin
Varathane Stain Marker in Dark Walnut
Schlage handleset in matte black
Schlage deadbolt in matte black
Doorbell in oil rubbed bronze
Striped outdoor rug
DIY coir doormat
Porch light
Read More About Our DIY Exterior Projects
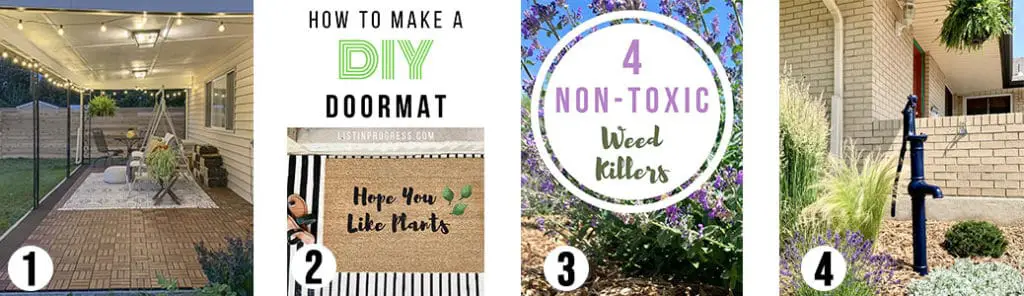
1 – Back Porch Refesh + How to Install IKEA floor tiles
2 – How to Stencil a Coir Doormat
3 – Four Non-Toxic Weed Killers for Your Yard
4 – Tips and Tricks to Spray Paint Metal
Subscribe and Never Miss a Post!
I will only email you 2-3 times per week, MAX. No junk!
[mc4wp_form id=”402″]


Since you didn’t stain the Inside, did you just put the protective layer on?
I want to keep my exterior door the natural color and just put what is needed to keep it that way and UV ray protection.
Any suggestions?
Your door is beautiful btw
Hi Tammy! Thanks! Yes, I did just use the clear top coat on the inside of the door. The product doesn’t need to be rated for exterior but I figured it wouldn’t hurt. It has held up perfectly on both sides of the door in the years since we did this project.
As for a UV protection product, I don’t have a specific rec based on experience. I would just google what you want and read reviews. Our door faces east, so it doesn’t really get much sun – the General Finishes top coat has lasted but the door hasn’t had a ton of UV exposure. Good luck with your project!!
Too much work for me but it is,indeed, beautiful.
Thanks Alice!